Mobile Menu IconMenu
Advanced Embroidery Designs -- Online Center for Machine Embroidery Designs
Easter Sale! 35% OFF EVERYTHING! Shop Now!

Flower Applique Wall Hanging

This is a very simple project that features designs from the Flower Applique Block set. It can add a cozy touch to your living room or den.

Flower Applique Wall Hanging image 1

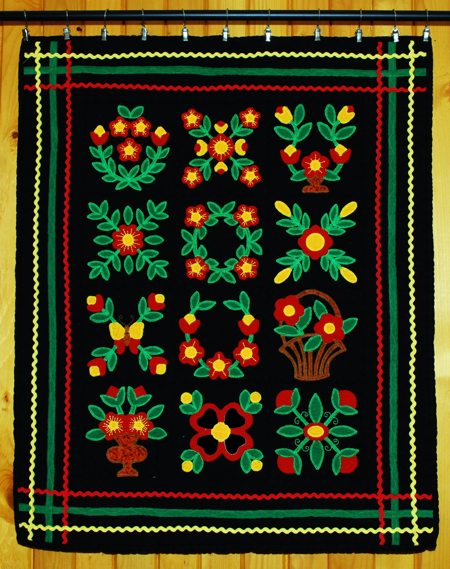
The finished size of the wall hanging is about 26" x 32".

For the project, we used

  • 1 yard of black fabric,
  • scraps of green, red, brown and yellow fabrics for the applique,
  • red and yellow rick-rack,
  • 3/8" wide green trim.
You will also need batting and fabric for the backing.

Embroidery:

Graph your black fabric into twelve 6 1/2" x 6 1/2" squares. Do not cut them out yet.
Stabilize each square with your favorite light-weight cut-away stabilizer.

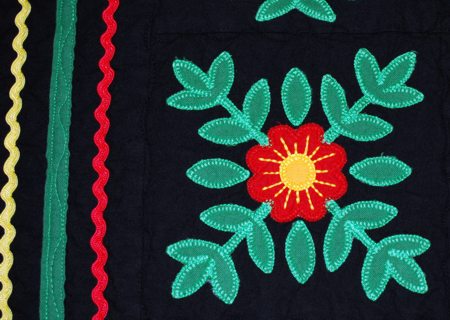
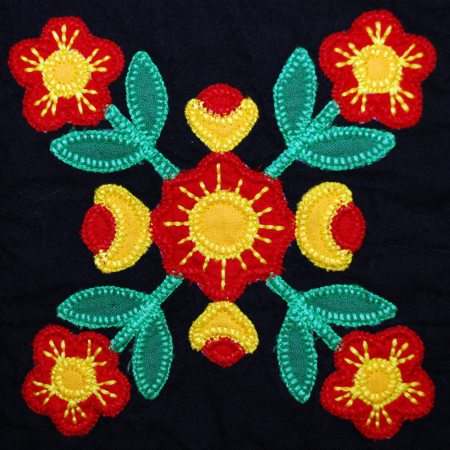
Make the applique as described in the instructions.

Cutting:

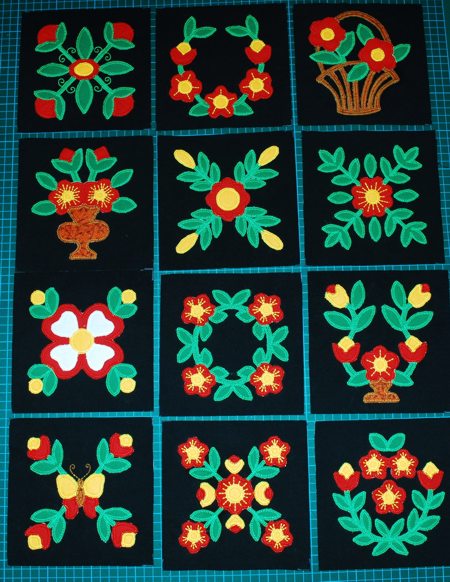
Cut out 12 squares with embroidery. Each square measures 6 1/2" x 6 1/2".

Flower Applique Wall Hanging image 2

Out of the black fabric, cut

  • 2 strips measuring 4 1/2" x 18 1/2",
  • 2 strips measuring 4 1/2" x 32 1/2"
  • 3 strips measuring 2 1/2" and the length of the width of the fabric for the binding.
Cut the red rick-rack into 2 strips 27" long, and 2 strips 33" long.
Cut the yellow rick-rack into 2 strips 27" long, and 2 strips 33" long.
Cut the green trim into into 2 strips 27" long, and 2 strips 33" long.

Sewing:

Sew the blocks into four rows, three blocks in each row.

Flower Applique Wall Hanging image 3

Sew the rows together.

Flower Applique Wall Hanging image 4

Sew the black 4 1/2" x 18 1/2" strips to the upper and lower edges of the working piece.

Flower Applique Wall Hanging image 5

Sew the black 4 1/2" x 32 1/2" strips to the left and right edges of the woking piece.

Flower Applique Wall Hanging image 6

Position the red rick-rack strips on the borders 1/2" from the blocks. Pin. Top-stitch in place.

Flower Applique Wall Hanging image 7

Position the green trim strips on the borders 1/2" from the red strips. Pin. Top-stitch in place.

Flower Applique Wall Hanging image 8

Position the yellow rick-rack strips on the borders 1/2" from the green trim. Pin. Top-stitch in place.

Flower Applique Wall Hanging image 9

Quilting and Finishing:

Now place the backing on a flat surface (table) face down. Cover with batting. Spread your panels over it.

Pin all three layers together with 1" pins. Quilt around the applique edges in a free-motion style. Quilt the rest of the work in the ditch.

After the quilting is finished, press the work with heavy steam and trim the work - the opposite sides should be straight and of the same length. Finish the raw edges with binding.

The wall hanging is ready. Enjoy!

Flower Applique Wall Hanging image 10

Flower Applique Wall Hanging image 11

Flower Applique Wall Hanging image 12

Happy Stitching!

Back to Flower Applique Block

Back to Projects Page

Mailing List
Enter your e-mail for news, discounts and exclusive special offers.


Find us on Twitter

Special Offers
Bonus design on all orders over $25
Daffodils and Eggs Set

Shop Now!

Announcement
Best Project Contest
The results are in!
Featured Project
Check out our latest project Birds and Blooms Quilted Tablerunner
Tutorials
Never heard of photo stitch? - Check out our What is Photo Stitch? page
Most Popular Designs
|| Home || Shop || Free Designs || New Designs ||
|| Projects || Tutorials || Links || About Us || Contact Us ||
|| Store Policy || Licensing || Accessibility ||

Social Media:

Copyright © Advanced Embroidery Designs. All Rights Reserved.