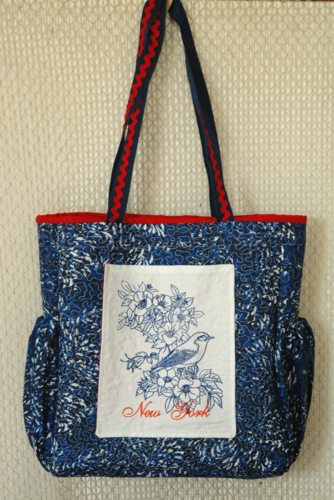
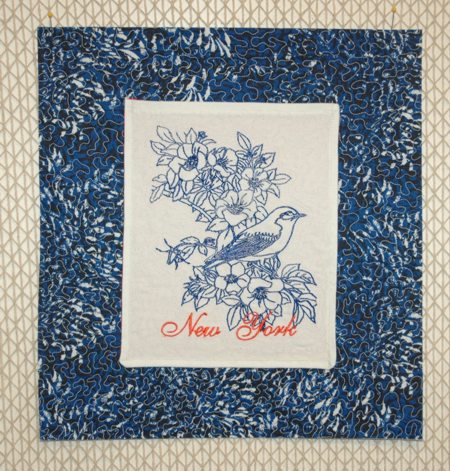
| For this charming tote, we used the design New York Bluebird for the Mega hoop. You should of course select the State Bird of your state. The tote, with its red, white and blue color scheme is a great accessory for July 4th. The tote features 3 outer and one inner pocket.
The finished size of the bag is about 15" x 13 1/2" x 3 1/2" .
|
|
We used:
- about 2 yards of blue-and-white fabric,
- a piece of white fabric measuring about 10" x 12" for the embroidery,
- about 1/4 yard of red fabric,
- 1/4" wide elastic tape,
- 1 1/2 yard of either blue or red, or white webbing for the handles.
You will also need low-loft batting and light-weight iron-on sewing interfacing.
|
|
Embroidery:
|
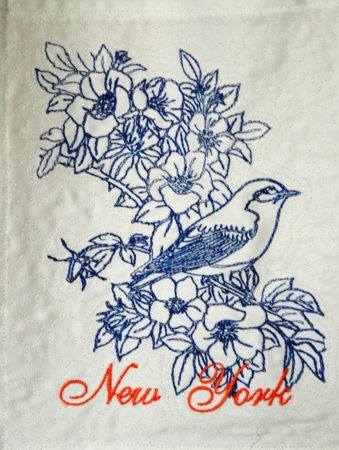
| Stabilize the piece of white fabric with your favorite light-weight iron-on cut-away stabilizer and embroider your state bird. We embroider the bird in blue and the name of the state in red. Trim the piece with embroidery to 8 1/2" x 10 1/2".
|
|
The outer pocket with embroidery.
|
Out of red fabric cut a rectangle measuring 8 1/2" x 10 1/2".
Place the red rectangle and the embroidered rectangle face to face, aligning the edges. Pin.
Stitch along three sides, with 1/4" seam allowance. Leave the short, bottom side open. |
|
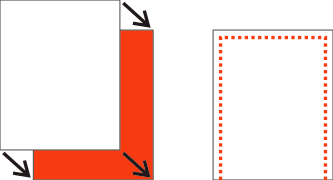
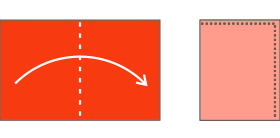
| Press the seams. With a pair of scissors, cut the corners. Turn the working piece right side out. Press. Tuck the bottom edges 1/4" - 1/2" inside. Press.
|
|
Topstitch 1/4" from the upper edge.
Quilt the piece in a free motion style (optional). |
|
|
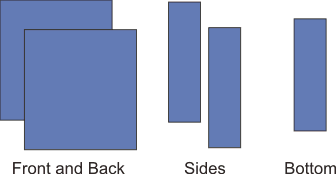
Cutting:
|
Out of blue-and-white fabric, cut
- 4 rectangles measuring 14" x 17" each,
- 4 rectangles measuring 5" x 16",
- 2 rectangles measuring 5" x 15" and
- 2 squares measuring 12" x 12" each.
Out of red fabric, cut
- a strip measuring 3" x 36" (for the binding), and
- a rectangle measuring 10" x 16" (for the inside pocket).
Out of batting, cut
- 2 rectangles measuring 15" x 17",
- 2 rectangles measuring 6" x 18" and
- 1 rectangle measuring 6" x 16".
Out of light-weight iron-on interfacing cut
- a strip measuring 3" x 36" and
- a rectangle measuring 10" x 16".
|
|
Quilting and Preparing the Parts:
|
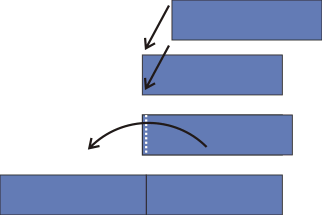
| On your woking table, spread two 14" x 16" rectangles face down. Cover with 15" x 17" pieces of batting. Place the remaining 2 rectangles, face up, on top. Pin all three layers. These will be back and front panels. |
| In the same way, prepare 2 sandwiches out of the fabric rectangles measuring 5" x 16" and batting strips measuring 6" x 17". These will be side panels. |
| In the same way, make a sandwich out of the fabric rectangles measuring 5" x 14" and the batting piece measuring 6" x 15". This will be the bottom. |
| Quilt all pieces to your taste. We quilted the pieces with meandering in a free motion style. |
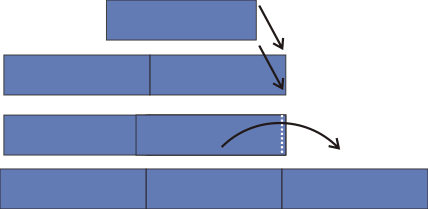
Press with heavy steam. Trim the front and the back panels to 14" x 15".
Trim the side panels to 4" x 15 1/2".
Trim the bottom panel to 4" x 14 1/2". |
|
|
Outer pocket:
|
| Position the outer pocket on the face of the front panel about 3" from the upper edge and equal distances from the side edges. Pin it in place. Topstitch along the side and bottom edges 1/4" from the edge of the pocket.
|
|
|
Sewing the Inner Pocket.
|
| Place the red rectangle measuring 10" x 16" face down. Position the iron-on interfacing piece on top of them. With a hot iron, fuse the fabric and interfacing together. |
| Fold the rectangle lengthwise, face inwards. Sew one short and one long side with 1/4" seam allowance. |
|
| Turn right side out. Press. Tuck the raw edges in 1/4" - 1/2" inside. Press. Topstitch closed. |
|
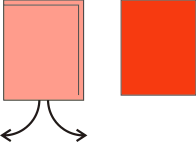
| Fold the lower edge up about 4". Pin the edges. Topstitch them in place. |
|
| Position the pocket on the inside of the back panel about 4" from the top edge and equal distances from the side edges. Pin. Topstitch along the upper edge. Please don't forget that the bobbin thread will be on the face side, so choose a color that will blend with the fabric.
|
|
|
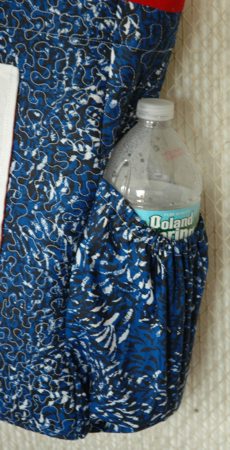
Sewing the Side Pockets:
|
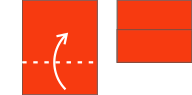
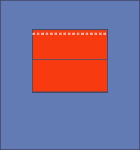
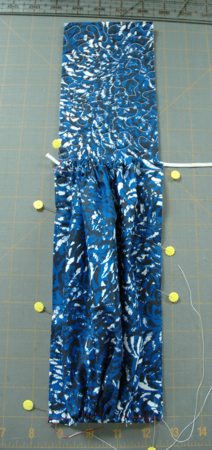
| Take the 12" x 12" blue-and-white squares, and position them on the working table face down. Fold the upper edge 1/2" to the wrong side. Press. Fold 1/2" again. Press. Stitch in place. Baste the lower edge about 1/4" from the edge.
|

|
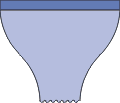
| Pull the ends of the basting threads to collect the piece in ruffles. Make the piece about 4" wide. |
|
| Insert the elastic tape in the sleeve on the upper edge. Pull it to collect the fabric into ruffles, not more than 5" wide. |

|
| Position the pocket on the lower end of the side panel. Align the bottom and side edges. Pin in place. Stitch the sides together 1/4" from the edge.
|
|
|
Assembly of the Bag:
|
| Sew the short edges of the side panels to the short edges of the bottom. Seam allowance should be 1/4". Stitch again 1/8" from the first stitch line. |
|
|
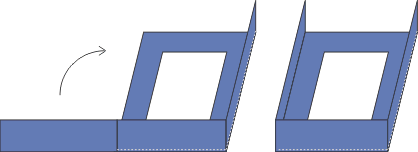
| Position the sides and bottom over the lower edge of the front panel, face to face. Align one long edge of the bottom with the bottom edge of the panel. Pin. Stitch together starting 1/4" from the side edge of the front panel and finishing when 1/4" is left to the second side of the front panel. Seam allowance is 1/4". |

|
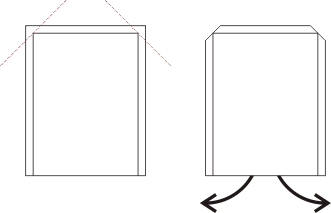
Fold the first side panel upwards and align its edge with the side edge of the front panel. Pin. Stitch. Seam allowance is 1/4".
Fold another side panel and aling its edge with the second side edge of the front panel.
Pin. Stitch. Seam allowance is 1/4". |
|
| In the same way, attach the back panel to the sides and bottom. |
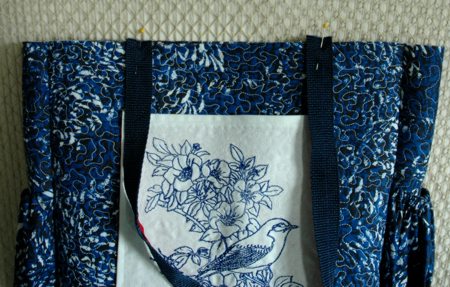
| Cut the 1 1/2 yard of webbing in half to get 2 strips, each 27" long. These are the handles. Position the handles as shown, on the fron and back panels, about 3" from each side. Pin in place. Topstitch in place 1/8"- 1/4" from the edge.
|
|
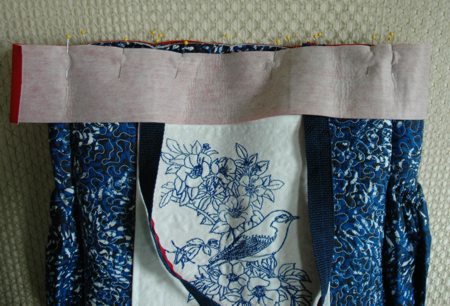
Take the red fabric strip and the interfacing strip. Fuse both strips together.
Fold one of the short edges 1/4" back and press. Pin the strip along the upper edge of the bag overlapping the ends. The finished end of the strip should lie under the unfinished end.
Stitch in place 1/4" from the edge. Stitch again 1/8" from the first stitch line.
|
|
Fold the strip back, inside the bag. Press.
By hand, slip-stitch the short edge.
Fold the lower edge of the strip 1/4" back and press. Topstitch in place. Please note that the bobbin thread will be on the face of the bag, so choose a thread that will match the fabric. |
|
|
|
|
Enjoy!
|
|
Happy Stitching!
|
|
Back to State Birds page
|
|
Back to Projects Page
|


