Mobile Menu IconMenu
Advanced Embroidery Designs -- Online Center for Machine Embroidery Designs
Earth Day Sale! 40% off Floral, Landscapes, Redwork Flowers and Seasons!

Quilted Rose Wall Hanging with 3D Windmills

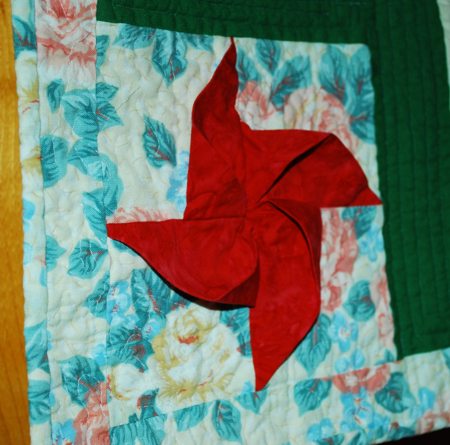
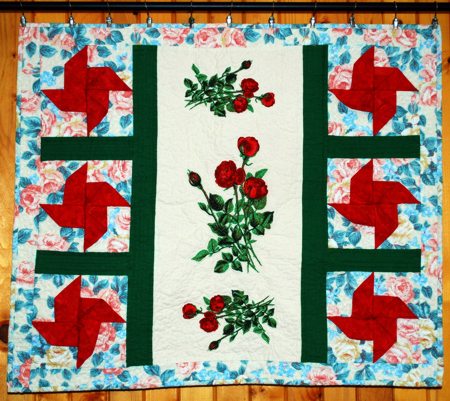
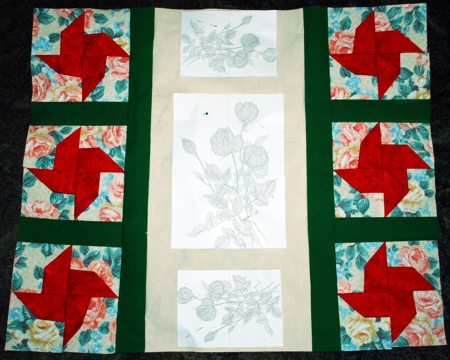
This bright quilted wall hanging is the perfect summer-themed centerpiece for your living room or dining room. The red whirligigs along the outer edges of the quilt are actually three-dimensional, adding an eye-catching element to the quilt.

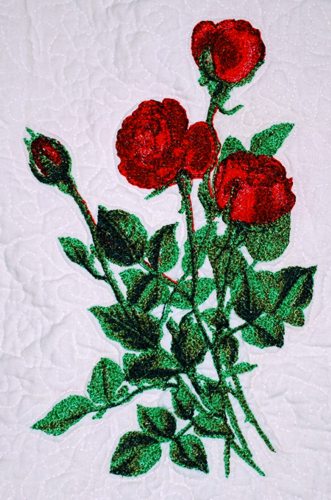
The embroidery design used for the quilt is Beauty of Norwich Rose for both large (5" x 7") and commercial-size hoops (larger than 6"x10"). The finished size of the wall hanging is about 28" x 32".

Quilted Rose Wall Hanging with 3D Windmills image 1

You will need

  • about 1/2 yard of light-colored fabric for the embroidered panel,
  • 1 yard of rose patterned fabric for the blocks, borders and binding,
  • about 1/4" yard of green fabric and
  • 1/2 yard of red fabric.

Cutting:

Out of solid light-colored fabric, cut a panel measuring 11" x 24 1/2".

Out of green fabric, cut

  • 2 strips measuring 2" x 24 1/2" and
  • 4 strips measuring 2" x 7 1/2";


Out of red fabric, cut 24 squares measuring 4" x 4";

Out of rose-patterned fabric, cut

  • 24 squares measuring 4" x 4" (for the windmill blocks);
  • 2 strips measuring 2 1/2" x 28", and
  • 2 strips measuring 2 1/2" x 28 1/2" (for the borders);
  • 4 strips 2 1/2" wide and the length of the width of the fabric (for the binding).

Making 3D Windmill Blocks:

You will need 24 red and 24 rose patterned squares.

Quilted Rose Wall Hanging with 3D Windmills image 2

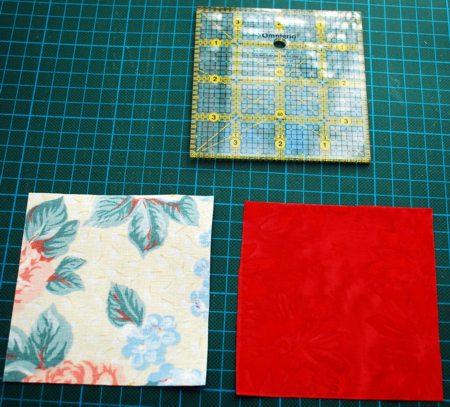
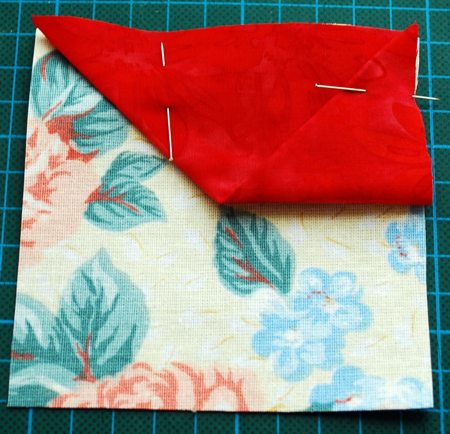
Place a rose square, face up. Cover it with a red square, face down. Align the edges.
Take the red square by a corner and fold it back along the diagonal, as shown.

Quilted Rose Wall Hanging with 3D Windmills image 3

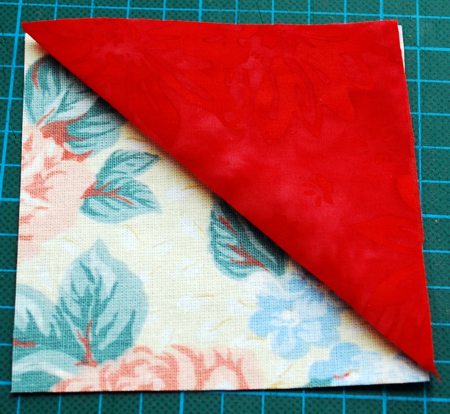
Take the lower corner and fold upwards. Pin in place.

Quilted Rose Wall Hanging with 3D Windmills image 4

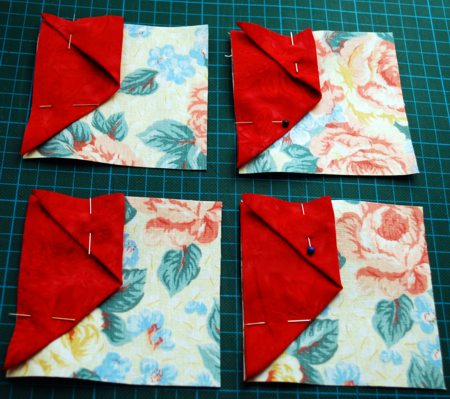
For each block you will need four parts like this.

Quilted Rose Wall Hanging with 3D Windmills image 5

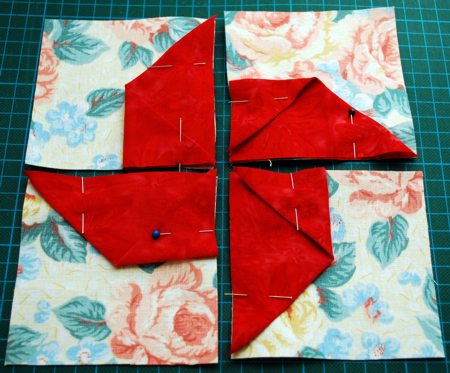
Position the parts as shown. First sew the upper pair together, then sew the lower pair together. Seam allowance is 1/4".

Quilted Rose Wall Hanging with 3D Windmills image 6

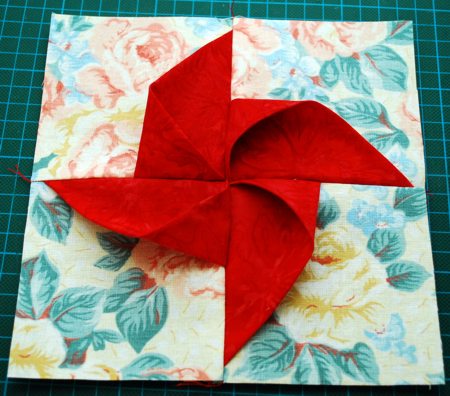
Then sew the pair in a block with the same, 1/4", seam allowance. You will have a block like this one, measuring 7 1/2" x 7 1/2":

Quilted Rose Wall Hanging with 3D Windmills image 7

Assembly of the Top:

Sew six windmill blocks as described above.
Take the 4 green strips measuring 2" x 7 1/2" and the 6 blocks and sew them into 2 strips as shown:

Quilted Rose Wall Hanging with 3D Windmills image 8

Sew the green 2" x 24 1/2" strips to the left and right edges of the central panel.

Quilted Rose Wall Hanging with 3D Windmills image 9

Sew the windmill strips to the left and right edges of the central piece.

Quilted Rose Wall Hanging with 3D Windmills image 10

Sew the 2 1/2" x 28" borders to the upper and lower edges of the quilt.

Quilted Rose Wall Hanging with 3D Windmills image 11

Sew the 2 1/2" x 28 1/2" to the left and right edges of the quilt.

Quilted Rose Wall Hanging with 3D Windmills image 12

Embroidery:

Mark the position of the embroidery on the top. Stabilize the fabric with medium-weight iron-on cut-away stabilizer.

Do the embroidery.

Quilted Rose Wall Hanging with 3D Windmills image 13

Quilted Rose Wall Hanging with 3D Windmills image 14

Quilting and Finishing:

Now place the backing/lining on a flat surface (table) face down. Cover with batting. Spread your working piece over it.

Pin all three layers together with 1" pins. We quilted around the embroidery and all over the quilt in a free-motion style. Remove the pins while quilting.

Press the work with heavy steam and square the work -- all corners should be 90 degrees and opposite sides should be of the same length.

Quilted Rose Wall Hanging with 3D Windmills image 15

Quilted Rose Wall Hanging with 3D Windmills image 16

Enjoy!

Happy Stitching!

Back to Beauty of Norwich Rose

Back to Projects Page

Mailing List
Enter your e-mail for news, discounts and exclusive special offers.


Find us on Twitter

Special Offers
Bonus design on all orders over $30
Ivy Vine Border Set

Shop Now!

Announcement
Best Project Contest
The results are in!
Featured Project
Check out our latest project Birds and Blooms Quilted Tablerunner
Tutorials
Never heard of photo stitch? - Check out our What is Photo Stitch? page
Most Popular Designs
|| Home || Shop || Free Designs || New Designs ||
|| Projects || Tutorials || Links || About Us || Contact Us ||
|| Store Policy || Licensing || Accessibility ||

Social Media:

Copyright © Advanced Embroidery Designs. All Rights Reserved.