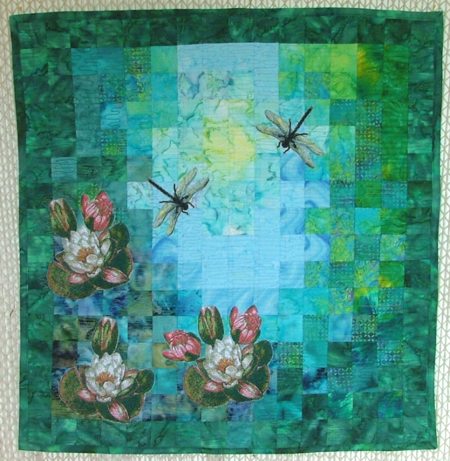
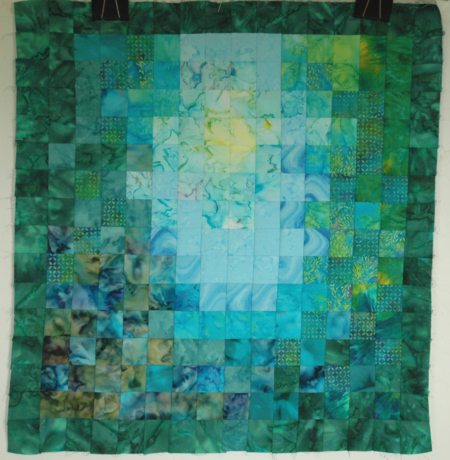
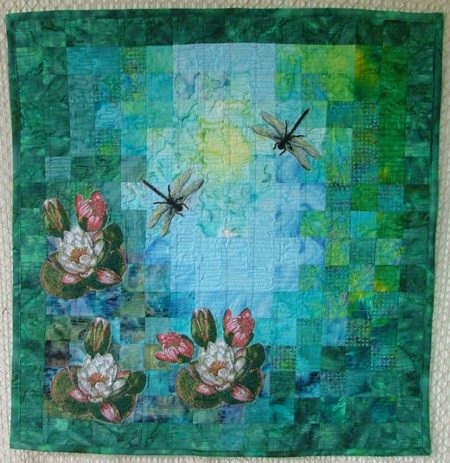
This art quilt was inspired when I was looking down into a pond from a dock. Trees were reflected around the edges, with the blue sky in the center. Lilypads were scattered throughout and dragonflies flitted over them.
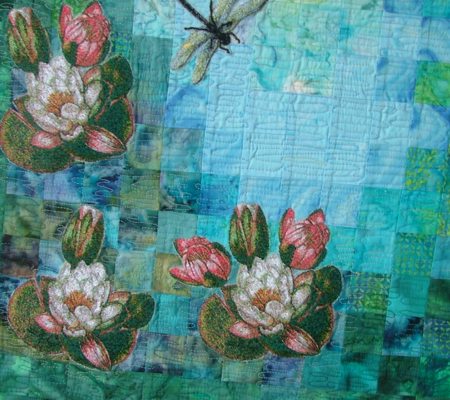
We used the designs Water Lily and Dragonfly for a large (5" x 7") hoop.
The finished size of the quilt is about 24" x 24" . You can purchase the original quilt in our Etsy store!
You will need a light-weight fusible grid with cells measuring 2" x 2" (5x5 cm).
You will also need 260 squares measuring 2" x 2" in all shades of blue and green. We used batiks. This is a good way to use up scraps left over from other projects. For this project, it's actually easier to cut the squares as you lay out the quilt top, so you don't have to cut out all 260 to start with. Start with 50-100 squares for the middle and the edges.
For the embroidery you will need organza, water soluble mesh and embroidery threads.
For quilting you will need quilting needle 90/14, and 30-40-weight quilting thread.
You will also need
For the binding we used the same batik with which we did the outer row of squares.
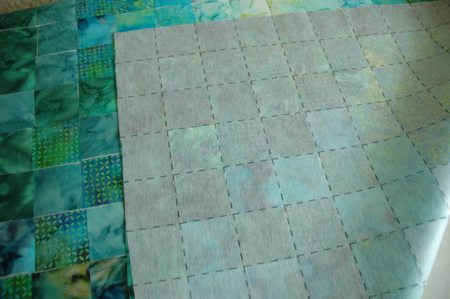
Cut out a piece of gridded mesh measuring 16 x 16 squares. Leave a margin of about 1/4 square (1/2") at each edge.
Position the grid on your designer wall. If you don't have a designer wall, a piece of foamboard that's big enough works just as well.
Select your fabrics. Cut out 1 strip 2" wide of each fabric. Subcut the strips into 2" x 2" squares.
Start making the background by pinning fabric squares onto the grid. Cut more squares as you work, depending on how the quilt is turning out.
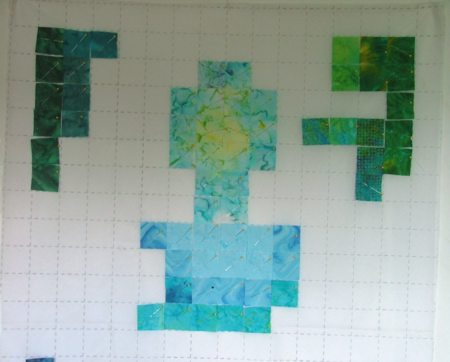
We made a gradient of blue in the center fading to green at the edges. Don't rush, and feel free to stop and re-arrange squares as you work.

Once you are satisfied with the color arrangement, take the grid to the ironing board.
Work in sections. Take out several pins and fuse the fabric to the grid.
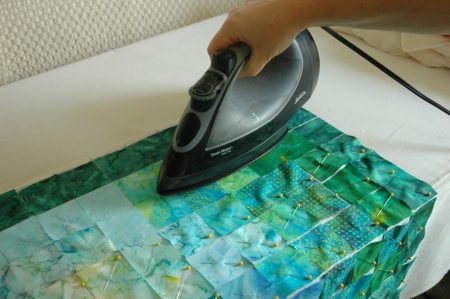
Repeat until all squares are fused.
On the back of the working piece you can distinguish the lines of the grid.
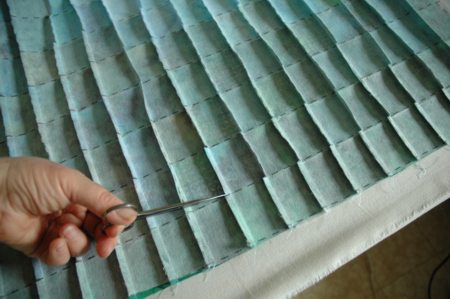
Working from the wrong side, fold the working piece along the first vertical line and stitch 1/4" from the edge. Repeat for the rest of the vertical lines.
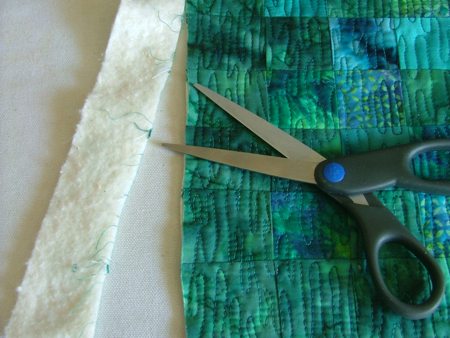
With a pair of sharp scissors, cut the seam allowances in the places of horizontal lines.
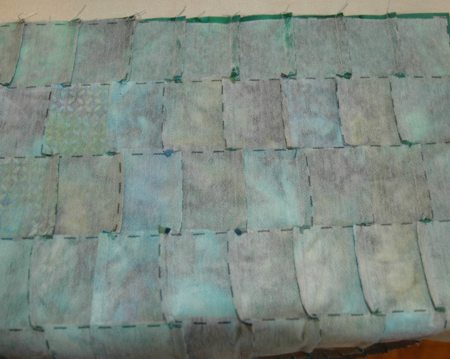
Then fold and press the seam allowances in the first row to the right, of the second row to the left, of the third row to the right, etc.
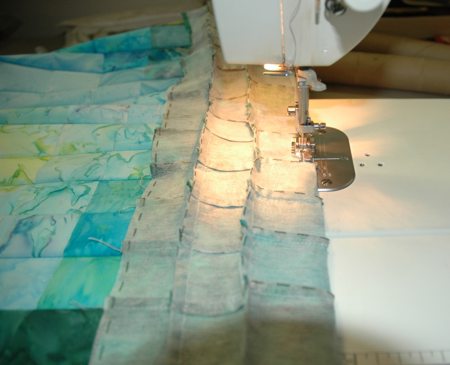
Fold the working piece along the horizontal lines and stitch with 1/4" seam allowance.
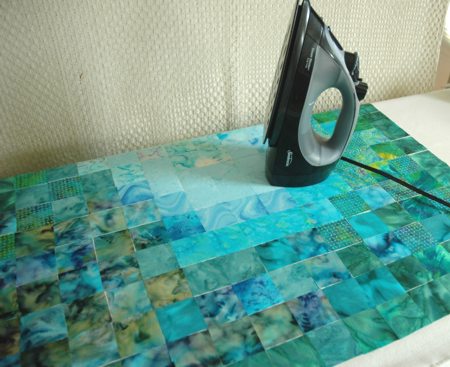
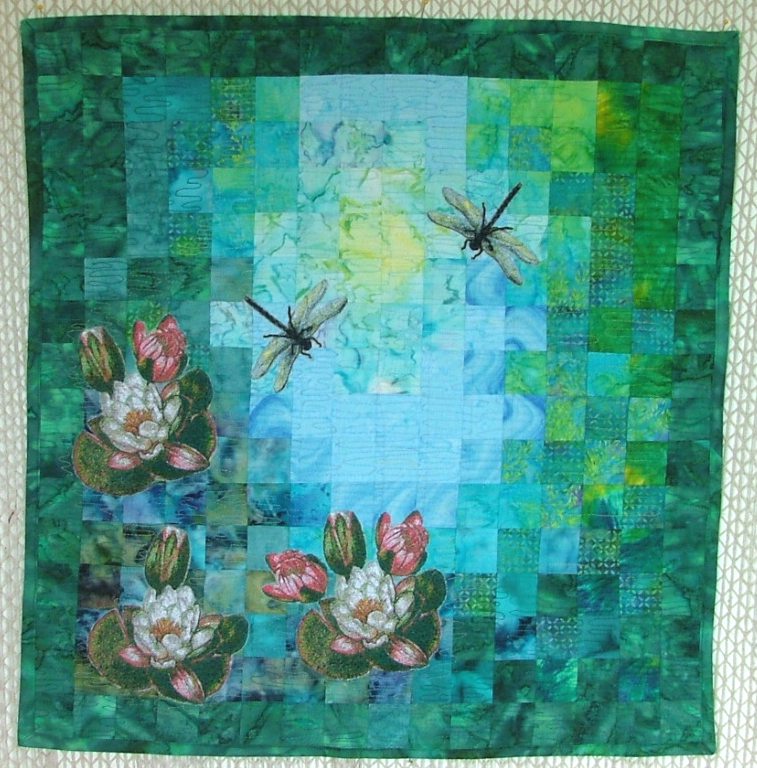
This is how our quilt top turned out. Yours can of course be different, as you prefer it.
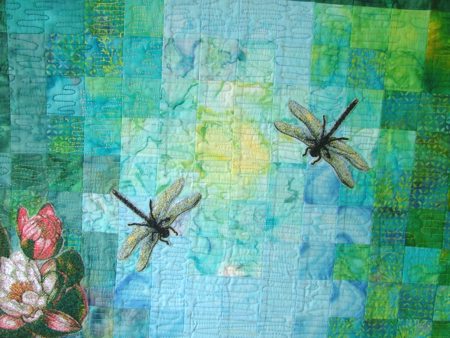
We made the embroidery on organza. Hoop organza with 2 layers of water-soluble mesh. Make the embroidery of the Water Lily and the Dragonfly. Embroider them as many times as you wish. We made 3 lilies and 2 dragonflies.
Wash out the stabilizer, let the embroidery air dry. Then cut the stitch-outs out.

Position the stitch-outs on your background. Pin them in place.
Using Steam-a-Seam2, or similar 2-sided fusible mesh, fuse the stitch-outs in place. Follow the instructions of the manufacture.
Take the working piece to your sewing machine and using the invisible thread, zig-zag the edges of the stitch-outs.
Now place the backing on a flat surface (table) face down. Cover with batting. Spread your working piece over it.
Pin all three layers together with 1" pins.
NOTE: The drawback of the grid is that it will make your quilt a little thick. So, use thinner polyester or wool batting. The cotton one will be more difficult to quilt. Use 90/14 quilting needle and 30-40-weight quilting threads.
We quilted around the embroidery and all over the quilt in a free-motion style, imitating the ripples on water. Remove the pins while working.
After you are done, press the work with heavy steam. As it's an art quilt you do not need to square the work -- make all corners 90 degrees and opposite sides of the same length. We just cut away the excess batting and backing with a pair of scissors.
Finish the raw edges with binding.


