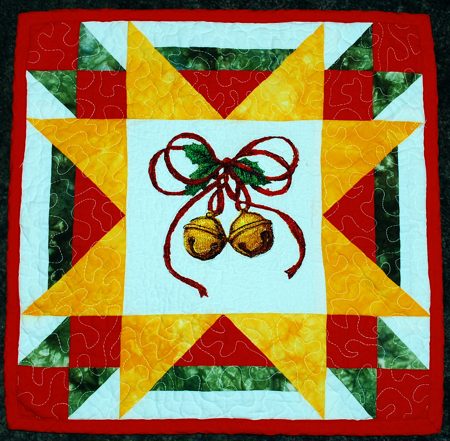
For this beautiful quilted cushion we used the design Jingle Bells. The finished size of the pillow is 17" x 17".

We used
Out of white fabric, cut
Assembly:
Out of white and green 2 7/8" x 2 7/8" squares we'll make half-triangles.
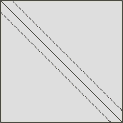
Place white and green squares in pairs, face to face. You'll get 4 pairs. With a pencil, draw a diagonal on the top square. Stitch 1/4" from the pencil line on both sides.
Cut along the line. Open the new squares. Press the seam towards the green. Trim the "ears" of the seam. Repeat for all the pairs. You should get 8 two-color squares, measuring 2 1/2" x 2 1/2".
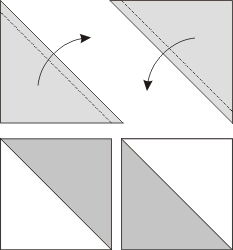
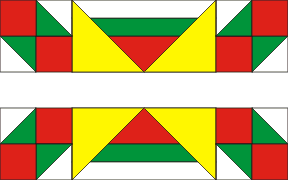
Using these 2-color squares and the red 2 1/2" squares, make 4 squares as shown on the picture.

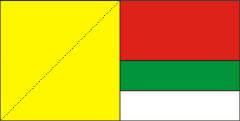
Now take the red, green and white strips and sew them together to get four rectangles measuring 4 1/2" x 8 1/2".

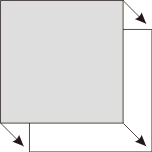
Place a three-color rectangle on your working table face up with red strip on top. Position a yellow square on the left part of the rectangle, face down. Align the upper, lower and left edges.With a pencil, draw a diagonal from the upper right corner to the lower left corner of the square.
Machine stitch along the diagonal. Cut the excess fabric, leaving 1/4" seam allowance. Unfold and press.

Repeat for the other side of the rectangle
Repeat for all of the 3-color rectangles.
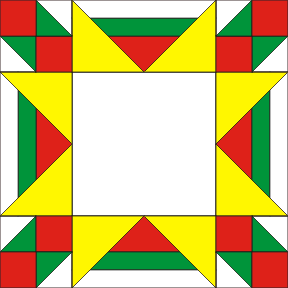
Sew two of the new rectangles to the left and right sides of the white 8 1/2" x 8 1/2" square.

Sew the 3-color squares to each end of the remaining two rectanges.
Sew these rows to the central part of the top.
Embroidery:
Cut out a piece of polyester craft felt measuring about 20" x 20". Place the top on it. With your hands spread and press the top evenly, so it clings to the polyester. Pin in several places along the borders.
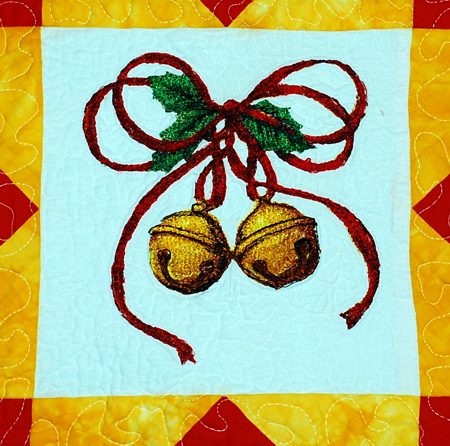
Hoop the central white square and embroider the Jingle Bells on it.
Quilting:
Quilt the embroidered top in a free motion style. Remove the pins while quilting. Note that we did not use backing.
Press the work with heavy steam and square the work -- all corners should be 90 degrees and opposite sides should be of the same length.
The Back Panel:
Out of red fabric, cut a piece measuring 19" x 19". Cut the same piece out of craft felt. Place them together and quilt.
Press the work with heavy steam and square the work -- all corners should be 90 degrees and opposite sides should be of the same length.
The back panel should be of the same size as the front panel, so trim it accrdingly.
Assembly and Finishing of the Pillow.
Align the back and the front of the pillow with the wrong sides towards each other. Align the edges and pin them together.
Topstitch along the edges with seam allowance 1/4". If you are using stuffing, leave about 10" unstitched on any side. If you are using a form, leave about 14" unstitched.
Insert the stuffing or pillow form through the opening. Stitch the opening closed.
Finish the raw edges with red binding.


