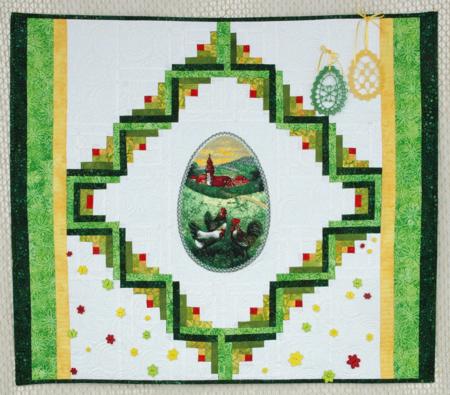
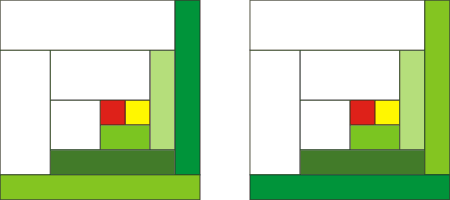
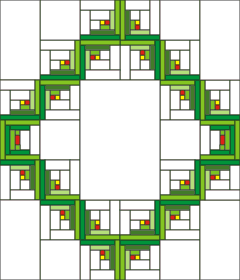
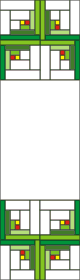
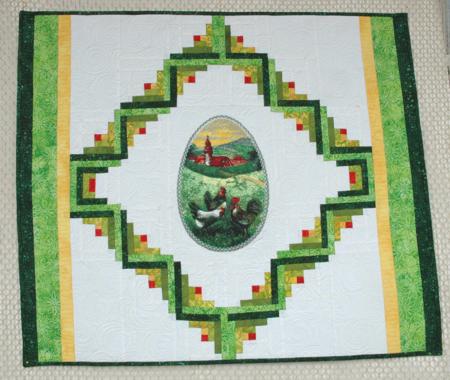
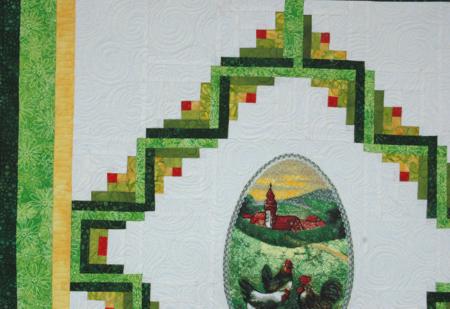
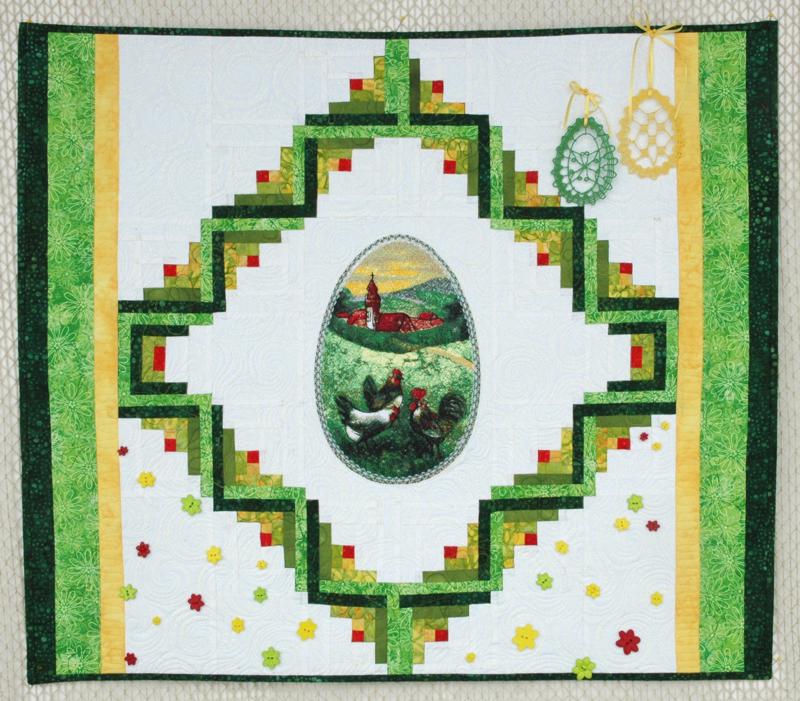
| This charming wall quilt is a wonderful Easter project. The green colors are perfect for Spring. It's great for using up left over scraps fabric from other projects. The quilt features the design Easter Egg with Chickens II for a commercial (8" x 12") hoop. However, you can use smaller versions of the design as well.
The finished size of the quilt is about 32" x 28" .
|
Click to enlarge |
You will need:
- about 1/2 yard of white cotton fabric,
- 1/4 yard of dark green fabric,
- 1/8 yard of bright green fabric,
- 1/8 yard of yellow fabric,
- scraps of red, yellow and green fabrics.
You will also need batting and the fabric for backing. For embroidery you will need medium- to heavy-weight iron-on cut-away stabilizer and embroidery threads. Instead of stabilizer you can use polyester craft felt.
Note: It's best to do the embroidery first, then select fabrics based on the colors of the embroidery.
|
|
Embroidery:
|
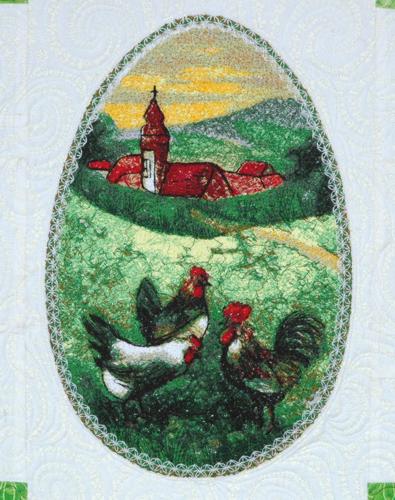
Stabilize a piece of white fabric and embroider the Easter Egg with Chickens design.
Cut away the excess stabilizer. Trim the piece to a rectangle measuring 8 1/2" x 12 1/2". |
|
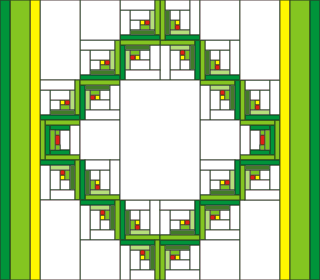
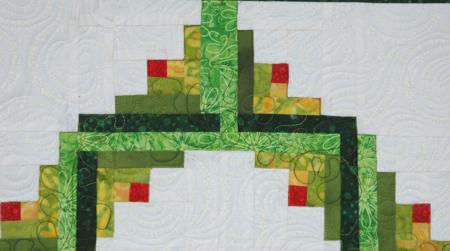
| The quilt consists of 20 log cabin blocks, 2 court house blocks and borders. We'll explain the cutting as we describe each block. |
|
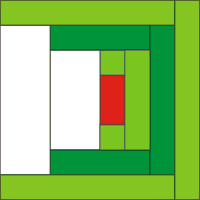
Log Cabin Block:
|
For the 20 log cabin blocks, cut the following parts:
Out of white fabric,
- 20 squares measuring 1 1/2" x 1 1/2";
- 20 strips measuring 1 1/2" x 2 1/2";
- 20 strips measuring 1 1/2" x 3";
- 20 strips measuring 1 1/2" x 4".
Out of red fabric, cut twenty 1" x 1" squares;
Out of yellow fabric, cut twenty 1" x 1" squares;
Out of different green scraps, cut
- 20 strips 1" x 1/2";
- 20 strips 1" x 2 1/2";
- 20 strips 1" x 3".
Out of the bright green fabric, cut
- 10 strips measuring 1" x 4" and
- 10 strips measuring 1" x 4 1/2".
Out of the dark green fabric, cut
- 10 strips measuring 1" x 4" and
- 10 strips measuring 1" x 4 1/2".
|
|
Assembly of the Log Cabin Block:
|
| Press each seam after you make it. The finished size of each block is 4 1/2" x 4 1/2". |
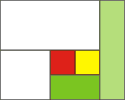
| Sew the red and yellow 1" x 1" squares together. The red square should be on the left. |

|
| Sew a green 1" x 1 1/2" strip to the bottom edge of the working piece. |

|
| Sew the white 1 1/2" x 1 1/2" square to the left edge. |

|
| Sew the white 1 1/2" x 2 1/2" strip to the upper edge. |

|
| Sew a green 1" x 2 1/2" strip to the right edge. |
|
| Sew a green 1" x 3" strip to the bottom edge. |

|
| Sew the white 1 1/2" x 3" strip to the left edge. |

|
| Sew the white 1 1/2" x 4" strip to the upper edge. |

|
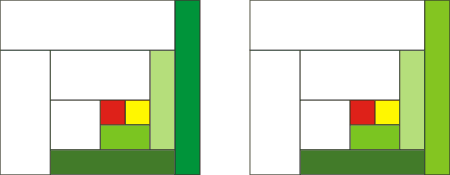
| Sew the bright green or dark green 1" x 4" strips to the right edge. You will have 10 blocks with a bright green and 10 blocks with a dark green right edge. |
|
| Sew the bright green and dark green 1" x 4 1/2" strips to the bottom edge. You will have 10 blocks with a bright green and 10 blocks with a dark green bottom edge. |
|
|
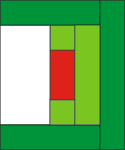
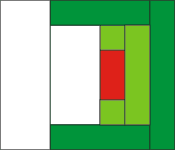
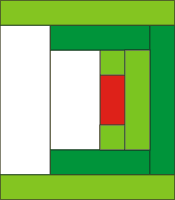
Court House Block:
|
You will need 2 of them.
Out of white fabric, cut
- 2 strips measuring 1 1/2" x 2 1/2" and
- 2 strips measuring 1 1/2" x 3 1/2".
Out of red fabric, cut 2 strips measuring 1" x 1 1/2".
Out of green scraps cut
- 4 squares measuring 1" x 1" and
- 2 strips measuring 1" x 2 1/2".
Out of dark green fabric cut
- 4 strips measuring 1" x 2 1/2" and
- 2 strips measuring 1" x 3 1/2".
Out of bright green (used for the borders) cut
- 4 strips measuring 1" x 4" and
- 2 strips measuring 1" x 4 1/2"
|
|
Assembly of the Court House Block:
|
| Sew the the green 1" x 1" squares to the upper and lower edges of the red 1" x 1 1/2" strip. |

|
| Sew the green 1" x 2 1/2" to the right edge of the piece. |

|
| Sew the white 1 1/2" x 2 1/2" strip to the left edge. |

|
| Sew the dark green 1" x 2 1/2" strips to the upper and lower edges. |

|
| Sew the dark green 1" x 3 1/2" strip to the right edge. |
|
| Sew the white 1 1/2" x 3 1/2" strip to the left edge. |
|
| Sew the bright green 1" x 4" strips to the upper and lower edges. |
|
| Sew the bright green 1" x 4 1/2" strip to the right edge. |
|
|
Cutting and Assembly of the Top:
|
Out of the remaining white fabric cut
- 6 squares measuring 4 1/2" x 4 1/2" and
- 4 strips measuring 4 1/2" x 8 1/2.
Out of yellow fabric, cut 2 strips measuring 1 1/2" x 28 1/2".
Out of bright green fabric, cut 2 strips measuring 2 1/2" x 28 1/2".
Out of dark green fabric, cut
- 2 strips measuring 1 1/2" x 28 1/2" and
- 3 strips measuring 2 1/2" and the length of the width of the fabric for the binding.
|
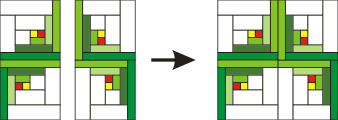
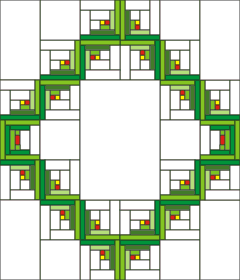
| On your work table or designer wall, arrange the blocks around the embroidered central part as shown. |
|
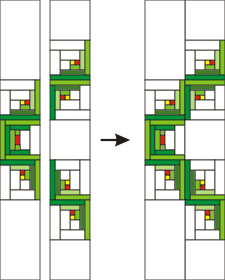
| First sew together the 4 blocks that go above the embroidered part. First, sew the 4 blocks into 2 strips, then sew the 2 strips together: |
|
| In a similar way, sew together the 4 blocks that go below the embroidered part: |
|
| Sew the blocks to the embroidered part. |
|
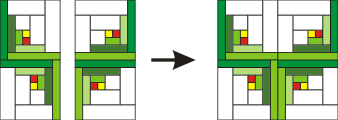
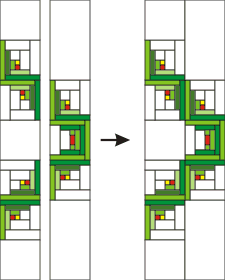
| Now sew together the left part of the quilt. First, sew the blocks into two long strips as shown, then sew the strips together: |
|
| In a similar way, sew together the right part of the quilt. |
|
| Sew these strips to the right and left edges of the quilt. |
|
| Sew yellow, bright green and dark green strips together to form the borders. |
|
| Sew them to the left and right sides of the top. |
|
|
Quilting and Finishing:
|
| Now place the backing/lining on a flat surface (table) face down. Cover with batting. Spread your working piece over it. Pin all three layers together with 1" pins. We quilted around the embroidery and all over the mat in a free-motion style. Remove the pins while quilting.
Press the work with heavy steam and square the work -- all corners should be 90 degrees and opposite sides should be of the same length.
|
|
| Finish the raw edges with binding. |
|
|
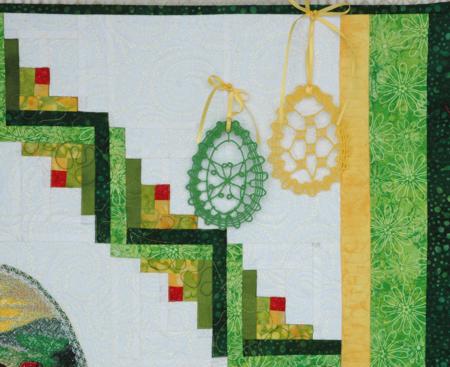
| You might like to embellish the white spaces. We added FSL Crochet Easter Eggs in the upper right corner. |
|
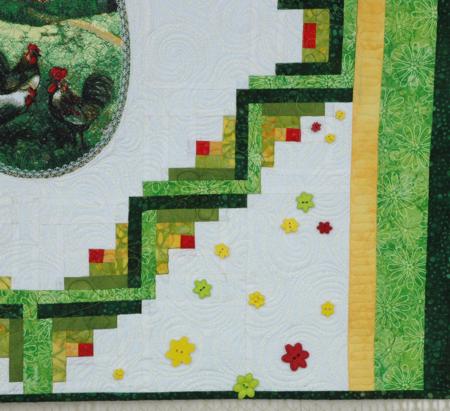
| Both lower corners are decorated with flower buttons. |
|
|
|
|
Enjoy!
|
|
Happy Stitching!
|
|
Back to Easter Egg with Chickens
|
|
Back to Projects Page
|


