These are instructions on how to embroider and assemble the FSL Belt and Strap Set.
This fashionable accessory can be done in any color and length to match your outfits. The belt can be worn on the waist or below the waist, depending on your style.
Stabilizers: We recommend to use water-soluble mesh, such as Vilene. Vilene D0102 is a non woven dissolvable stabilizer which is imported into the US, is sold in large rolls and is sometimes packaged under different brand names. Some of these brand names are Fabri-Solvy by Sulky, Avalon Plus by Madeira, Wash-Away, and Aqua Magic.
Film-like water soluble stabilizers, such as Solvy by Sulky, Avalon by Madeira and Badge Master are not suitable for Free-Standing Lace embroidery.
Threads: The thinner the thread, the finer the final product will be.
Embroidery rayon thread is too soft, it does not keep its shape and very often its color fades under the influence of chemicals from the water-soluble mesh.
Embroidery polyester thread is great for the project.
You can also use 50- and 60-weight cotton thread for machine quilting.
To get two-sided embroidery, use threads of the same color in the needle and in the bobbin.
Needles: We use size 80/12 embroidery needles with polyester and 80/12 metallic needles with cotton thread. Our experience shows that cotton thread used with metallic needles gives less lint. The needles should be sharp, so it's advisable to change them often.
Most Importantly: ALWAYS make a test stitch-out of the design and wash away the stabilizer. This helps you to select the threads, needles, stabilizers and settings of your machine correctly. DO NOT embroider several designs in one hoop.
Washing out the Stabilizer: Rinsing away the stabilizer is an important step, because the lace can be stretched or distorted if this is done incorrectly. We recommend to use a foam board and stainless pins.
Cut away the excess stabilizer close to the stitches. Take your time and carefully pin the lace's outer edge to the board.
Now place the board into a bowl with luke-warm water. Leave the board in the water for at least half an hour. Change the water a couple of times.
Take the board from the water and leave to air dry. DO not unpin the lace until it's completely dry.
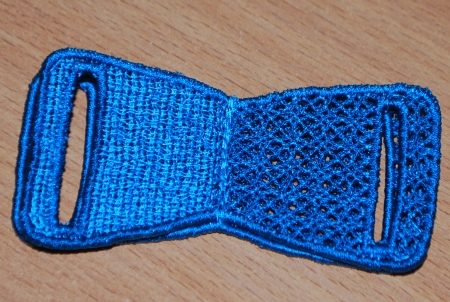
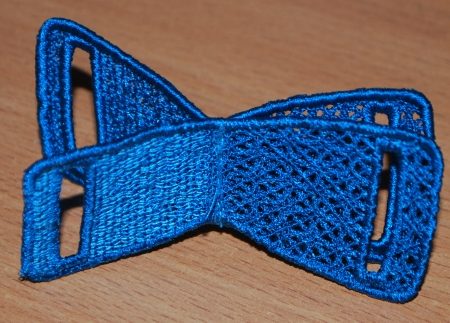
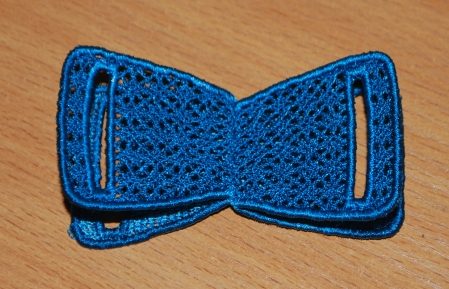
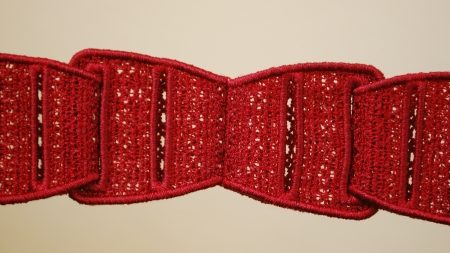
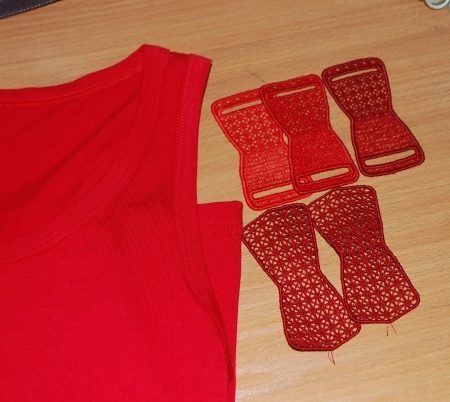
There are four parts in the set. All of them are embroidered in the same way as described above.
For the belt you will also need a fastener of some type. Ties, such as ribbon, a scarf, matching trim, etc., work well for this type of belt.
All belt parts are assembled in the same way.
Embroider part 1, 2 or 4 several times. Use threads of similar color in the needle and in the bobbin.
Wash away the stabilizer. Press with steam, if needed.
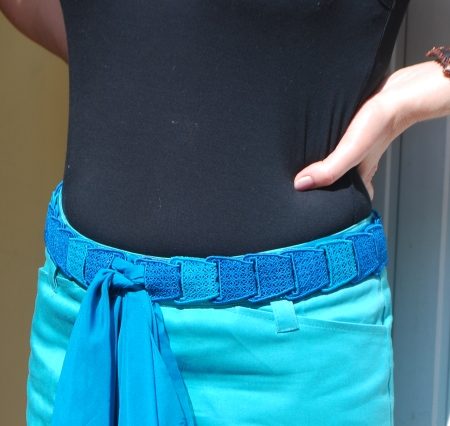
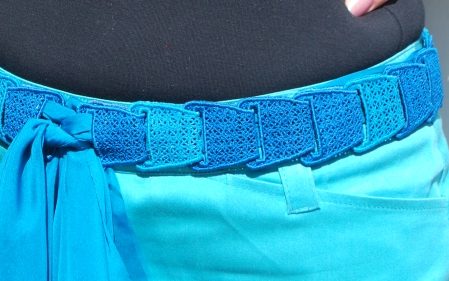
For the blue belt we used part 1. (Part 2 can be used instead of part 1).
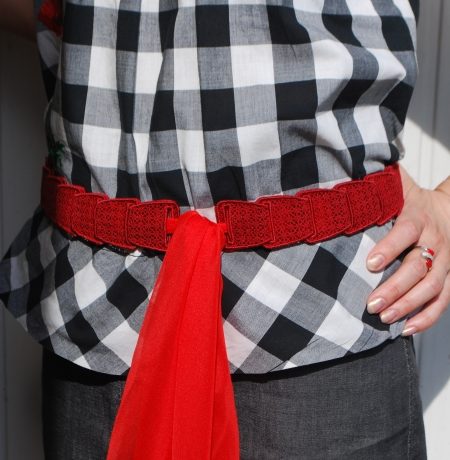
For the red belt, we used part 4.
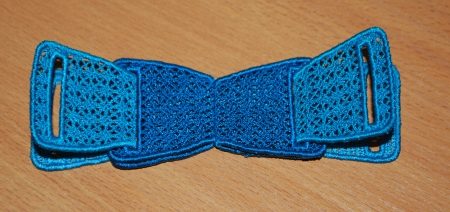
After the parts are ready, start to assemble the belt. For the center of the belt, you need to take two parts and place them together, face to face.
Stitch the parts together along the central line.
Now fold each part in half along the seam line.
Now take two more parts, insert them into the slots and fold in half.
Go on adding parts on both ends until you have the desired length.
For the blue belt, we inserted ties into the slots of the end pieces.
With the "red " belt we used a long silk scarf which we inserted in each slot along the length of the belt.
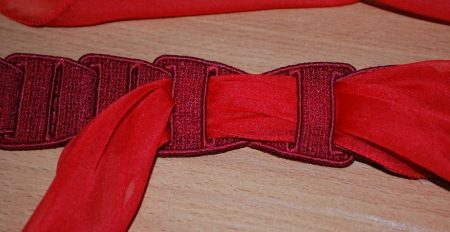
You can wear this belt with the scarf facing out or in. Contrasting colors can make for an interesting effect.

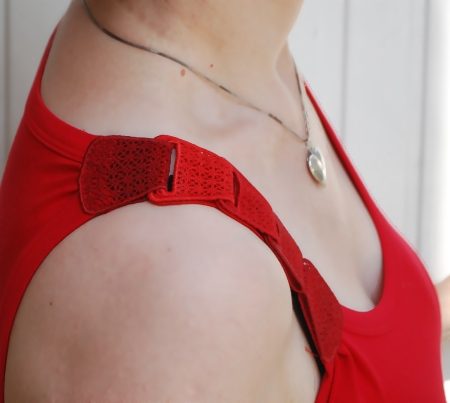
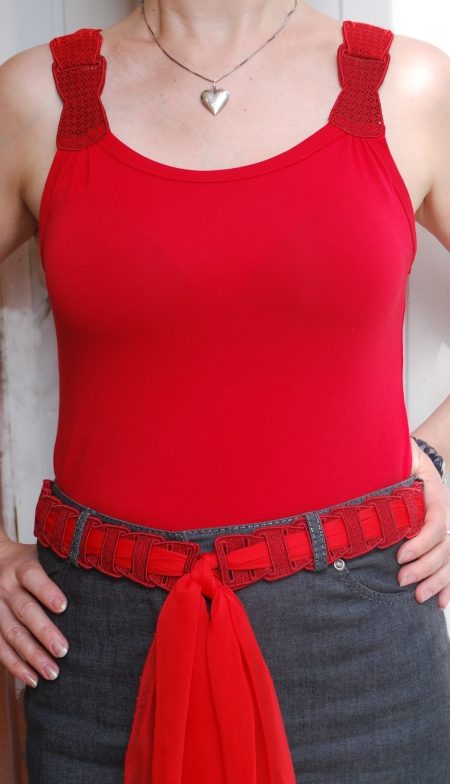
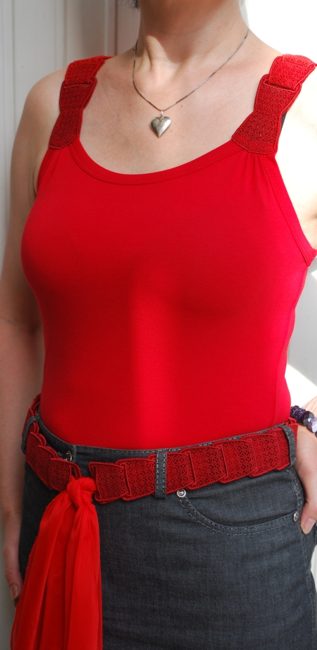
Straps for a Summer Top
For this project we used a sleeveless t-shirt and parts 1 and 3 from the set.
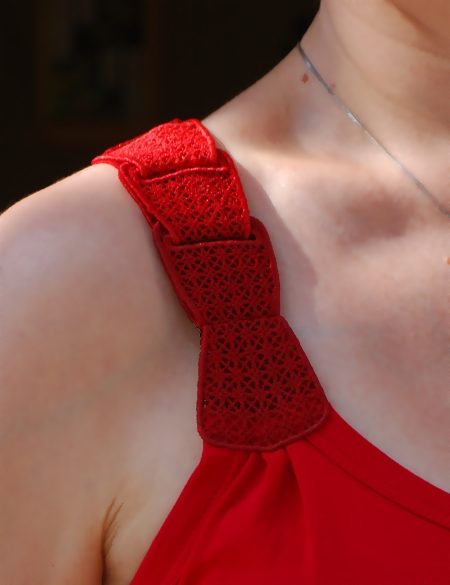
For one strap embroider part 3 twice and part 1 three or more times, depending on the legth of your strap.
Position one part #3 and one part #1 face to face and stitch along the central line as described above for the belt.
Fold both parts in half, face outwards.
Cut away the T-shirt's shoulder and finish the edge of the fabric. Tuck the fabric of the front between the halves of part 3. Pin. Topstitch in place.
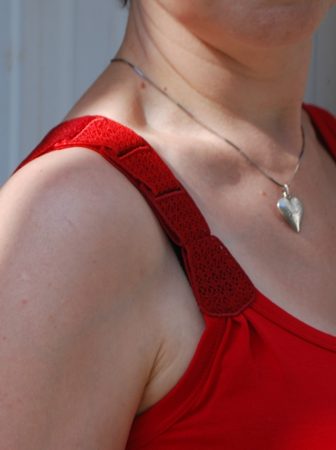
Assemble the rest of the strap as described for the belt above.
Finish with the second part 3. Fold it in half and tuck the fabric of the back between its halves. Stitch in place.