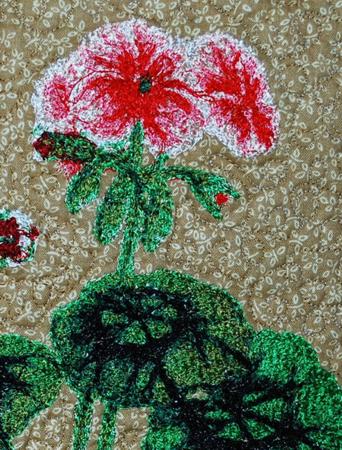
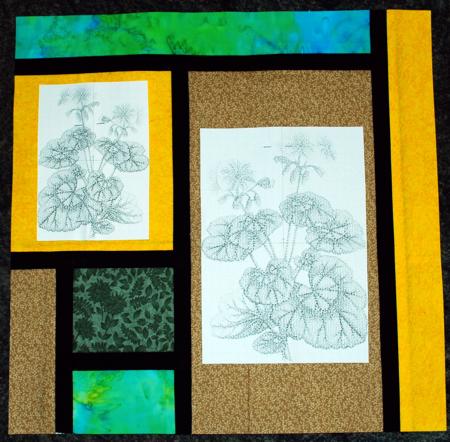
This artsy cushion is a great project to use up fabric scraps left over from other projects. It's quick to piece and looks very attractive. It features the design Geranium for the large (5" x 7") hoop and commercial-size hoop.
The finished size of the cushion is about 17" x 18" .
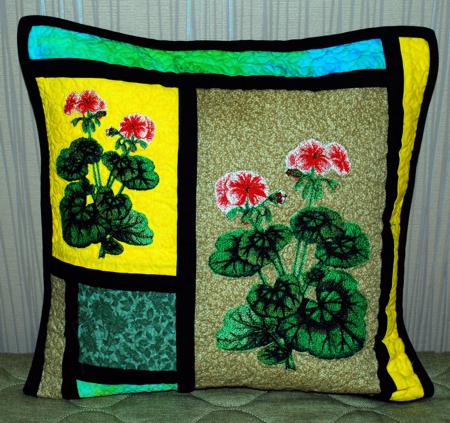
We used left-overs of different cotton fabrics. The only fabric that we needed a large piece of was black - we used it for the top, the backing, the binding and the rear panel of the pillow. You will also need batting and stuffing or a cushion form.
For embroidery, you will need light-weight cut-away stabilizer and embroidery threads.
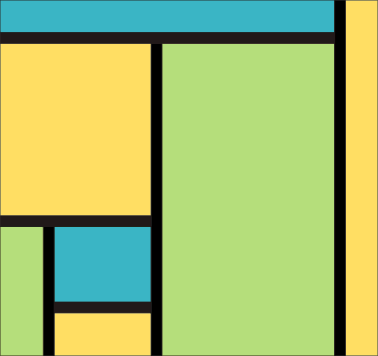
For the front of the pillow, out of black fabric, cut 2 strips measuring 1" wide and the length of the width of the fabric. Subcut them into strips of the following length:
Press seams immediately after you sew them.
Take the 2 1/2" x 5" rectangle and 1" x 5" black strip. Sew the strip to the upper edge of the rectangle.

Take the 4" x 5" rectangle and sew it to the upper edge of the black strip.

Sew the black 6 1/2" strip to the left edge of the working piece.

Take the 2 1/2" x 6 1/2" rectangle and sew it to the left edge of the black strip.

Sew the black 7 1/2" strip to the upper edge of the working piece.

Take the 7 1/2" x 8 1/2" rectangle and sew it to the upper edge of the black strip.

Sew the black 15" strip to the right edge of the working piece.

Take the 8 1/2" x 15" rectangle and sew it to the right edge of the black strip.

Sew the black 16" strip to the upper edge of the working piece.

Take the 2" x 16" rectangle and sew it to the upper edge of the black strip.
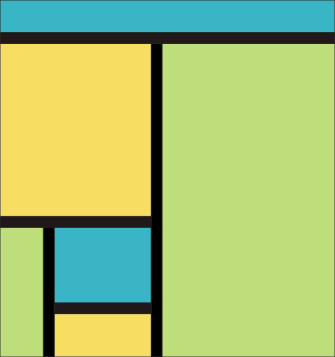
Sew the black 17" strip to the right edge of the working piece.
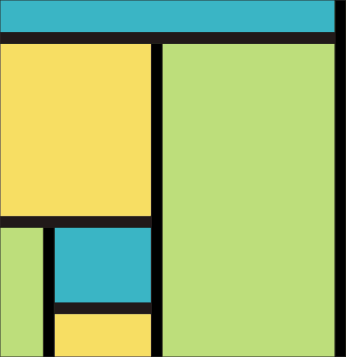
Sew the 2" x 17" rectangle to the right edge of the black strip.
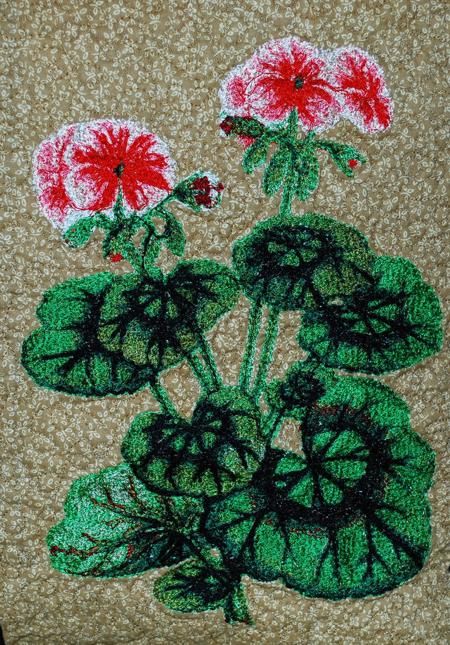
Using paper templates, determine the position of the embroidery on the top. Stabilize the fabric and embroider the designs one by one.
Cut away the excess stabilizer.
If you use crafter's felt or low-loft polyester batting (which is very similar to felt), you can spread the top on the felt/batting and make the embroidery without a stabilizer. Felt will work as a stabilizer in this case.
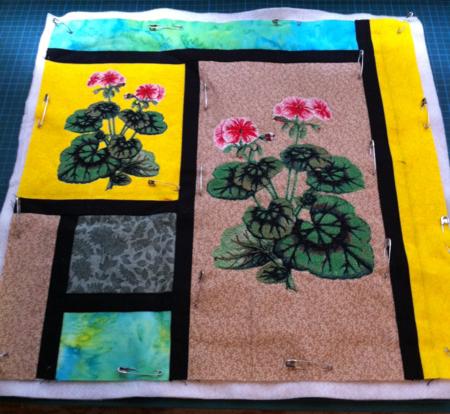
Now place the backing on a flat surface (table) face down. Cover with batting. Spread your working piece over it. If you embroidered on felt, you do not need the batting.
Pin all three layers together with 1" pins. We quilted around the embroidery and all over the mat in a free-motion style. Remove the pins while quilting.
Press the work with heavy steam and square the work -- all corners should be 90 degrees and opposite sides should be of the same length.
Out of black fabric, cut 2 pieces measuring 18" x 18". Out of batting, cut a piece measuring 18" x 18". Make a sandwich and quilt.
Press the work with heavy steam and square the work -- all corners should be 90 degrees and opposite sides should be of the same length.
The back panel should be of the same size as the front panel.
Align the back and the front of the pillow with wrong sides towards each other. Align the edges and pin them together.
Topstitch along the edges with seam allowance 1/4". If you are using stuffing, leave about 10" unstitched on any side. If you are using a form, leave about 14" unstitched.
Insert stuffing or cushion form through the opening. Stitch the opening closed.
Finish the raw edges with black binding.