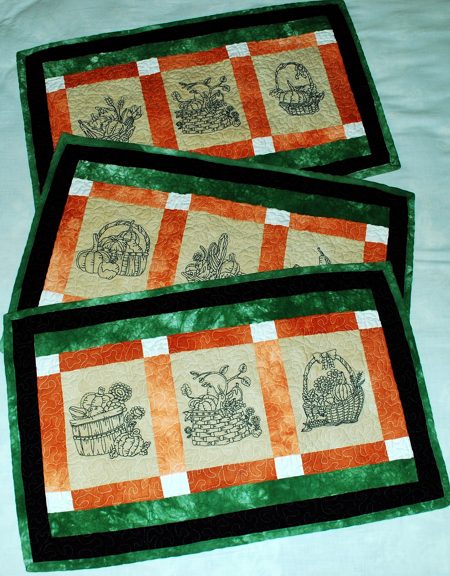
These easy-to-make harvest-themed placemats will surely add some seasonal spice to your table. We used the designs from the Redwork Harvest Basket Set for a large hoop (5" x 7") and autumn-colored fabrics.
The finished size of each placemat is about 16" x 25".
You will need fabrics of fall colors. Batiks or marbled fabrics are the beast choice.
For a set of four mats we used:
Cutting:
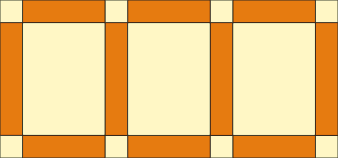
For each mat, out of cream fabric, cut 3 rectangles measuring 6" x 8" and 8 squares measuring 2" x 2".
Out of orange fabric, cut 6 strips measuring 2" x 6" and 4 strips measuring 2" x 8".
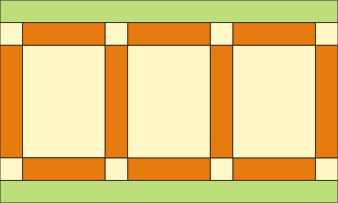
Out of foliage green fabric, cut 2 strips measuring 2" x 23", use the remaining fabric for the binding.
Out of forest green fabric cut 2 strips measuring 3" x 23" and 2 strips measuring 3" x 17".
Top Assembly:
Sew the four orange 2" x 8" strips and the three cream 6" x 8" rectangles together:
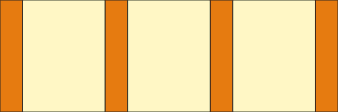
Press seams towards the orange.
Sew the orange 2" x 6" strips and cream 2" x 2" squares into 2 sashing strips: 4 squares and 3 strips in each. Press seams towards the orange.

Sew the sashing strips to the upper and lower edges of the central piece:
Sew the foliage green 2" x 23" strips to the upper and lower edges of the working piece.
Sew the forest green 2" x 23" strips to the upper and lower edges of the working piece.
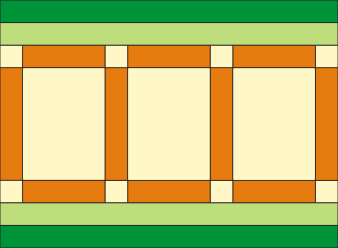
Sew the forest green 2" x 17" strips to the left and right edges of the working piece.

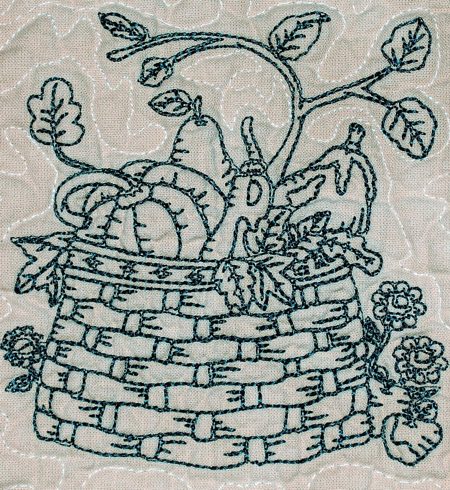
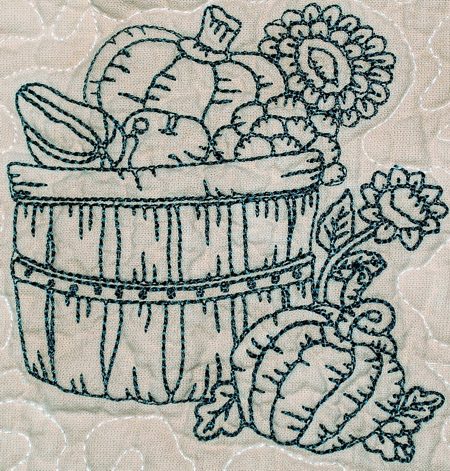
Stabilize each cream rectangle with a light-weight stabilizer, and embroider one of the designs from the Harvest Basket Redwork Set.
In the same way, make stitch-outs in every cream rectangle.
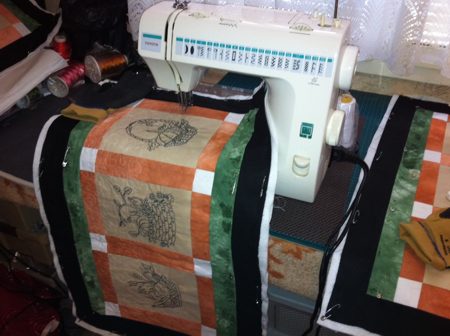
Quilting and Finishing:
Now place the backing on a flat surface (table) face down. Cover with batting. Spread your working piece over it.
Pin all three layers together with 1" pins. We quilted around the embroidery and all over the quilt in a free-motion style. Remove the pins while quilting.
Press the work with heavy steam and square the work -- all corners should be 90 degrees and opposite sides should be of the same length.
Finish the raw edges with binding.
Your placemats are ready! Enjoy!


