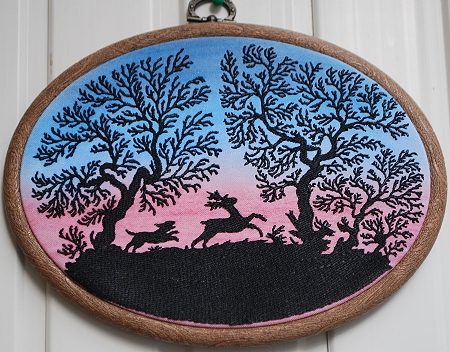
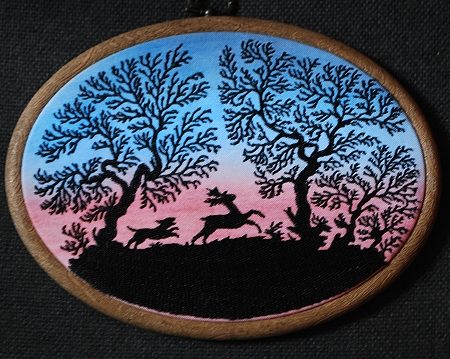
This simple but gorgeous project features the Hunting Scene Silhouette I design for a large hoop (5" x 7"). It makes a great gift if you know any hunters or someone who simply likes the outdoors.
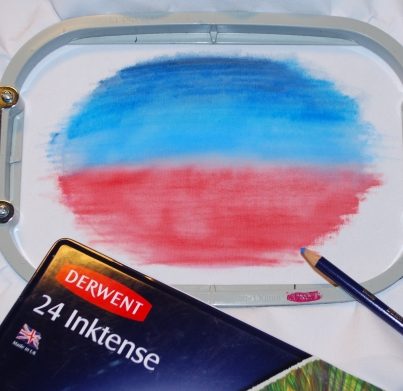
You will need a 12" x 12" square of white cotton fabric, 1/2" brush, Derwent Inktense Blocks or Derwent Inktense Pencils. These can be used to draw directly on fabric. When water is applied to them (more on this later), they fuse to the fabric and become color fast. Derwent Inktense is an interesting alternative if you can't find just the right color fabric to use for an embroidery or a quilt. We purchased ours at Amazon.com.
For embroidery you will need medium-weight cut-away stabilizer and embroidery threads.
You will also need an oval embroidery frame about 5" x 7" in size, available in many craft stores.
Preparing the fabric:
Cover your working table with a piece of paper, plastic or carboard to protect the surface. Position the white fabric on top of it.
Position the frame over the fabric and lightly trace the outline.
With Derwent Intense Blocks or pencils, color the upper part of the oval blue, and the lower pink.
Take the brush and water and dab at the fabric to cover the painting with a layer of water. The colors will blend slightly. Leave the work to dry for 24 hours. After it dries, the colors will bind to the fabric permanently and will not run.
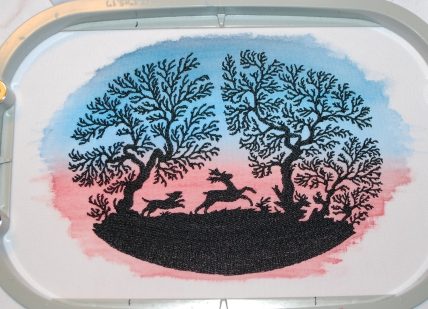
Press the fabric with a hot iron.
Stabilize the fabric square and hoop so that the painted area is centered in the hoop. Embroider the Hunting Scene Silhouette I.
When you are finished, press the embroidery.
Open the frame and position the embroidery over the smaller oval (back part of the frame). Put the main part of the frame over the embroidery. Make sure that there are no creases.
Cut away the excess fabric and stabilizer around the smaller part of the frame (on the back).