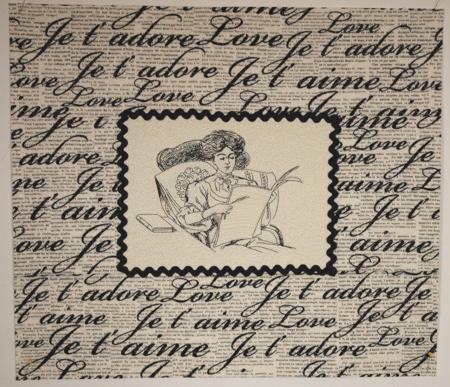
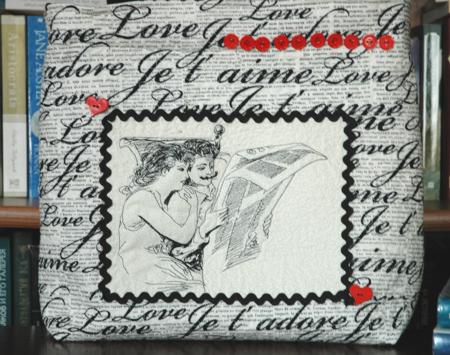
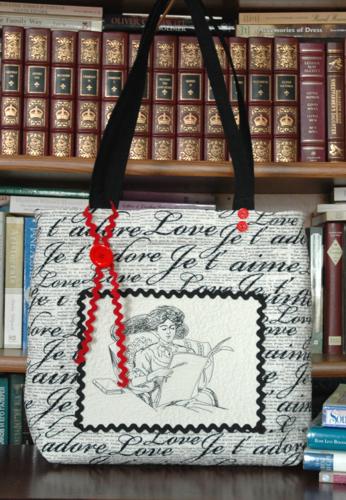
This attractive qulted tote bag features the designs Sunday Newspaper (on the front) and Reading the Newspaper (back). It is roomy and practical. The finished size of the bag is about 13 1/2" high x 14" wide and 4" deep.
|

|
You will need
a piece of light-colored fabric for the embroidery,
1/2 yard of fabric for the outer bag (we used cream colored fabric with lettering),
1/2 yard of fabric for the lining and
about 1/4 yard of fabric for trim (we used black fabric). To make handles, we used fabric from a pair of old black twill pants. You can use duck cloth or any other thick cotton fabric.
You will also need batting and a 16" long zipper. We also used black rick-rack and red buttons as embellishments.
For embroidery you will need light-weight cut-away stabilizer and embroidery threads.
|
|
Cutting:
|
Out of light-colored fabric for embroidery, cut 2 rectangles measuring 8 1/2" x 10 1/2".
Out of fabric for the outer bag, cut
- 4 rectangles measuring 5 1/2" x 8 1/2";
- 4 rectangles measuring 5 1/2" x 20 1/2"; and
- 2 rectangles measuring 3 1/2" x 15" (for the top of the tote).
Out of the fabric for the lining cut 2 rectangles measuring 20" x 22".
Out of black fabric, cut
- 3 strip measuring 2" x 15";
- 2 strips measuring 11" x 16" (for the pockets);
- 2 rectangles measuring 3 1/2" x 15" (for the top of the tote) and
- 2 strips measuring 4" x 20".
Out of batting, cut
- 2 rectangles measuring 20" x 22",
- 2 rectangles measuring 3 1/2" x 15" (for the top of the tote).
|
|
Assembly of the outer panels of the tote.
|
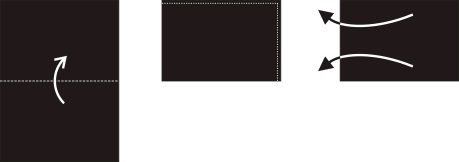
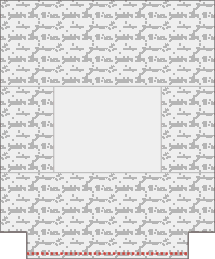
| Sew the 5 1/2" x 8 1/2" rectangles to the left and right edges of the light-colored 8 1/2" x 10 1/2" part. |

|
| Sew the 5 1/2" x 20 1/2" rectangles to the upper and lower edges of the working piece. |
|
|
Embroidery:
|
Working with one panel at a time, stabilize the central light-colored rectangle and embroider the designs. We embroidered the Sunday Newspaper on the front and Reading the Newspaper on the back panel.
Cut away the excess stabilizer. |
|
Quilting:
|
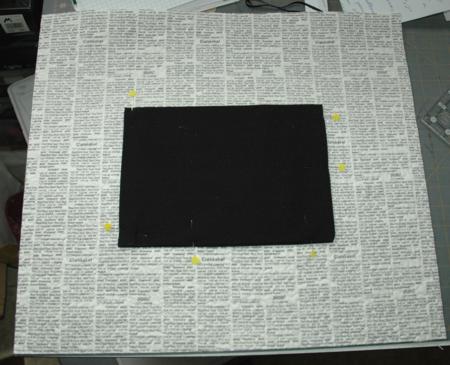
| Now place the lining on a flat surface (table) face down. Cover with batting. Spread the first panel over it. Repeat for the second panel. Pin all three layers together with 1" pins. We quilted around the embroidery and all over the panels in a free-motion style. Remove the pins while quilting.
Press the work with heavy steam and square the work -- all corners should be 90 degrees and opposite sides should be of the same length. Trim each panel to 17 1/2" x 20".
Cut a 2 1/2" square from each corner of the lower edge of both panels.
|
|
|
Making the pockets
|
| Take the 11" x 15" black strips, fold them widthwise right side inwards and align the edges. Stitch 2 of the raw edges together with seam allowance 1/4"; leave the 3rd side open.
|
|
Turn the working piece out. Press. Tuck the raw edges 1/2" inside and press. Topstitch this side closed 1/8" from the edge. You'll get a rectangle measuring 10" x 7".
Topstitch the upper edge of the rectangle 1/4" and 1/2" from the edge. |

|
| Position the pockets on the lining behind the embroidery. Align the bottom and side edges of the pocket with the edges of the embroidered rectangles. Pin. Topstitch in place. Tip: To make the seams less visible, use black thread (to match the pocket) in the needle, and white or cream thread (to match the outer bag) in the bobbin.
|
|
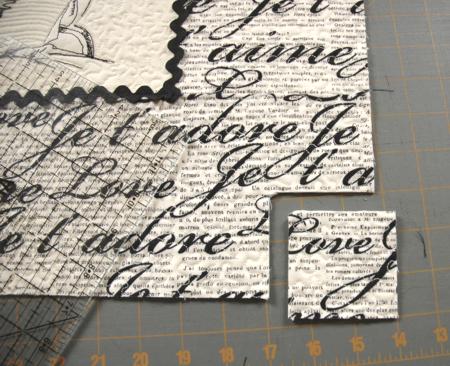
| Cut the rick-rack into 2 strips measuring 36" each. Pin it around the embroidery. Topstitch in place. This will hide the seams left by attaching the pocket. |
|
|
Making the tote
|
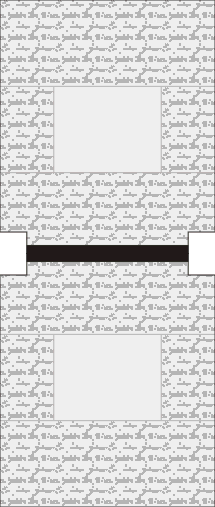
| Position the panels face to face and align all edges. Pin the lower edges. Stitch them together with seam allowance 1/2". |
|
Open the panels, open the seam and press it with steam.
Cover the seam with the black 2" x 15" strip. Tuck in the edges of the strip under the seam allowance and press. Then topstitch several times through all layers 1/8" and 1/4" from both edges. |
|
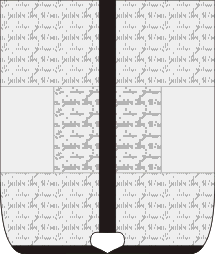
| Fold the working piece in half again, face side inwards. Align the side edges. Stitch the panels together along one side with 1/2" seam allowance. Press the seam open. Finish the seam with a black strip in the same way as the bottom. |
|
| Repeat for the second side. |
| Now align and pin the side and the bottom seams. Stitch 1/2" from the raw edges. Finish the raw edges either with zig-zag stitch or with binding. |
|
|
Handles
|
| We made handles out of dense twill fabric. Cut 2 strips measuring 3" x 31". Fold them lengthwise, face inwards, and stitch 1/4" from the raw edge. Press the seam open. Turn the tubes out. Press. Topstitch 1/4" from both edges. |
| Position one handle on the front panel 4 1/2" from the side seams. The short ends of the handle shold protrude 1/2" beyond the raw edge of the tote. Stitch close to the upper edge. Repeat with the second handle on the back panel. |
|
Making the Top with Zipper
|
| Spread a 3 1/2" x 15" black strip, face up. Position the zipper on top, face up, aligning the upper edges of the pieces. Cover with the 3 1/2" x 15" strip of patterned fabric, face down. Align the upper edges. Pin all three layers together. Stitch through all layers 1/4" from the edge. Unfold the fabric layers and press. Repeat for the other side of the zipper.
Tuck the 3" x 15" strips of batting between the fabric. Quilt in a free-motion style.
|

|
Trim the piece to 5 1/2" wide, including zipper, by 14 1/2" long.
Find the center of each long edge and mark it with a pin. |
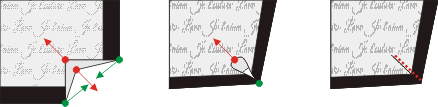
| Take the black 4" x 20" strips. Fold it in half legthwise, wrong side inwards. Press to make a crease. Unfold. Place the strips, face inwards, align the short sides. Stitch them 1/4" from the edge. Open the seams and press. Find the center of each strip and mark them with a pin.
|
| With the right sides together, pin the strip to the short edges of the zippered top. Match the side seams with the center of the zipper. Stitch each side with 1/4" seam allowance. Start stitching 1/4" from the long edge and finish stitching 1/4" from the other long edge. |
|
| Pin the strip to the long edges of the zippered top, lining up the pins. Stitch along the long edges with seam allowance 1/4", starting and stopping 1/4" from the short edges. |
|
|
Attaching the top to the tote
|
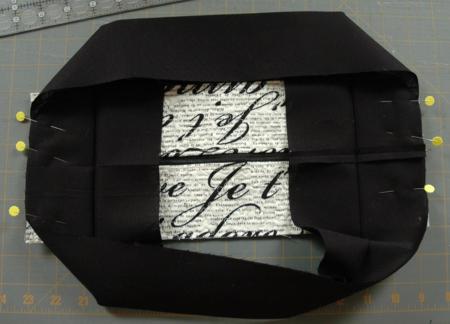
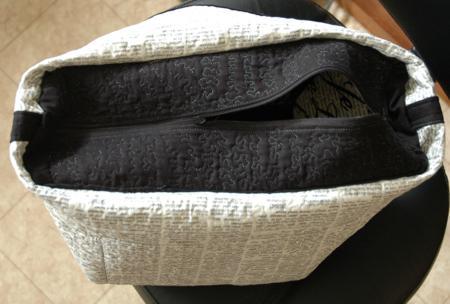
Turn the tote right side wards. Open the zipper.
With the right sides together, pin the black band to the bag, aligning the crease on the band with the upper edge of the bag and lining up the side seams.
Stitch 1/4" from the edge. |
|
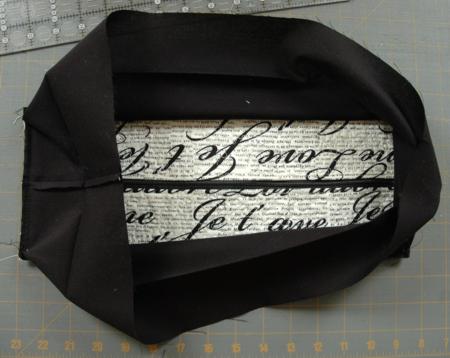
| Fold the wide free edges of the band over the unfinished edge of the zippered part. Fold the band edges 1/4" and baste over the unfinished edges. |
| Turn the work right side out. Tuck the zippered top inside. Topstitch 1/4" from the edge. Topstitch again about 1 1/2" from the edge. Rip the baste. |
|
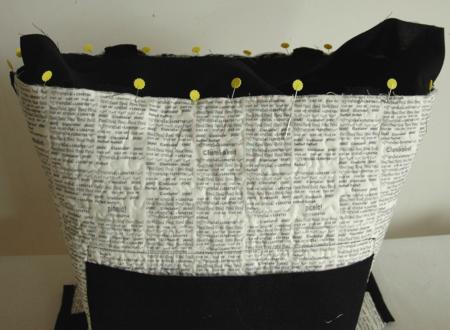
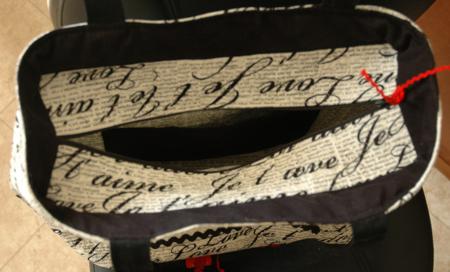
| This is what the top of the bag looks like from inside. |
|
| Decorate the front and back of the tote with buttons. |
|
|
|
Enjoy!
|
|
Happy Stitching!
|
|
Back to Sunday Newspaper and Reading the Newspaper
|
|
Back to Projects Page
|


