Our customers often ask us what they can do with fine art embroidery other than framing. Here is one of the options - a small simple art quilt!
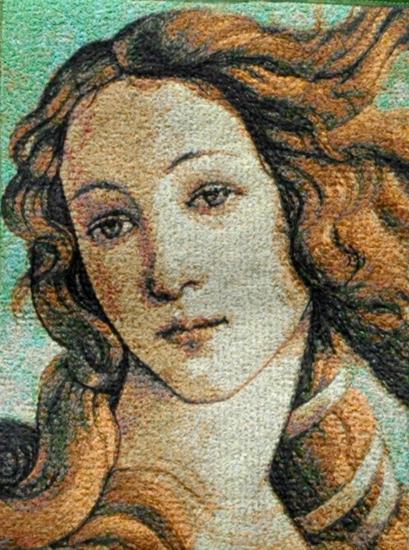
For this quilt we used the design Birth of Venus by Sandro Botticelli.
The finished size of the quilt is 18" x 22".
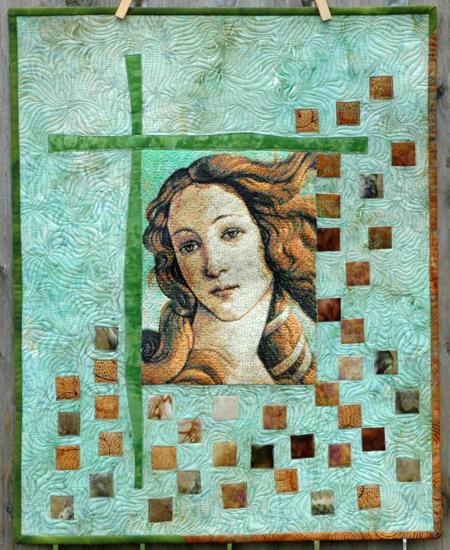
We chose the fabrics for the quilt based on the colors of the design.
For the main fabric, choose one of the paler colors. For the complimentary fabrics, choose from the darker colors.
For this quilt I recommend batiks. Batiks have an interesting texture, but they also have high thread count and do not fray, which is important for applique.
You will need a fat quarter (a piece measuring 18" x 22") of light-colored batik, and scraps of batiks in light green, gray, brown and cream hues.
For embroidery you will need medium-weight cut-away stabilizer and embroidery threads. I prefer to use polyester craft felt instead of stabilizer. Cut a piece 1" wider and 1" longer than the fat quarter (19" x 23").
You will also need a piece of fabric for backing. If you use stabilizer instead of the felt, you will need batting.
I made the binding out of scraps of the batiks I used for the quilt.
You will also need Light Steam-a-Seam II, fusible heat-activated net, or a similar product.
Stabilize the fat quarter, mark its center. Hoop the fat quater so that its center is in the center of the hoop. Embroider the design.
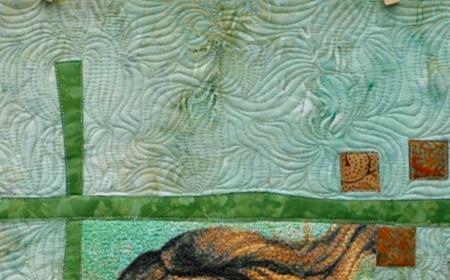
Out of the complimentary fabrics, cut a strip measuring 1 1/2" x 18" and 40-50 small 1" x 1" squares.
Remove the protective paper from one side of the Steam-a-Seam net. Place the strip and the squares on the net. Press with fingers to attach the fabric to the net.
Cut out all shapes together with the net and the protective paper on the back.
Either with scissors or with a rotary cutter (but without a ruler) cut the strip into 2 lengthwise. Your cut should not be straight - the more uneven, the better.
Remove the protective paper fron one of the strips and position the strip with the straight edge along the left edge of the embroidery. Press with fingers to make it adhere.
Cut the second strip to 14". Remove the paper, position the strip with the straight edge along the upper edge of the embroidery.
Remove the protective paper from all squares. Position the squares around the embroidery. When you are satisfired with the composition, press with an iron to permanently attach the shapes to the fabric.
Now place the backing/lining on a flat surface (table) face down. Cover with batting.( If you embroidered on felt, you do not need batting.) Spread your working piece over it.
Pin all three layers together with 1" pins. We quilted around the embroidery and all over the quilt in a free-motion style. Long curving lines are good for this project because they follow the lines of Venus's hair.
Remove the pins as you quilt.
Press the work with heavy steam and square the work -- all corners should be 90 degrees and opposite sides should be of the same length.
Finish the raw edges with binding. We sewed the binding out of the strips of the same batiks we used as complimentary fabrics on the quilt.


