These are instructions on how to embroider and make the Applique Quilt Block which we offer as free design of the month.
The design is available in 2 sizes to fit a large hoop (130 x 180 mm or 5" x 7") and a Mega Hoop ( 150 x 150 mm or 6" x 6") .
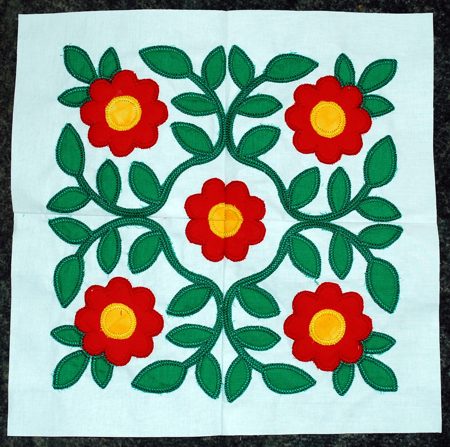
The finished size of the block with the applique embroidery is about 10"-14", depending on the space you wish to leave around the embroidery.
The applique has a blanket stitch finish.
| Large Hoop: Size: 129 x 129 mm Stitches: 13267 Colors: 9 |
Mega Hoop: Size: 149 x 149 mm Stitches: 15163 Colors: 9 |
You will need base fabric, fabric for the applique, light-weight stabilizer, embroidery threads, machine quilting cotton threads and temporary fabric adhesive in a stick.
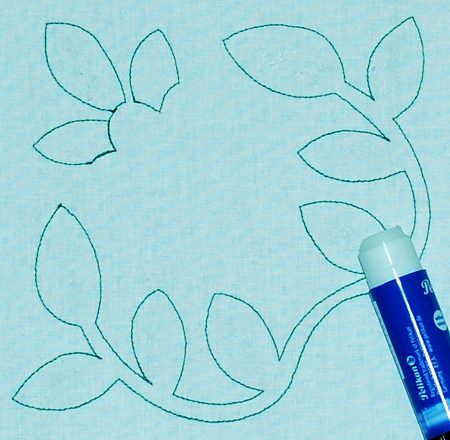
Step One: Hoop the base fabric stabilized with the stabilizer needed for your project. We used light-weight cut-away stabilizer.
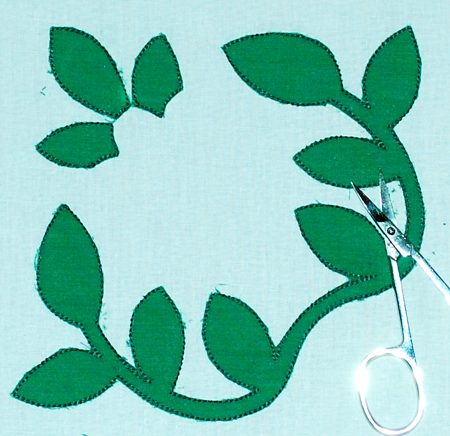
Upload the file into your machine. Start embroidering. The machine will embroider the outlines of the stems and leaves and stop.
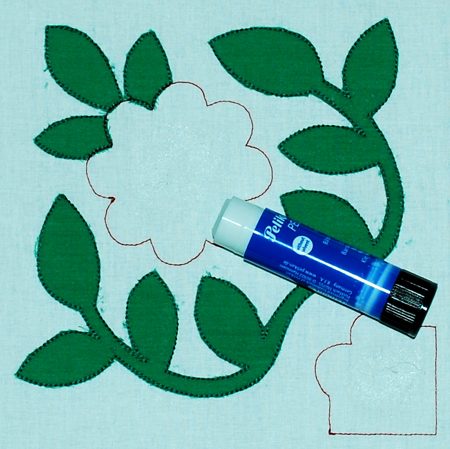
Step Two: Place a very small amount of the fabric glue inside the shapes. Cover the shapes with green piece of fabric, press a little with the tips of your fingure so that the applique fabric adheres to the base and does not shift during the next step. Start the machine.
The machine will embroider the same shapes over the applique fabric and stop.
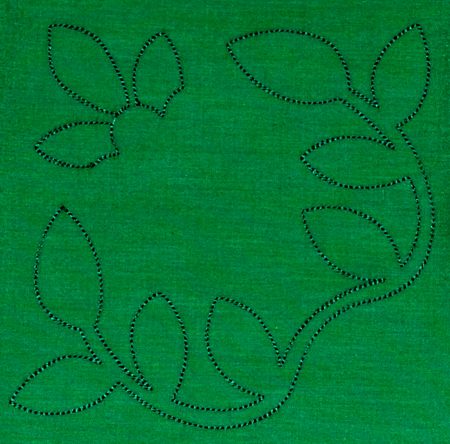
Step Three: Take the hoop from the machine. With a pair of sharp scissors cut away the fabric around the shape as close to the stitches as possilbe. Return the hoop to the machine.
Step Four: Return the hoop to the machine and embroider the next shapes - flowers.
Step Five: Place a very small amount of the fabric glue inside the shape. Cover it with a piece of applique fabric. Start the machine.
The machine will embroider the same shapes over the applique fabric and stop.

Step Six: Take the hoop from the machine. With a pair of sharp scissors cut away the fabric around the shapes as close to the stitches as possible. Return the hoop to the machine.
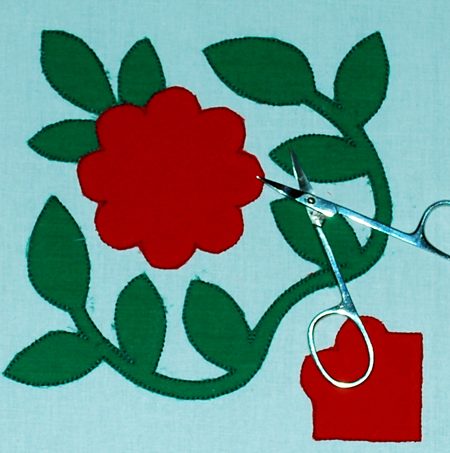
Step Seven: Return the hoop to the machine and embroider the next shapes - flower centers.
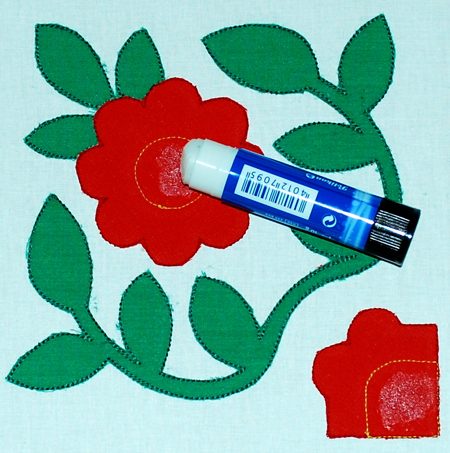
Step Eight: Place a very small amount of the fabric glue inside the flower centers. Cover them with pieces of applique fabric. Start the machine.
The machine will embroider the same shapes over the applique fabric and stop.
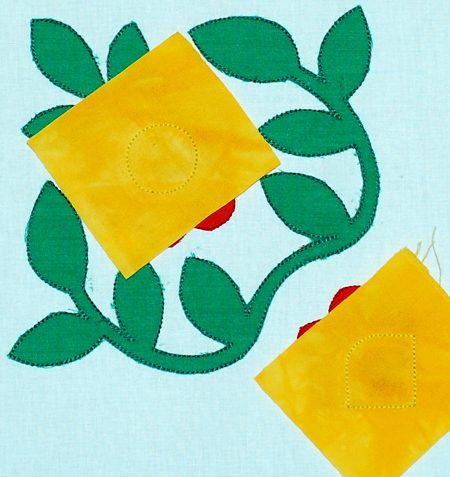
Step Nine: Take the hoop from the machine. With a pair of sharp scissors cut away the fabric around the shapes as close to the stitches as possible. Return the hoop to the machine.
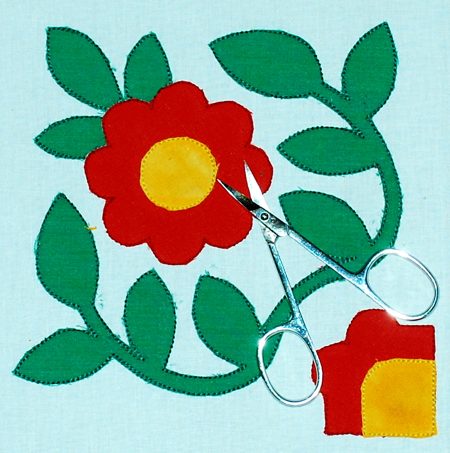
Step Ten: Return the hoop to the machine and let it finish the raw edges. Change threads when needed. The designs have a blanket-stitch finish. We recommend to use cotton machine quilting threads for the finish.
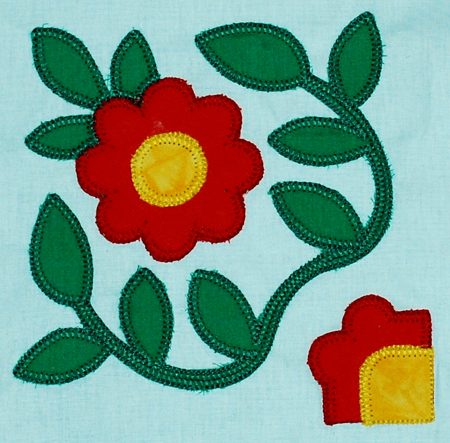
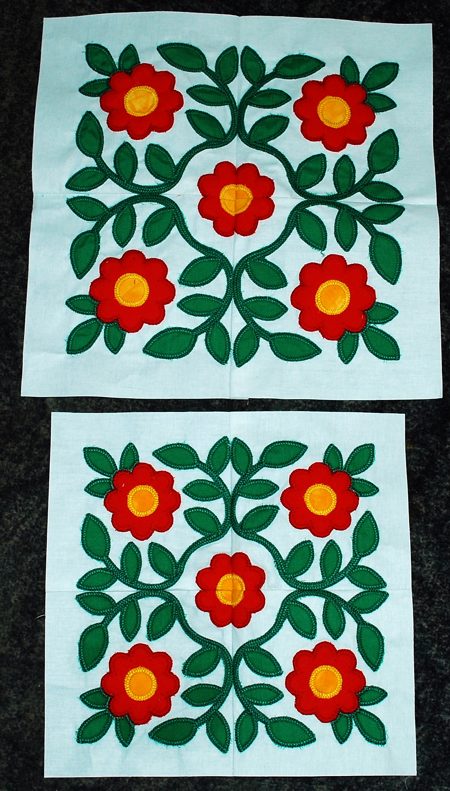
To make a block, you will need to embroider the design 4 times.
When you have all 4 parts embroidered, take one part at a time, place it on a cutting mat, align your ruler along the embroidered lines and cut.

When you have trimmed all four parts this way, align them as shown:
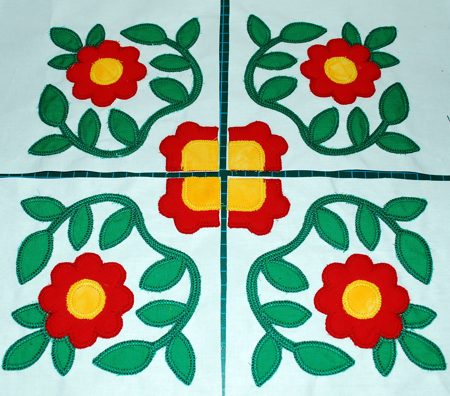
First sew the two upper quarters together, then the two lower quarters together. Seam allowance is 1/4". Press the seams open.
Finally sew the upper and the lower strips together. Press the seam open.
Trim the block to the size you need.