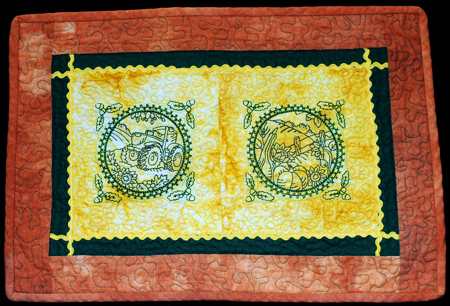
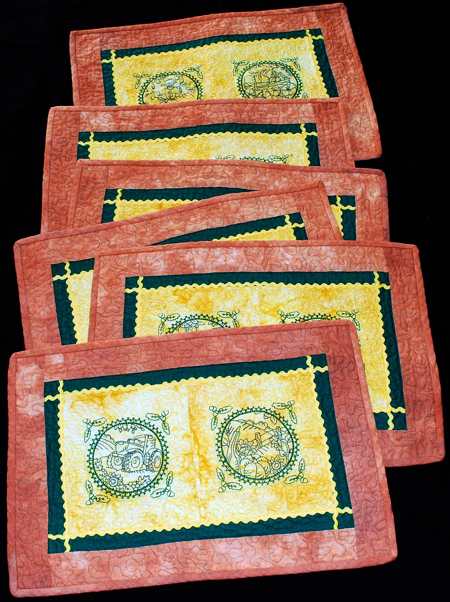
These gorgeous Fall-themed placemats feature the designs from the Redwork Autumn Set V for a large hoop. They're pretty simple to make and add a delightful casual accent to your dinner table.
The finished size of each placemat is 13" x 20".
Besides embroidery thread (either polyester or rayon), we used cotton fabrics in autumn hues:
Emboridery
We made the embroidery first and then put the placemats together. You can do it this way, or you can assemble the tops first and then embroider them.
With a removable fabric marker, graph the yellow fabric into 9" x 9" squares. Do not cut the fabric yet as it would be difficult to hoop.
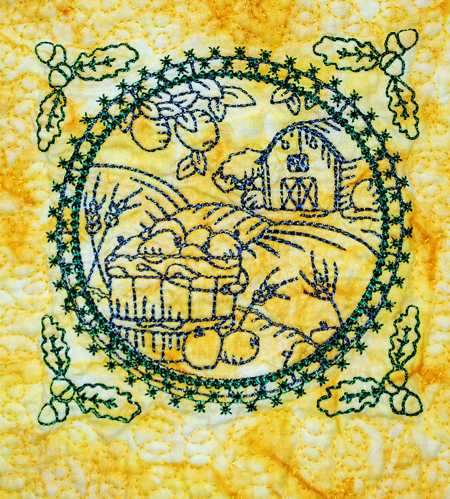
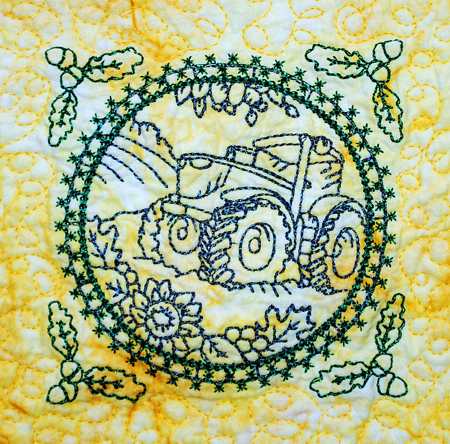
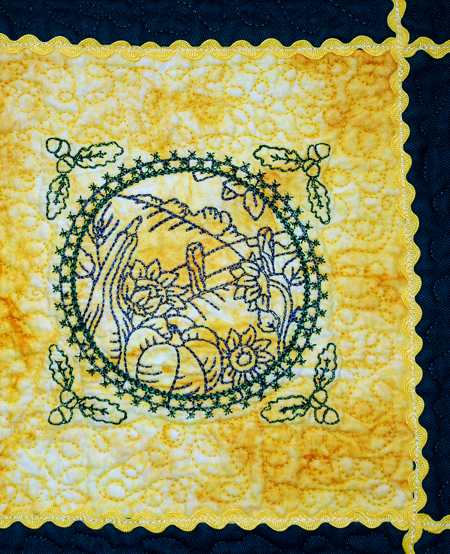
Embroider the designs in the center of each square. For each place mat we used 2 stitch-outs.
Cut out the squares. Trim each square to 7 1/2" x 7 1/2". Sew the squares in pairs. Seam allowance is 1/4".
Cutting
Cut the forest green fabric into strips 1 1/2" wide. For each place mat you will need:
Cut the brown fabric into strips 2 1/2" wide. For each place mat you will need:
Assembling the Top
Note: Seam allowance is 1/4".
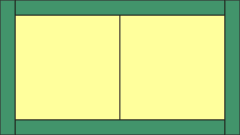
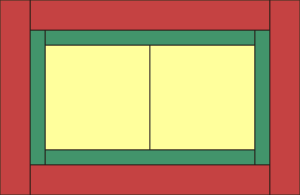
Sew the green 1 1/2" x 14 1/2" strips to the upper and lower edges of the embroidered center. Press the seams.
Sew the green 1 1/2" x 9 1/2" strips to the left and right edges. Press.
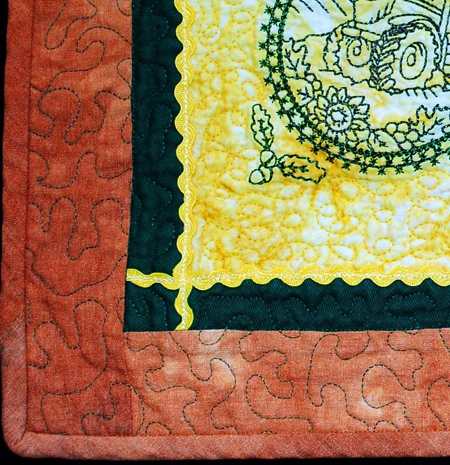
If you use ric-rac, position the 9 1/2" pieces along the side seams and topstitch in place. Position the 13 1/2" pieces along the upper and lower seams and topstitch in place.
Sew the brown 2 1/2" x 16 1/2" strips to the upper and lower edges. Press the seams.
Sew the brown 2 1/2" x 13 1/2" strips to the left and right edges. Press the seams.
Quilting and Finishing:
Spread the backing on your table, face down. Cover the backing with batting. Cover with the working piece. Pin all three layers together with 1" pins.
We quilted around the embroidery and all over the quilt in a free-motion style.
Press the work with heavy steam and square the work -- all corners should be 90 degrees and opposite sides should be of the same length.
Finish the raw edges with binding.
Your placemat is ready!