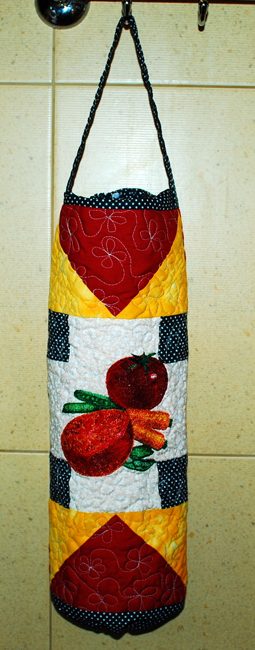
If you like to keep and re-use disposable plastic bags from the store, this convenient organizer provides an attractive way to store them until they're needed.
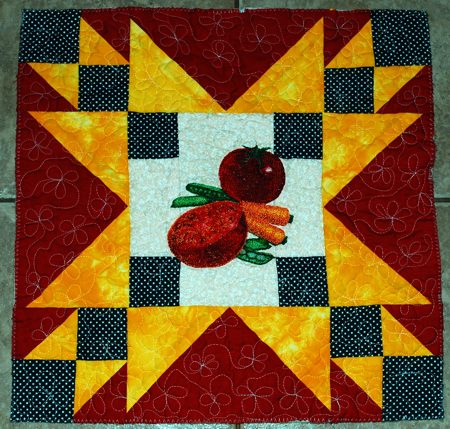
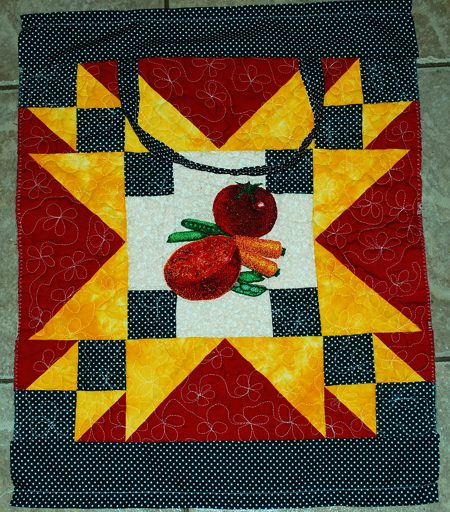
The organizer features the Vegetables design for a large (5" x 7") hoop.
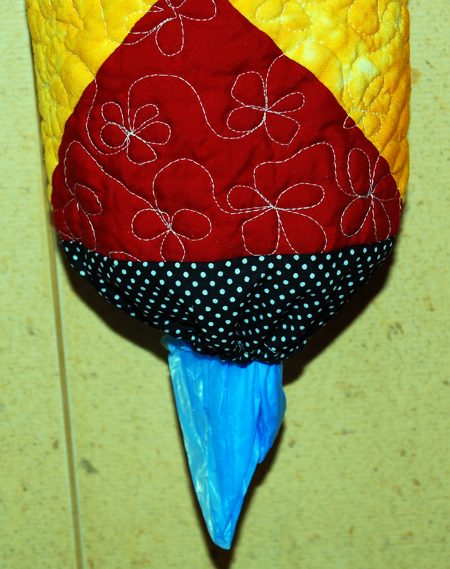
The finished size of the tote is about 22" high and about 6" in diameter.
We used the scraps of 4 cotton fabrics: white, black with a white pattern, red and yellow. You will also need a piece of batting or polyester craft felt measuring 17" x 17", and a piece of backing of the same size.
You will also need elastic tape.
Cutting:
Out of white fabric, cut
Assembly of the Top:
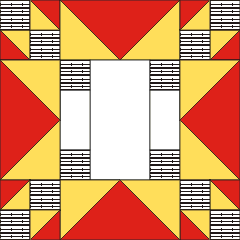
Take the two white 2 1/2" x 4 1/2" strips and sew black-and-white 2 1/2" squares to the ends of the strips.

Sew the new strips to the left and right edges of the white 4 1/2" x 8 1/2" rectangle.

To sew the next parts, called the "flying geese", take the red 4 1/2" x 8 1/2" rectangles and yellow 4 1/2" squares.
Position the rectangle on your working table, face up. Position one of the yellow squares, face down, on the right of the rectangle. Align the sides.
With a thin graphic pencil, draw a diagonal to connect the upper left corner and the lower right corner.

Machine stitch along the diagonal.
Cut the excess fabric, leaving 1/4" seam allowance.
Unfold the yellow fabric and press.
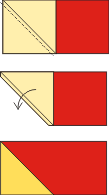
Repeat for the other side of the strip.
Repeat with the remaining red strips and yellow squares. You will need 4 such flying geese parts.

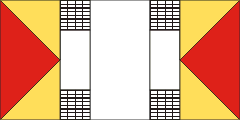
Sew two of the "flying geese" parts to the left and right edges of the central part.
For the corner blocks you'll have to sew half-triangle squares first. For this, position the yellow and red 2 7/8" squares in pairs, face to face. You'll get 4 pairs.

With a pencil, draw a diagonal on the lighter square. Stitch 1/4" from the pencil line on both sides.

Cut along the line. Open the new squares. Press the seam towards the red. Trim the "ears". Repeat for all the pairs. You should get 8 yellow-and-red squares measuring 2 1/2" x 2 1/2".
Using these half-trinagle squares and 2 1/2" black-and-white squares sew 4 blocks as shown below.
Sew the blocks to the left and right edges of the remaining "flying geese".

Sew the new strips to the upper and lower edges of the central part.
Spread a piece of polyester craft felt on your working table. Cover it with the pieced top. With your hands, smooth the top so that the fabric clings to the felt. Hoop both layers and embroider the Vegetables on the white part of the top.
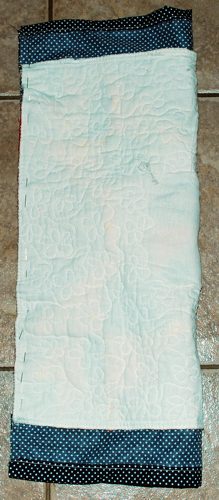
Spread the backing on your table, face down. Cover with the working piece (pieced and embroidered top with the layer of felt), face up. Pin all 3 layers together with 1" pins. and quilt is a free-motion style. Remove the pins while quilting.
When you are finished, press with heavy steam and trim the square to 16" x 16". Finish the edges with zig-zag stitch.
Assembly of the Tote:
Handle:
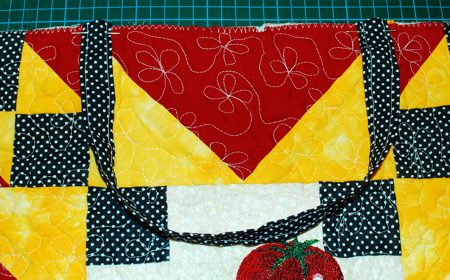
Fold the black-and-white 3" x 20" strip in half lengthwise and press firmly to mark the center. Unfold. Fold the edges to the central line. Press. Fold again. Top-stitch along both long edges, 1/8" from each edge.
Position the ends of the handle on the upper edge of the working piece, on the seams between the corner blocks and the "flying goose" element, as shown. Pin. Topstitch in place.
On your working table, place the embroidered square face up. Position the 4" x 16" strips along the upper and lower edges. Pin in place. Sew together with seam allowance slightly larger than 1/4".
Fold the upper edge 1/4" back and press. Fold again, now 3/4", and press again.
Repeat for the lower edge. Unfold.
Fold the working piece lengthwise, face inwards. Align the edges and pin.
Sew the seam closed. Open the seam and press it open.
Fold the upper edge along the crease lines. Top-stitch in place along the folded edge, leaving about 1/2" unstitched. Repeat for the lower edge.
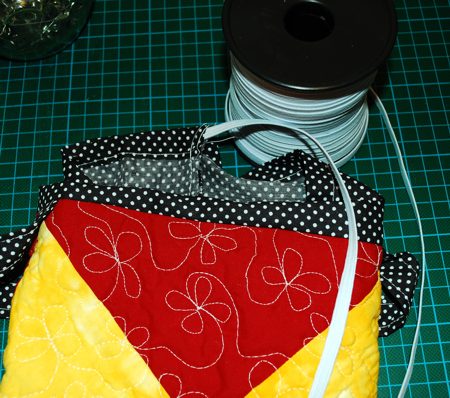
Insert elastic tape into the sleeves at each end of the tube.
The elastic tape on the top should be longer, to leave a larger opening.
The elastic tape on the bottom should be shorter, to leave a smaller opening.
Hang the bag in the kitchen. Insert plastic bags into it from the top. When you need them, take them out one-by-one from the bottom.