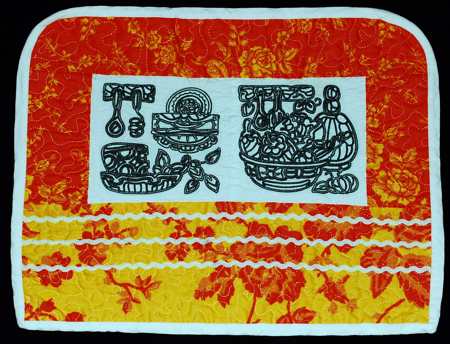
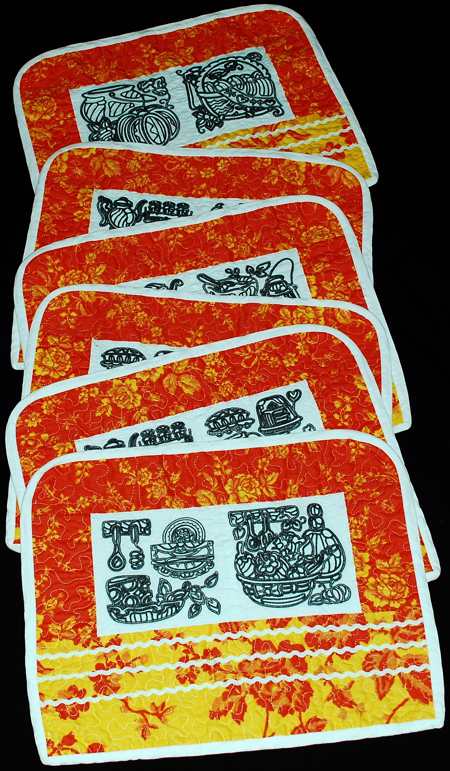
These placemats are very easy to make. They're great to throw together as a quick but charming gift, for example for a bridal shower. They use designs from the One-Color Vintage Kitchen set for a large hoop (5" x 7"). The finished size of the placemats is about 17" x 14".
We used solid white fabric for the embroidery background and 2 patterned fabrics: yellow with an orange pattern and orange with a yellow pattern. White rick-rack trim adds a whimsical accent.
You will also need batting, fabric for the backing and white binding.
For embroidery we used light-weight cut-away stabilizer and embroidery threads.
We made the embroidery first.
For each placemat, you will need 2 stitch-outs.
Graph white fabric with disappearing fabric marker into 8" x 8" squares. Do not cut the fabric now, because it will be difficut to hoop it.
Find the center of each square. Stabilize the fabric with light-weight cut-away stabilizer. Hoop so that the center of the square is in the center of the hoop. Make embroidery in each square.

Cut the squares.
Cut away the excess stabilizer.
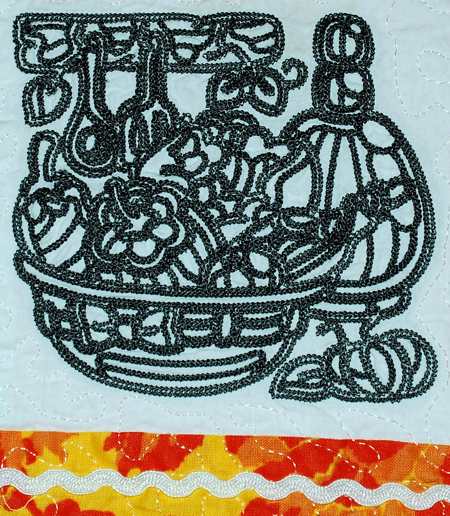
Trim the embroidered fabric to 6 1/2" x 6 1/2" blocks.
Cutting:
Out of the yellow fabric cut a strip measuring 6 " x 17 1/2".
Out of the orange fabric cut a strip measuring 3 1/2" x 17 1/2" and 2 strips measuring 3" x 6 1/2".
Cut rick-rack into piece 17 1/2" long . For each mat you will need 3 pieces.
Sew the embroidered blocks into a strip with 2 blocks per strip.

Sew the orange 3" x 6 1/2" to the left and right edges of the 2-block strip.

Sew the orange 3 1/2" x 17 1/2" strip to to the upper edge of the piece.
Sew the yellow 6" x 17 1/2" strip to the lower edge of the piece.

Quilting:
Spread the backing on the table, face down. Cover with batting. Spread the top over the backing. Pin all three layers together with 1" pins.
We quilted around the embroidery and all over the top in a free-motion style. Remove the pins while working.
When finished, press the mats with heavy steam and square the work. All corners should be 90 degrees and opposite sides should be of the same length.
Topstitch the rick-rack pieces to the lower strip. Space them evenly, 1" apart.
If you want rounded upper angles, take a small plate or saucer. Place it on the corner and trace the outline. Cut away the corner along the line.
Finish the raw edges with binding.