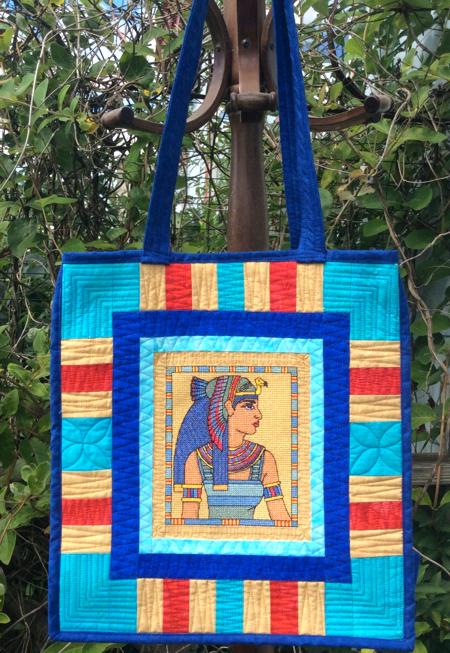
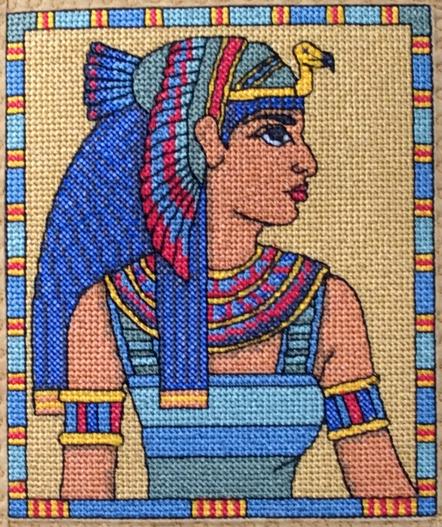
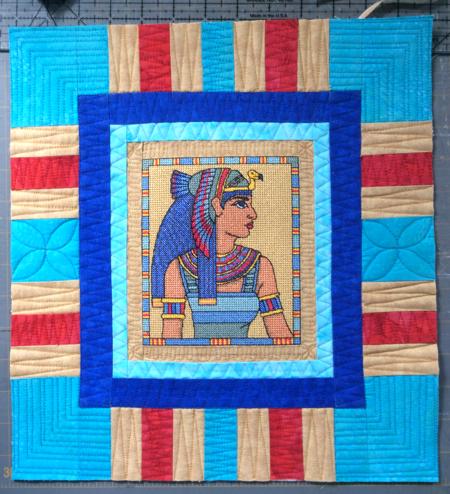
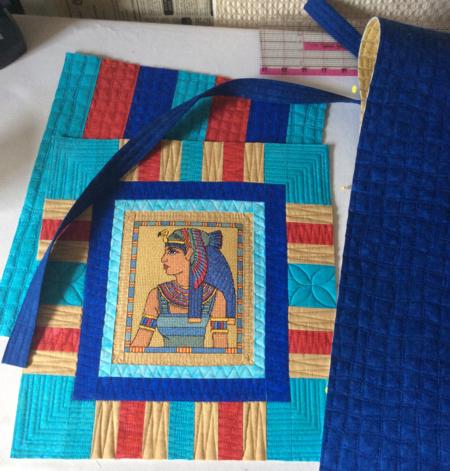
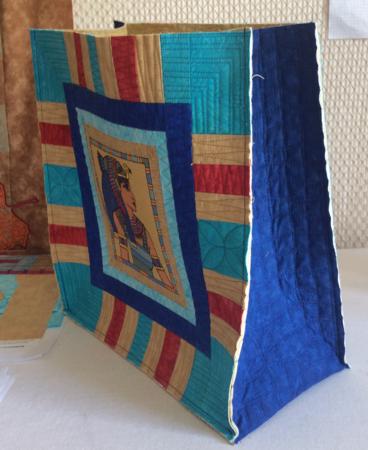
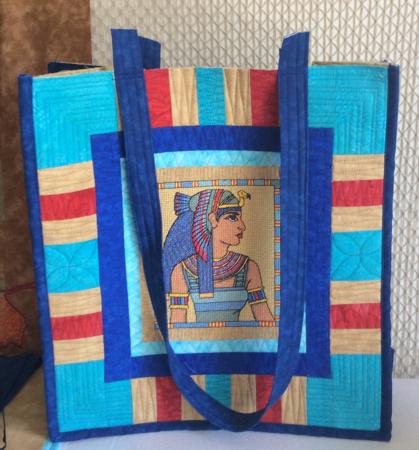
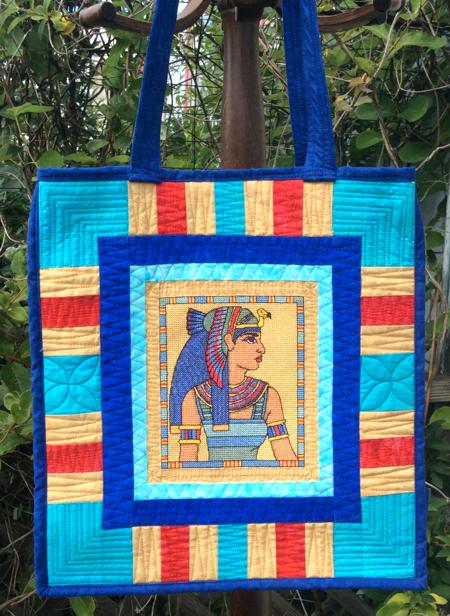
This one-of-a-kind tote features the embroidery design Queen Cleopatra in the cross-stitch technique.
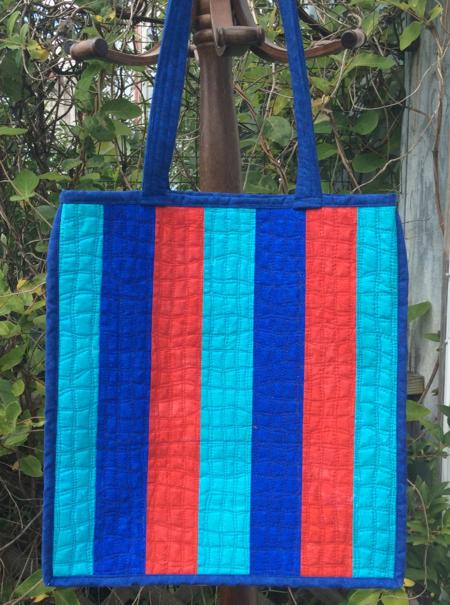
The finished size of the tote is about 13" W x 14" H x 6" D.
|
|
You will need
- embroidery thread (either polyester or rayon)
- medium-weight cut-away stabilizer or a piece of polyester craft felt, which can be used as stabilizer,
- a piece of light-colored cotton fabric for embroidery,
- fabrics for the outer bag to match the colors of the embroidery (choose them after you made the embroidery, we chose sand, red, royal blue and turquoise).
- fabric for the lining and inner pocket, about 3/4 -1 yard.
- batting,
- light-weight iron-on sewing interfacing,
- quilting threads to match the fabrics,
- quilter's ruler and rotary cutter (or graphic pencil and sharp scissors).
|
| Emboridery |
Stabilize the light-colored piece of fabric with medium-weight cut-away stabilizer for embroidery. Upload the design into the machine and embroider it.
Trim the stitch-out leaving 1/4" seam allowance around it.
|
|
Cutting:
|
Out of sand colored fabric, cut
- 2 strips measuring 1" x 5 1/2",
- 2 strips measuring 7 1/2",
- 16 strips measuring 1 1/2" x 2 1/2".
Out of turquoise fabric, cut
- For the front panel:
- 2 strips measuring 1" x 6 1/2" ,
- 2 strips measuring 1" x 8 1/2",
- 8 strips 1 1/2" x 2 1/2",
- 4 strips measuring 2 1/2" x 3 1/2",
- 2 squares measuring 2 1/2" x 2 1/2",
- For the back panel:
- 3 strips measuring 2 1/2" x 15".
Out of red fabric, cut
- 8 strips measuring 1 1/2" x 2 1/2" for the front panel, and
- 2 strips measuring 2 1/2" x 15" for the back panel.
Out of royal blue fabric, cut
- For the front panel:
- 2 strips measuring 1 1/2" x 7 1/2" and
- 2 strips measuring 1 1/2" x 10 1/2",
- For the back panel:
- 2 strips measuring 2 1/2" x 15",
- For the handles:
- 2 strips measuring 4" x 30",
- For the sides and bottom
- a strip measuring 7"x 40"-42",
- For the side binding
- 2 strips measuring 2 1/2" and the length of the width of the fabric,
- For the upper edge binding
- a strip measuring 3" x 45" .
Out of fabric for the lining, cut
- 2 rectangles measuring about 15" x 16" for the front and back panels,
- a strip measuring 7" x 40"-42" for the side and bottom panel, and
- a strip measuring 7" x 16" for the pocket.
Out of sewing interfacing cut
- 2 strips measuring 4" x 30" for the handles and
- one strip measuring 3" x 45" for the upper edge binding.
|
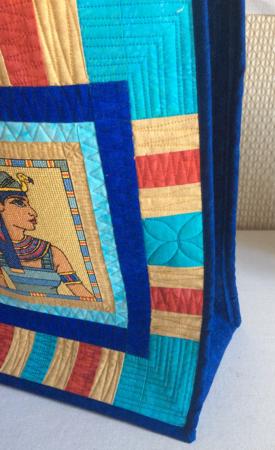
Assembly of the Front and Back Panels
|
For the back panel sew the 2 1/2" x 15" strips in the following order: turquoise - red - blue - turquoise - red - blue - turquoise.
Press the seams. |

|
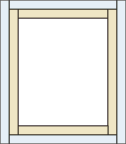
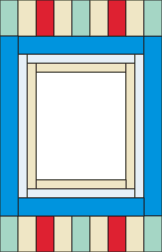
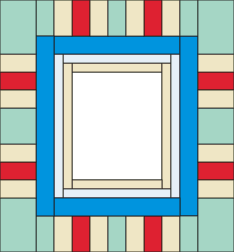
For the front panel, sew the sand-colored 1" x 5 1/2" strips to the upper and lower edges of the stitch-out. Press the seams.
Sew the sand-colored 1" x 7 1/2" strips to the left and right edges of the stitch-out. Press the seams. |

|
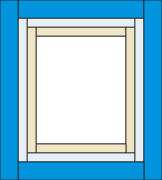
Sew the turquoise 1" x 6 1/2" strips to the upper and lower edges of the working piece. Press the seams.
Sew the turquoise 1" x 8 1/2" strips to the left and right edges of the working piece. Press the seams. |
|
Sew the blue 1 1/2" x 7 1/2" strips to the upper and lower edges of the working piece. Press the seams.
Sew the blue 1 1/2" x 8 1/2" strips to the left and right edges of the working piece. Press the seams. |
|
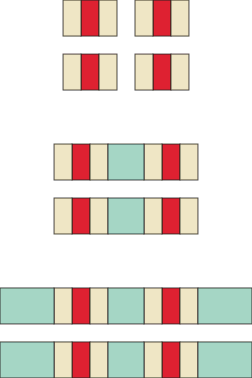
| Sew the sand, red and turquoise 1 1/2" x 2 1/2" strips into a new strip in the following order: turquoise - sand - red - sand - turquoise - sand - red- sand - turquoise. Make two such strips. |

|
| Sew the new strips to the upper and lower edges of the working piece. |
|
Using the remaining 2 1/2" x 1 1/2" strips, sew 4 strips with the following order: sand - red - sand.
Sew the strips to each side of the 2 1/2" x 2 1/2" turquoise squares.
Sew the turquoise 2 1/2" x 3 1/2" rectanges to the ends of each strip.
|
|
| Sew the strips to the left and right edges of the working piece. |
|
Pocket
|
Fold the 7" x 16" strip widthwise, face inside. Align the edges. Sew 2 sides closed.
Turn the right side out. Press the seams. Fold the raw edges of the opening 1/2" inside. Press. Topstitch the opening closed.
|
|
Handles
|
Press the sewing interfacing to the back of the handle strips (4" x 30").
Fold the strips lengthwise in half, wrong side inwards, and press.
Fold each of the raw edges to the center (creased line), press again.
Topstitch each handle 1/16" from the edges, and 1/4" from each side topstitch line.
|
|
| Quilting: |
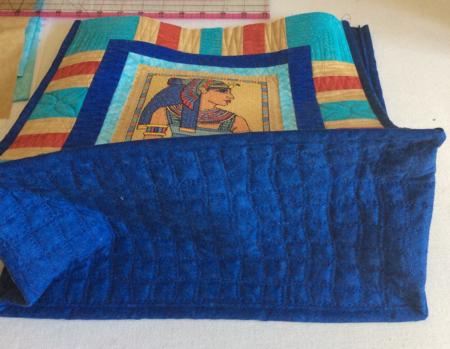
Now place the backing/ lining of the back and front panels on a flat surface (table) face down. Cover with batting. Spread your panels over it. Pin all three layers together with 1" pins.
Do the same with the side-bottom panel - place the 7" x 40-42" lining strip face down, cover with batting, cover with the 7" x 40"-42" blue strip for the outer bag.
Pin all three layers together with 1" pins.
The parts are ready for quilting. We quilted in a free motion style all 3 parts. |
|
| After quilting is finished, press with steam. Trim the front and back panels. They will be about 13" x 14". It's OK if they are a little bit larger or smaller. The most important thing is to make them of the same size! |
Trim the side-bottom panel to 6" wide.
Carefully measure the height and the width of the front panel. Trim the side-bottom panel so that it's length is equal to the length of the left, right and bottom edges of the front panel. E.g. if the panel is 14" high and 13" wide, the side-bottom panel should be 14+14+13 = 41" long.
On each long side, measure 14" (or the height of the front panel), place a mark, measure 13" (or the width of the front panel), place a mark. Check that the remaining length is 14" (or the height of the front panel).
Make four 1/4" notches at the marks. |
Assembly of the Tote Bag:
|
|
| First top-stitch the inner pocket to the lining of the back panel. |
Working first with the front and then with the back panel, attach the side-bottom panel, making the seam to the outside. Start by pinning the middle section of the side-bottom panel to the bottom of the front panel.
Topstitch starting 1/4" from one side and finishing 1/4" from the other side. Seam allowance is 1/4".
Pin, then stitch the sides. Start stitching from the bottom, 1/4" from the bottom edge, and stitch to the top of the bag. Seam allowance 1/4".
In the same way, attach the back panel. |
|
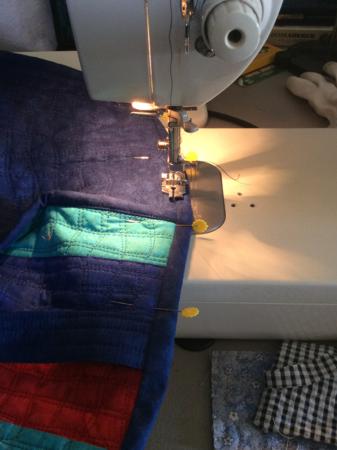
| Finish the raw edges with binding. |
|
|
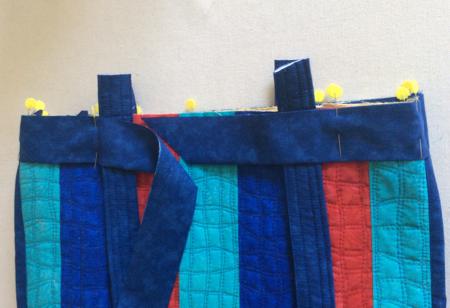
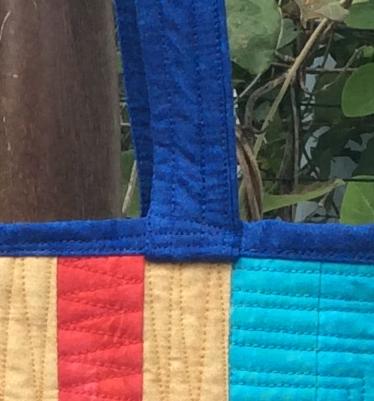
Attach the handles as shown: about 3" from the sides, about 1" protruding beyond the upper edge of the bag. Pin and check that you like the length of the handles, if you need shorter handles, cut away the extra length now.
Stitch the handles in place 1/8" and 1/4" from the the edge. |
|
Iron on the interfacing 3" x 45" strip on the back of the 3" x 45" binding strip.
Fold the strip lengthwise in half.
Pin the binding along the upper edge. Topstitch, seam allowance 1/4". |
|
Unfold the binding and the handles.
Fold the binding on the lining. Pin in place. Topstitch from the right side in the ditch between the bag and the binding. |
|
Topstitch the handles several times to the binding.
|
|
| Handstitch the edge of the binding to the lining (optional). |
| Your tote is ready. Enjoy! |
|
|
|
Happy Stitching!
|
|
Back to Queen Cleopatra
|
Back to the Project Page
|


