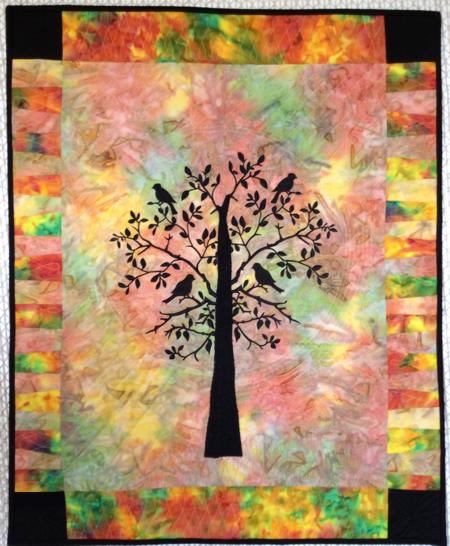
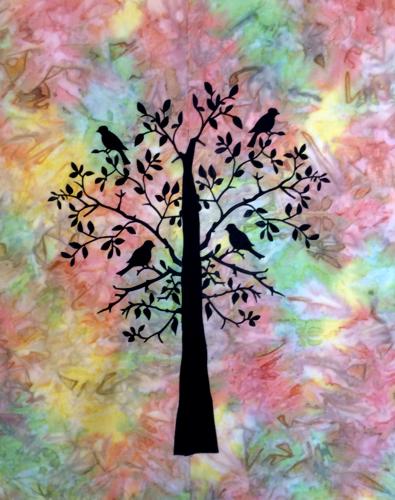
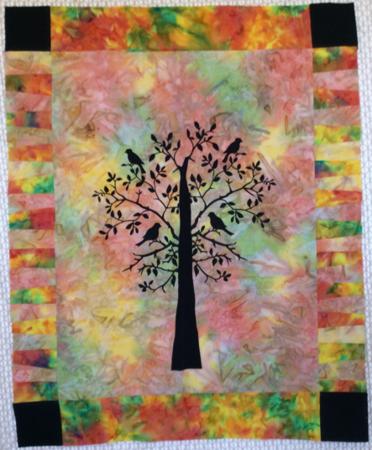
This gorgeous art quilt uses colorful batiks and a black contrast fabric to produce an effect similar to stained glass. It is instantly eye-catching, and makes a great accent to your home.
We used the design Birds in a Tree for the commercial size hoop. The size of the embroidery is not crucial to this project, so you can just as easily use the large hoop (5" x 7" / 130 x 180 mm) or mega hoop (6" x 10") version of the design.
|
The finished size of the quilt is about 25" x 30". If you use smaller stitch-outs, you will probably want to make your quilt smaller than that.
|
|
Besides embroidery thread (either polyester or rayon), you will need
- light-weight tear-away stabilizer,
- about 3/4 yard of cotton batik fabric for the background,
- 1 fat quarter of matching batik for the borders,
- about 1/4 yard of black cotton fabric,
- batting,
- fabric for the backing,
- quilting threads,
- tracing paper and graphic pencil,
- Lite Steam-A-Seam 2 fusible web or similar product,
- quilter's ruler and rotary cutter (if you don't use rotary cutter, you'll need a graphic pencil and sharp scissors).
|
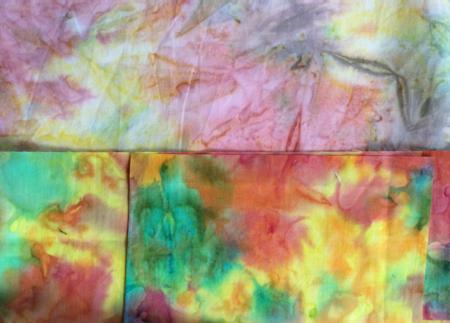
| For the background we recommend to use batik. You can choose any coloring, depending on what mood you'd like to create in your quilt. Consider early morning or dusk, a burning sunset, a bright summer day in a green wood, etc. |

|
| We choose 2 watercolor batiks for a late summer mood. The paler batik is for the background, the brighter is for the borders. |
| Emboridery |
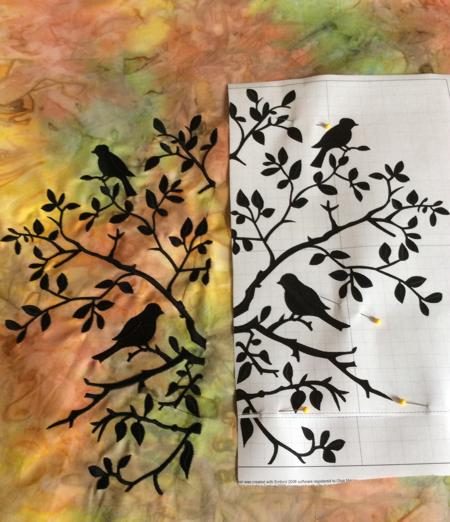
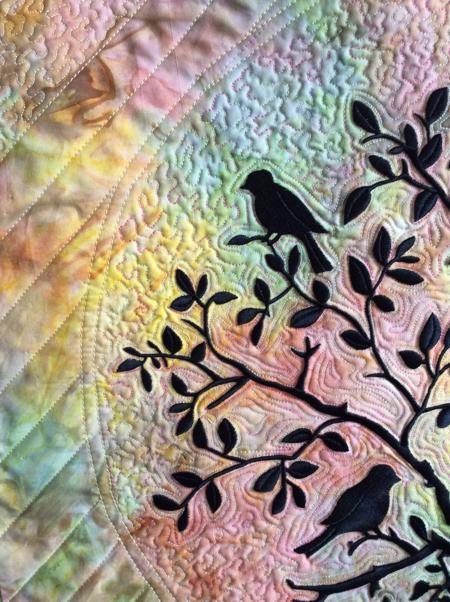
There are 2 files for the Birds in a Tree design. Choose the file without the frame. Embroider it on the background fabric. Use light-weight tear-away stabilizer for embroidery.
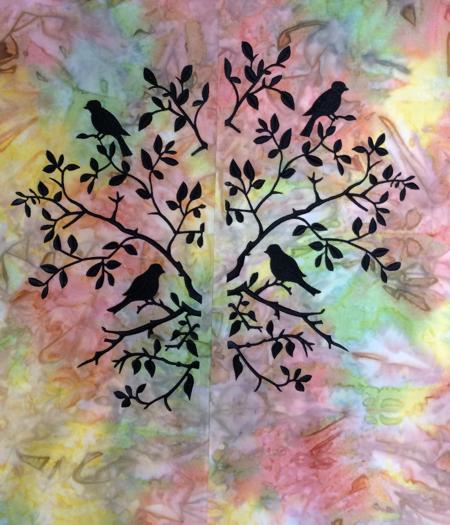
After the embroidery is finished, flip the design in your machine. Mark the position of the mirror image on the fabric. The second stitch-out should not be directly next to the first stitch-out, make it a little bit higher and slightly angled towards the first stitch-out.
|
|
Tear away the excess stabilizer around the embroidery.
If you're having a hard time putting both stitch-outs on one piece of fabric, make them on different pieces, then sew the pieces together to create the angle you want. . |
|
Making an Applique Trunk:
|
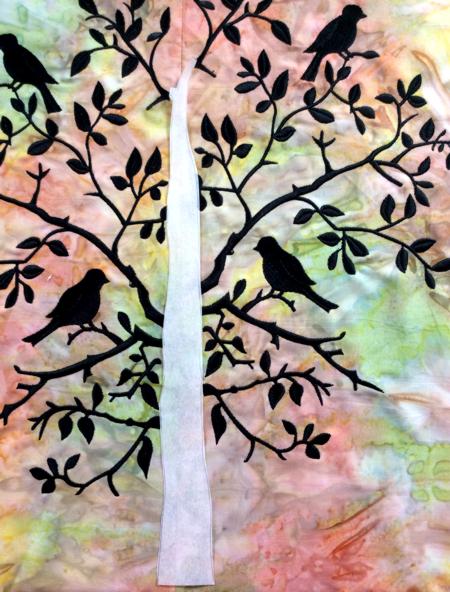
Position a piece of tracing paper over the stitch-out. With a graphic pencil trace the distance between the stitch-outs. This is the outline of the tree-trunk. Draw the lower part of the trunk.
|

|
| Cut out the template. |
|
| Using the template, cut the trunk out of black fabric. Using adhesive web or Lite Steam-A-Seam 2 and following the manufacture's directions, adhere the trunk between the branches. |

Pellon EZ Steam II Lite |
|
| Trim the working piece to the size you like. We trimmed to 19 1/2" x 24 1/2". |
| Cutting the Borders: |
| Out of the bright batik cut 2 strips measuring the shorter side of the quilt. In our case it's 19 1/2", and we made the borders 3" wide. So we cut 2 strips measuring 3 1/2" x 19 1/2". |
| Out of black fabric, cut 4 corner squares measuring 3 1/2" x 3 1/2". |
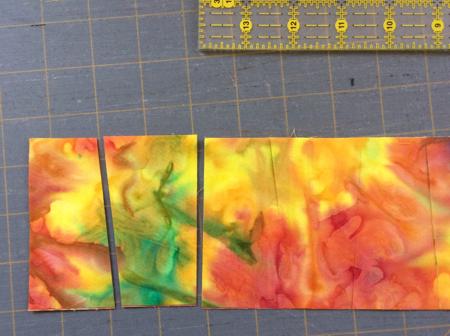
| Out of the same batik, which was used for the background and out of the batik for the borders, cut similar strips 3 1/2" wide and as long as the fabric allows. |
|
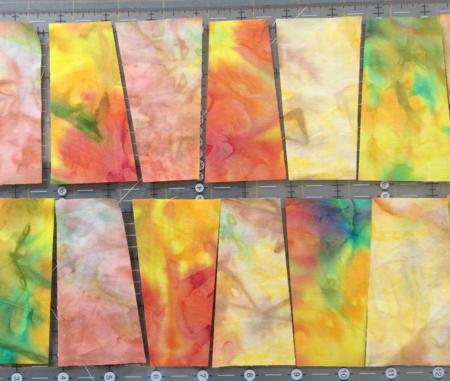
| Place the strips, face up, one over the other. Align the edges. Using a quilter's ruler and a rotary cutter, cut them into slanted strips, not less then 1 1/2" wide. Narrow pieces would just be too tough to work with. |
|
| Alternating the bright and pale pieces, make up 2 new strips. |
|
| Sew the pieces together. You will need borders as long as the long sides of your quilt. In our case that's 24 1/2". Press the seams. |
| Sew the borders to the left and right edges of the quilt. |
| Sew the black squares to the ends of the 3 1/2" x 19 1/2" strips. |
| Sew the borders to the upper and lower edges of the quilt. |
|
| Quilting and Finishing: |
Now place the backing on a flat surface (table) face down. Cover with batting. Spread your working piece over it.
Pin all three layers together with 1" pins and start quilting.
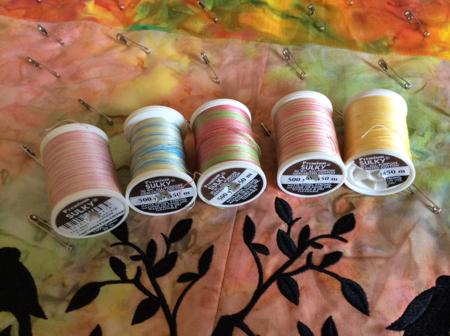
A great thread to work with batik is Sulky Blendables, a thread for sewing and quilting.
|
|
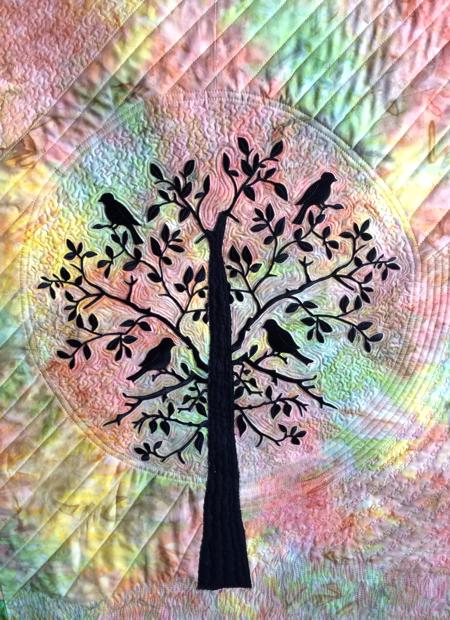
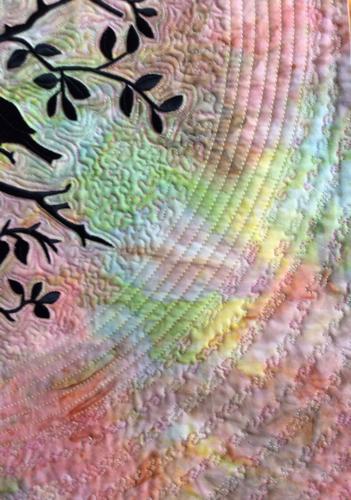
| We quilted in a free-motion style all over the quilt. |
|
|
After the quilting is finished, press the work with heavy steam and square the work -- all corners should be 90 degrees and opposite sides should be of the same length.
|
|
| Finish the raw edges with the binding. |

|
Your wall quilt is ready. Enjoy!
|
|
Enjoy!
|
|
Happy Stitching!
|
|
Back to Birds in a Tree
|
Back to the Project Page
|


