Mobile Menu IconMenu
Advanced Embroidery Designs -- Online Center for Machine Embroidery Designs
Easter Sale! 35% OFF EVERYTHING! Shop Now!

Cats and Leaves Quilted Table Topper

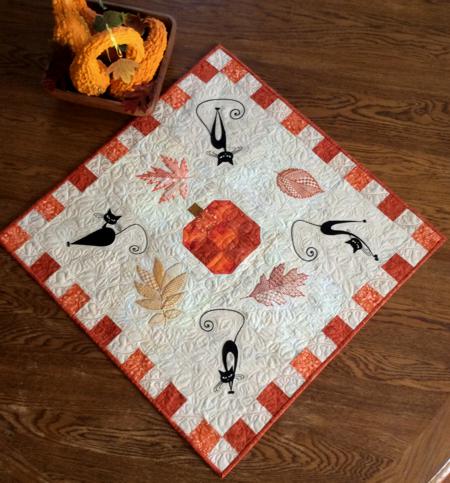
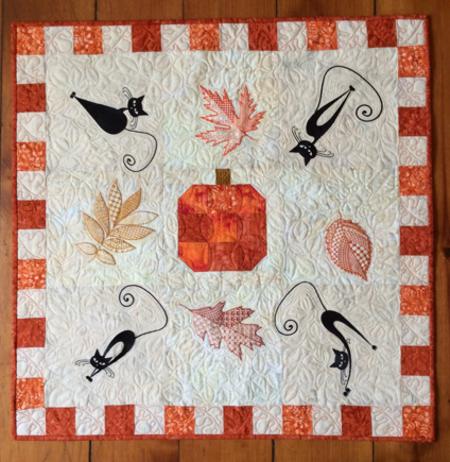
This eye-catching seasonal quilt is extremely easy and quick to make. We used embroidery designs from the Patchwork Leaf Set, and Whimsical Cat Silhouette Set I and Set III for the large (5" x 7") hoop.

The finished size of the table topper is about 28" x 28".

Cats and Leaves Quilted Table Topper image 1

You will need:

  • embroidery thread (either polyester or rayon)
  • light-weight and medium-weight cut-away stabilizer,
  • about 1 yard of light/neutral cotton fabrics (we used 3 batiks),
  • a scrap of brown fabric,
  • about 1/4 yard of orange cotton fabric (we used an orange batik),
  • batting,
  • quilting threads to match the fabrics,
  • quilter's ruler and rotary cutter (or graphic pencil and sharp scissors).

Cutting:

Note: seam allowance is 1/4" is included.

Out of light fabrics cut:

  • 8 squares measuring 8 1/2" x 8 1/2",
  • 2 strips measuring 1 1/2" x 6 1/2",
  • one strip measuring 1 1/2" x 8 1/2",
  • 2 strips measuring 1 1/2" x 3 3/4",
  • 4 squares measuring 1 1/2" x 1 1/2" and
  • 26 squares measuring 2 1/2" x 2 1/2".
Out of orange fabric, cut
  • 35 squares measuring 2 1/2" x 2 1/2" and
  • 3-4 strips 2 1/2" wide and the length of the width of the fabric for the binding.
Out of brown fabric, cut a square measuring 1 1/2" x 1 1/2".

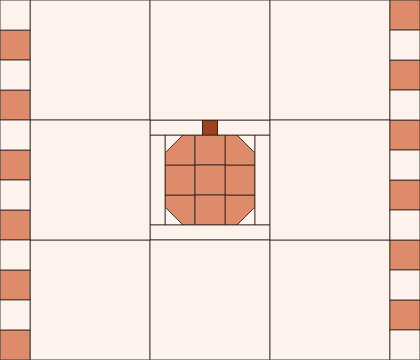
Assembly of the Central Block.

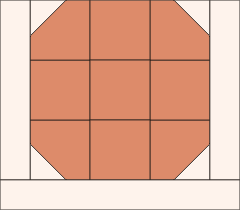
For the central block, the pumpkin, take 9 orange squares, 4 light 1 1/2" x 1 1/2" squares, all light strips and the brown square.

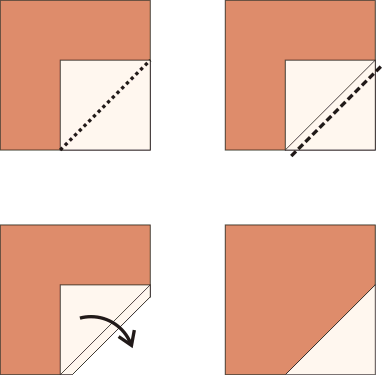
On the corner of an orange square, place a light square, face to face. Align the edges.

Draw a diagonal from corner to corner on the light square. Topstitch along the diagonal.
Cut away the corner with seam allowance 1/4".
Open the corner and press.
Repeat to make a total of 4 such "corner" squares.

Cats and Leaves Quilt

Sew two "corner" squares to an orange square to make a strip as shown. Make 2 such strips.

Cats and Leaves Quilt

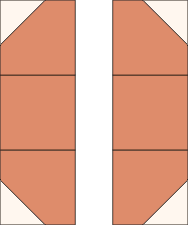
Sew 3 orange squares in a strip.

Cats and Leaves Quilt

Sew all the strips together.

Cats and Leaves Quilt

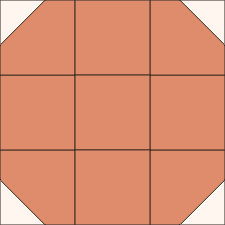
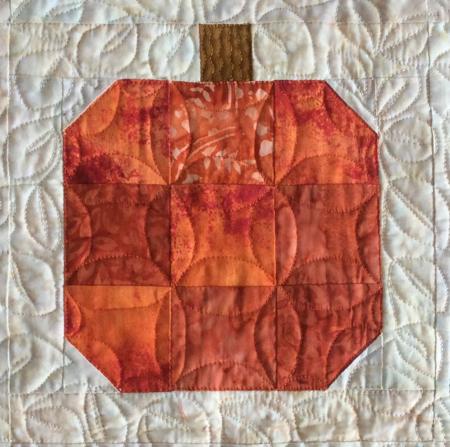
Sew the 1 1/2" x 6 1/2" neutral-colored strips to the left and right edges of the pumpkin.

Cats and Leaves Quilted Table Topper image 2

Sew the 1 1/2" x 8 1/2" to the lower edge of the pumpkin.

Cats and Leaves Quilted Table Topper image 3

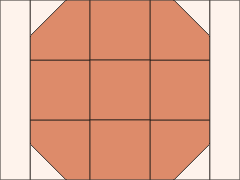
Sew the brown square between 1 1/2" x 3 3/4" strips.

Cats and Leaves Quilted Table Topper image 4

Sew the strip to the upper edge of the pumpkin.

Cats and Leaves Quilted Table Topper image 5

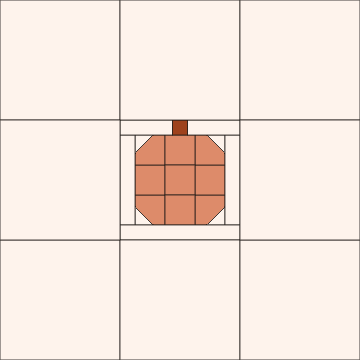
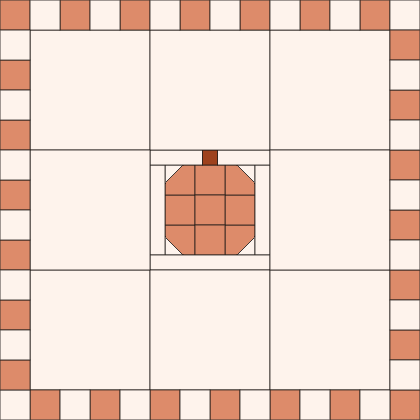
Assembly of the Top:

Sew the 8 1/2" x 8" in 2 strips, 3 squares in a strip.

Cats and Leaves Quilted Table Topper image 6

Sew the remaining 2 squares to the left and right edges of the pumpkin block.

Cats and Leaves Quilted Table Topper image 7

Sew the strips together.

Cats and Leaves Quilted Table Topper image 8

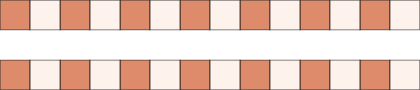
Alterating neutral and orange 2 1/2" x 2 1/2" squares sew them in 2 strips, 12 squares in each strip.

Cats and Leaves Quilted Table Topper image 9

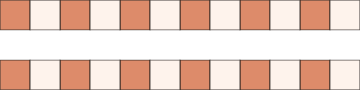
Sew the strips to the left and right edges of the working piece.

Cats and Leaves Quilted Table Topper image 10

Alterating neutral and orange 2 1/2" x 2 1/2" squares sew them in 2 strips, 14 squares in each strip.

Cats and Leaves Quilted Table Topper image 11

Sew the new strips to the upper and lower edges of the working piece.

Cats and Leaves Quilted Table Topper image 12

Emboridery

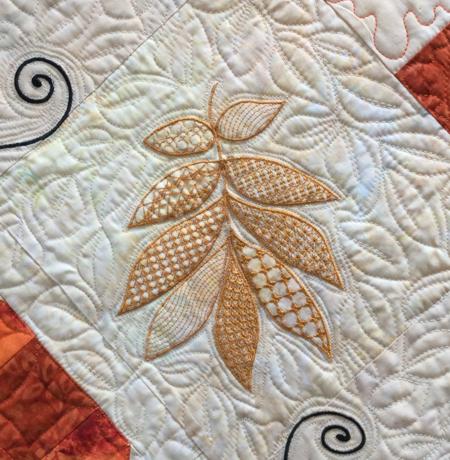
We embroidered the Patchwork Leaves in the squares around the pumpkin. Choose autumn-colored threads for the leaves.
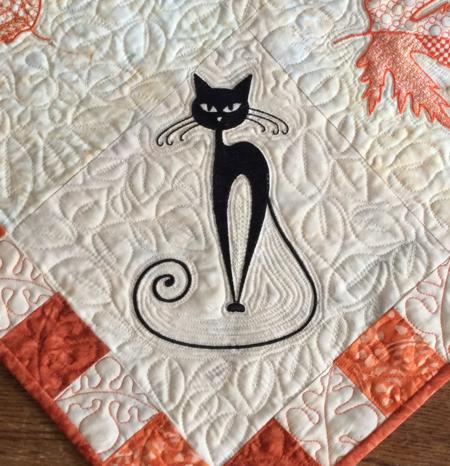
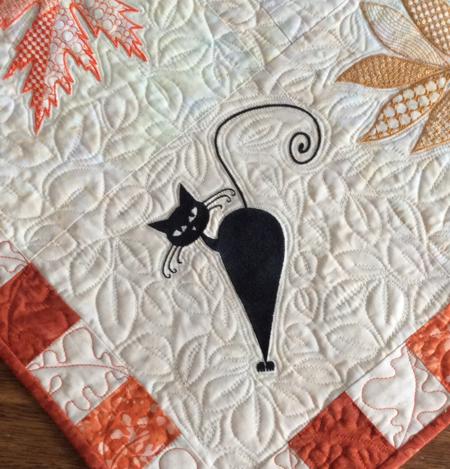
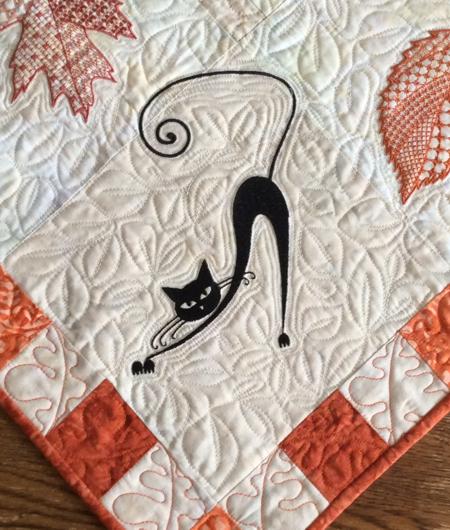
The cats are embroidered on diagonal in the corner squares, heads inside. Please be careful not to ....
Use light-weight cut-away stabilizer for leaves and medium-weight cut-away stabilizer for cats.

Cats and Leaves Quilted Table Topper image 13

Cats and Leaves Quilted Table Topper image 14

Quilting and Finishing:

Now place the backing on a flat surface (table) face down. Cover with batting. Spread your working piece over it.

Pin all three layers together with 1" pins and start quilting. We quilted with parallel lines along the light margin around the embroidery, the first and the second borders. The third border is quilted with a meandering pattern.

After the quilting is finished, press the work with heavy steam and square the work -- all corners should be 90 degrees and opposite sides should be of the same length.

Finish the raw edges with the binding.

Cats and Leaves Quilted Table Topper image 15

The table topper is done!
Here are some more close-ups.

Cats and Leaves Quilted Table Topper image 16

Cats and Leaves Quilted Table Topper image 17

Cats and Leaves Quilted Table Topper image 18


Enjoy!

Happy Stitching!

Back to Patchwork Leaf Set, Whimsical Cat Silhouette Set I or Set III

Back to the Project Page

Mailing List
Enter your e-mail for news, discounts and exclusive special offers.


Find us on Twitter

Special Offers
Bonus design on all orders over $25
Daffodils and Eggs Set

Shop Now!

Announcement
Best Project Contest
The results are in!
Featured Project
Check out our latest project Birds and Blooms Quilted Tablerunner
Tutorials
Never heard of photo stitch? - Check out our What is Photo Stitch? page
Most Popular Designs
|| Home || Shop || Free Designs || New Designs ||
|| Projects || Tutorials || Links || About Us || Contact Us ||
|| Store Policy || Licensing || Accessibility ||

Social Media:

Copyright © Advanced Embroidery Designs. All Rights Reserved.