Mobile Menu IconMenu
Advanced Embroidery Designs -- Online Center for Machine Embroidery Designs
Easter Sale! 50% OFF EVERYTHING! 3 Days Only! Shop Now!

Quilted Blender Cover with Embroidery

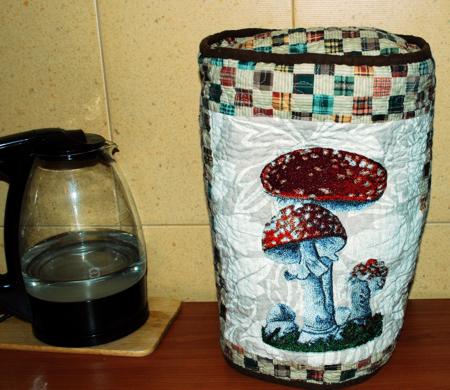
This is a project for a quilted blender cover for your kitchen. Blenders come in different sizes, so our dimensions may not work for you, which is why we offer tips for adjusting the size to fit your blender.

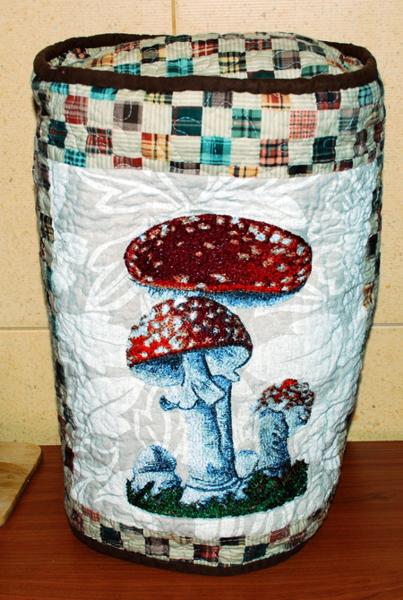
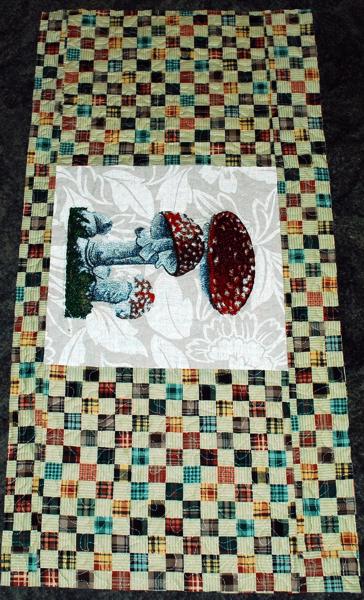
The embroidery design we used to embellish the cover is Toadstool.

Quilted Blender Cover with Embroidery image 1

You will need

  • embroidery thread (either polyester or rayon)
  • medium-weight cut-away stabilizer,
  • a piece of light-colored cotton fabric for embroidery,
  • fabric for the outer cover and backing/lining,
  • batting,
  • bias tape for binding,
  • quilting threads to match the fabrics,
  • quilter's ruler, removable fabric marker or graphic pencil, pins, and sharp scissors.

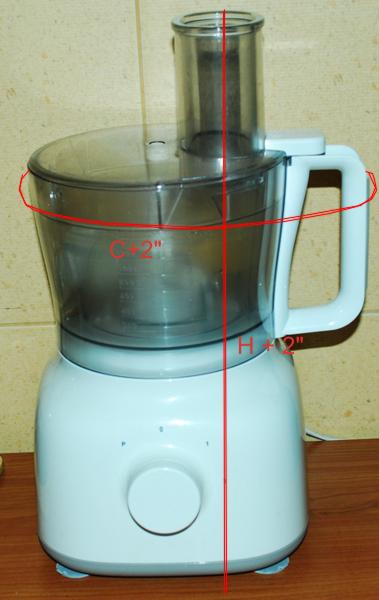
Measure the height of the blender the circumference of the blender at the widest point. For example, the height of our blender is 18" and the circumference at the widest point is 34".

Quilted Blender Cover with Embroidery image 2

Cutting:

Out of light-colored fabric, cut a piece for the embroidery:

  • 6 1/2" x 8 1/2" for the large hoop embroidery,
  • 7 1/2" x 9 1/2" for the mega hoop embroidery,
  • 8 1/2" x 10 1/2" for the commercial hoop embroidery.
Out of the fabric for the outer cover, cut 2 strips measuring 6 1/2" (7 1/2" or 8 1/2" depending on hoop size) x half the blender height - 3" (3 1/2" or 4", depending on hoop size):.
In our example, half the blender height is 18" / 2 = 9";
9" - 3" = 6" for a large hoop embroidery.
9" - 3 1/2" = 5 1/2" for a mega hoop embroidery.
9" - 4" = 5" for a commercial hoop embroidery.

Out of the fabric for the outer cover cut 2 pieces measuring the height of the blender + 2" times half the circumference of the blender minus 2", 2 1/2" or 3" depending on hoop size:
In our example, half the circumference is 34" / 2 = 17";
17" - 2" = 15" for a large hoop embroidery.
17" - 2 1/2" = 14 1/2" for a mega hoop embroidery.
17" - 3" = 14" for the commercial hoop embroidery.

Out of the fabric for the backing/lining, cut a rectangle measuring the height of the blender plus 4" by the circumference plus 4". In our example it will be 18" + 4" = 22" and 34" + 4" = 38", so 22" x 38".

Out of the fabric for the outer cover, cut a square measuring half the circumference plus 1". In our example it will be 34" / 2 = 17", 17" + 1" = 18". Our square will be 18" x 18". Cut the same square out of fabric for the backing/lining.

Assembly of the Top:

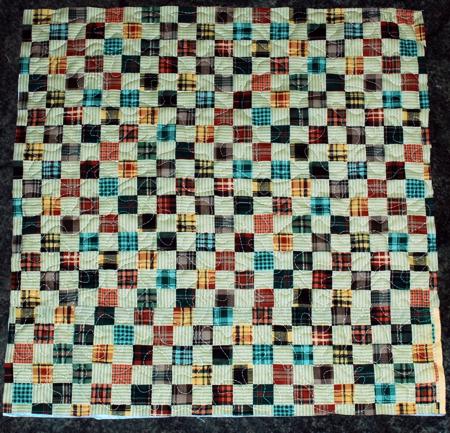
Sew the 6 1/2" (7 1/2" or 8 1/2") strips to the upper and lower edges of the rectangle for embroidery.

Quilted Blender Cover with Embroidery

Sew the remaining rectangles to the left and right edges of the central pieces.

Quilted Blender Cover with Embroidery

Embroidery

Stabilize the light-colored blocks with medium-weight cut-away stabilizer for embroidery. Upload the design into the machine and embroider it.

Quilted Blender Cover with Embroidery image 3

Quilting:

Now place the backing on a flat surface (table) face down. Cover with batting. Spread your working piece over it.

Pin all three layers together with 1" pins and start quilting. We quilted with a meandering pattern all over the piece.

Make the same "sandwich" with the square pieces: backing fabric square - batting outer fabric square.

After the quilting is finished, press the work with heavy steam and square the work -- all corners should be 90 degrees and opposite sides should be of the same length.

Finish the raw edges of the piece with zig-zag stitch.

Quilted Blender Cover with Embroidery image 4

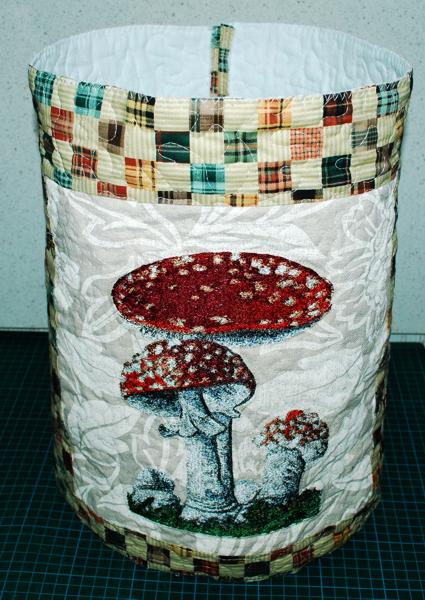
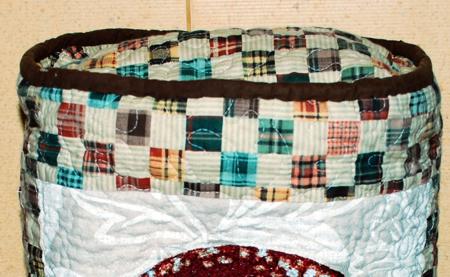
Assembly of the Cover:

Fold the work, face inwards and align the edges. Pin, then sew the side edges together, with seam allowance about 1/2".

Quilted Blender Cover with Embroidery image 5

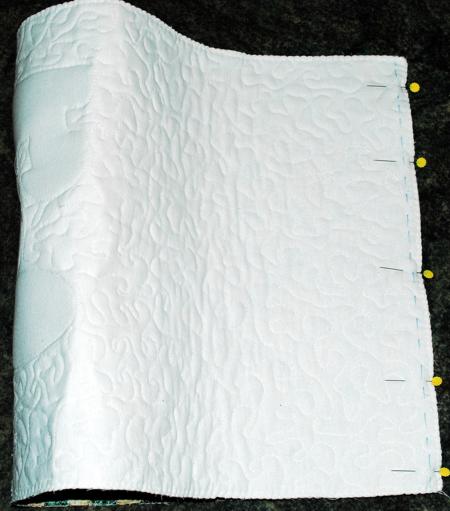
Open the seam allowances and press. Topstitch 1/4" from the seam on each side. Turn the work right side out to form a cylinder.

Quilted Blender Cover with Embroidery image 6

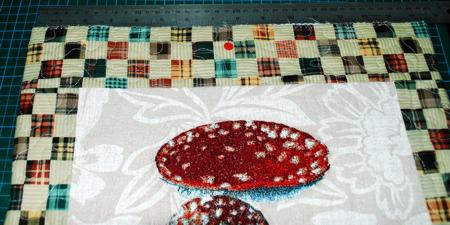
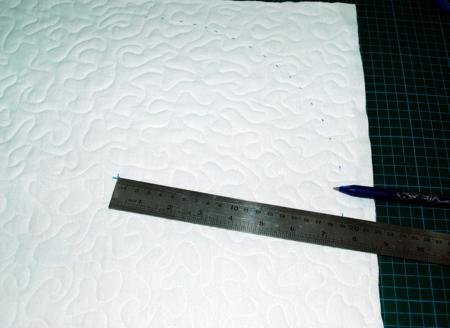
Place the working piece flat and measure the upper edge. Find the center. Measure from the center (marked with red pin) to the side. Add 1" and write down the number. This will be the radius for the top of the cover. In our case it is 7 1/2".

Quilted Blender Cover with Embroidery image 7

Take the quilted square for the upper part of the cover.

Quilted Blender Cover with Embroidery image 8

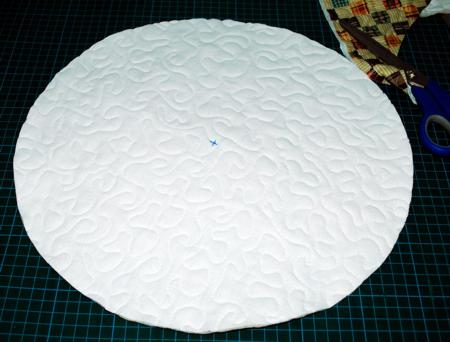
Find the center of the square. Using a ruler, measure 7 1/2" from the center in all directions and make marks. You will get a dotted circle.

Quilted Blender Cover with Embroidery image 9

With a pair of sharp scissors, cut out the circle along the marks.

Quilted Blender Cover with Embroidery image 10

Pin the circle to the upper edges of the cylinder, aligning the edges..
Sew both sides together with seam allowance 1/4".

Quilted Blender Cover with Embroidery image 11

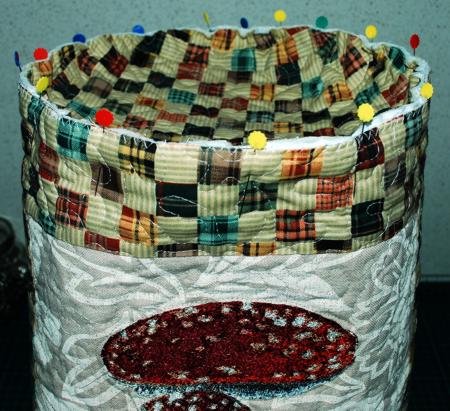
Finish the raw edges with the binding.

Quilted Blender Cover with Embroidery image 12

Your cover is ready. Enjoy!

Quilted Blender Cover with Embroidery image 13


Happy Stitching!

Back to Toadstool

Back to the Project Page

Mailing List
Enter your e-mail for news, discounts and exclusive special offers.


Find us on Twitter

Special Offers
Bonus design on all orders over $50
Daffodils and Eggs Set

Shop Now!

Announcement
Best Project Contest
The results are in!
Featured Project
Check out our latest project Birds and Blooms Quilted Tablerunner
Tutorials
Never heard of photo stitch? - Check out our What is Photo Stitch? page
Most Popular Designs
|| Home || Shop || Free Designs || New Designs ||
|| Projects || Tutorials || Links || About Us || Contact Us ||
|| Store Policy || Licensing || Accessibility ||

Social Media:

Copyright © Advanced Embroidery Designs. All Rights Reserved.