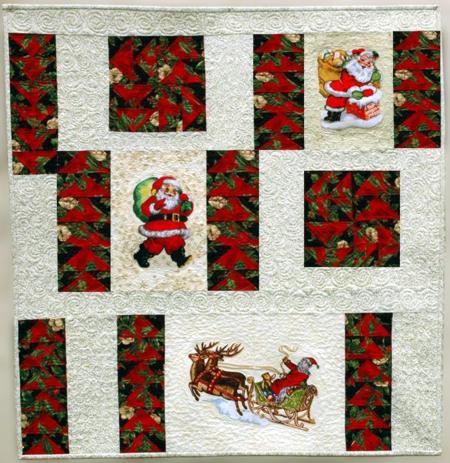
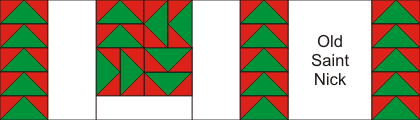
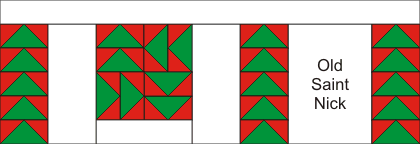
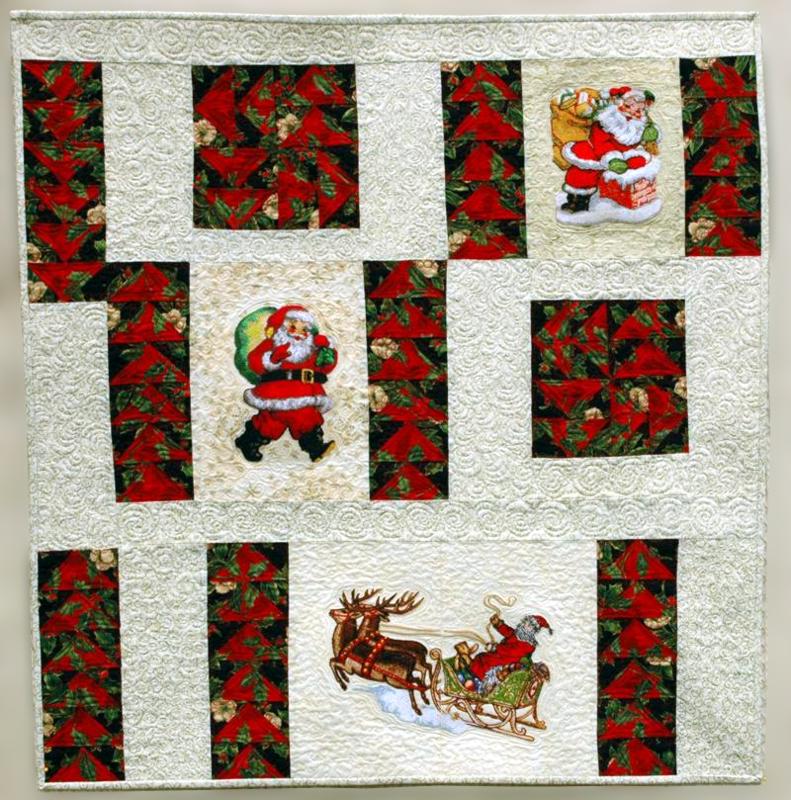
| For this wall quilt, we used the embroidery designs Santa Claus with Gifts, Old Saint Nick, Santa's Sleigh Set for the mega hoop. The finished size of the quilt is about 35" x 36". |
Click to enlarge
|
Besides embroidery thread (either polyester or rayon), you will need
- medium-weight cut-away stabilizer (instead of stabilizer you can use polyester craft felt),
- light-colored cotton fabric with a snowflake pattern in gold or silver (we used a couple of differently patterned fabrics),
- 2 contrasting fabrics with a Christmas pattern for the flying geese blocks;
- batting,
- fabric for the backing (1 yard) and binding (about 1/2 yard),
- quilting threads to match the fabrics,
- quilter's ruler and rotary cutter (or graphic pencil and sharp scissors).
|
| Emboridery |
Stabilize the light-colored fabric with medium-weight cut-away stabilizer for embroidery. Upload the designs into the machine and embroider them one by one.
|
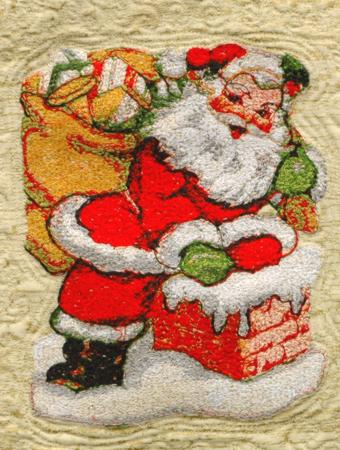
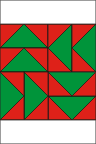
| Trim the stitch-out of Old Saint Nick to 7 1/2 " x 10 1/2". |
|
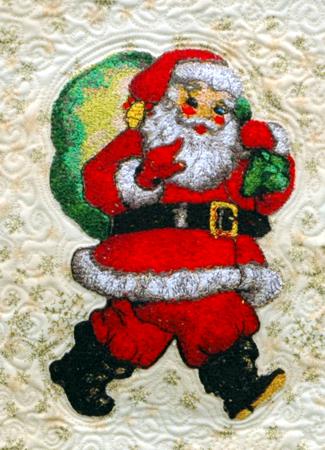
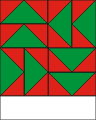
Trim the stitch-out of Santa Claus with Gifts to 8 1/2" x 12 1/2".
|
|
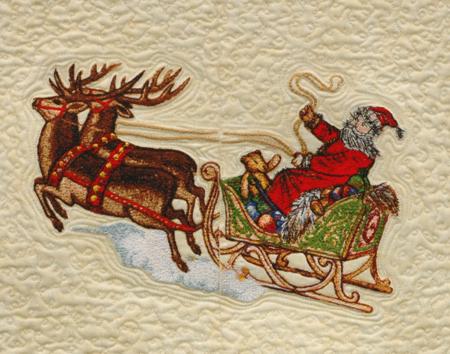
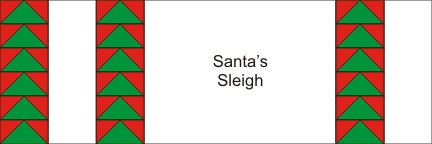
| The design Santa's Sleigh consists of 2 parts. Sew them together as explained in the instructions and trim to 12" x 16". |
|
| Cutting: |
Out of the first patterned fabric cut 52 rectangles measuring 2 1/2" x 4 1/2" (cut strips 2 1/2" wide and the length of the width of the fabric and subcut them into rectangles.)
Oot of the second patterned fabric, cut 104 squares measuring 2 1/2" x 2 1/2" (cut strips 2 1/2" wide and the length of the width of the fabric and subcut them into squares).
Out of the light-colored fabrics with the silver/golden snowflakes cut:
- 2 strips measuring 2 1/2" x 35 1/2",
- 3 strips measuring 2 1/2" x 8 1/2",
- 4 strips measuring 4 1/2" x 10 1/2",
- 2 strips measuring 4 1/2" x 12 1/2" and
- 2 strips measuring 3 1/2" x 12 1/2".
|
Sewing the Flying Geese Blocks:
|
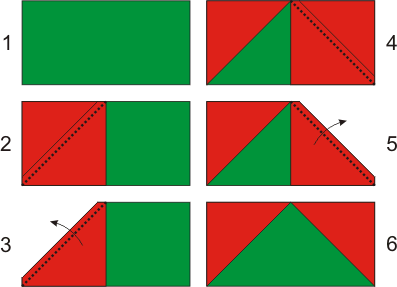
To make a flying geese unit, take a 2 1/2" x 4 1/2" rectangle and two 2 1/2" x 2 1/2" squares. Place one of the squares on one end of the rectangle, draw a diagonal and sew over it. Trim the excess fabric, leaving 1/4" seam allowance. Press the seam, unfold the red triangle and press again. Repeat with a red square on the other side of the rectangle.
Make 52 flying geese blocks. |
|
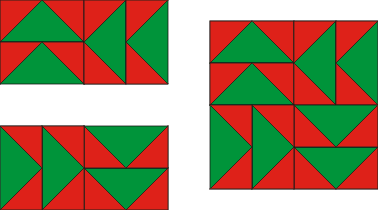
Sew 16 flying geese units in pairs.
|

|
| Sew the pairs into 2 blocks as shown: |
|
| Sew 15 more flying geese blocks into 3 strips, 5 blocks per strip. |
|
| Sew 30 flying geese blocks into 5 strips, 6 units per strip. |
|
| Sew the remaining flying geese unit to the short end of one of the 4 1/2" x 10 1/2" strips. |

|
| Assembly of the Top: |
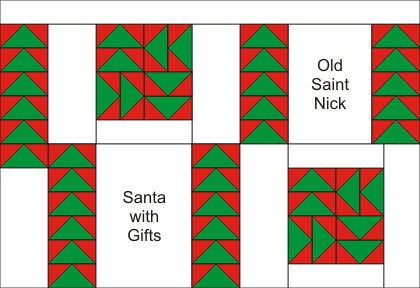
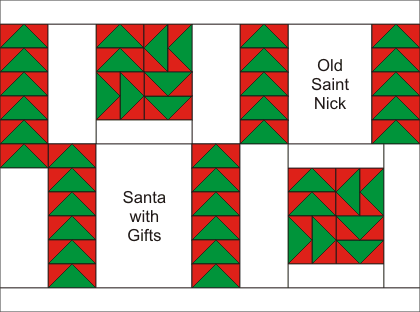
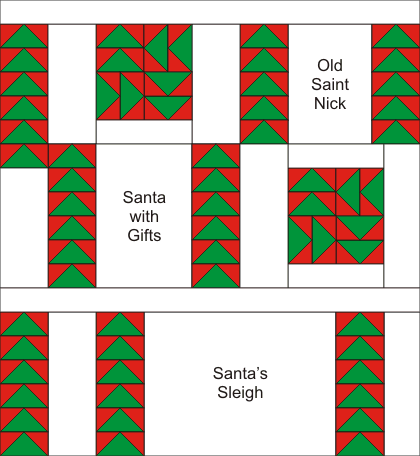
| The quilt consists of 3 rows, with a stitch-out in each row. |
| First Row: |
| Sew a 2 1/2" x 8 1/2" strip to one of the square blocks. |
|
| Assemble the row in the following order: 5-flying-geese strip - 4 1/2" x 10 1/2" strip - flying geese block - 4 1/2" x 10 1/2" strip -5-flying-geese strip - block with Old Saint Nick - 5-flying-geese strip. |
|
| Second Row: |
| Sew 2 1/2" x 8 1/2" strips to the upper and lower edges of the flying geese block. |
|
| Assemble the row in the following order: the strip with one flying geese - 6-flying-geese strip - block with Santa Claus with Gifts - 6-flying-geese strip - 4 1/2" x 12 1/2" strip - flying geese block - 3 1/2" x 12 1/2" strip. |

|
| Third Row: |
| Assemble the row in the following order: 6-flying-geese strip - 4 1/2" x 12 1/2" strip - 6-flying-geese strip - Santa's Sleigh block - 6-flying-geese strip - 4 1/2" x 12 1/2" strip. |
|
| Sew one of the 2 1/2" x 35 1/2" to the upper edge of the first row. |
|
| Sew the second row to the first row. |
|
| Sew the second 2 1/2" x 35 1/2" strip to the lower edge of the second row. |
|
| Sew the third row to the lower edge of the strip. |
|
| Quilting and Finishing: |
Now place the backing on a flat surface (table) face down. Cover with batting. Spread your working piece over it.
Pin all three layers together with 1" pins and start quilting. We quilted in a free-motion style all over the quilt |
After the quilting is finished, press the work with heavy steam and square the work -- all corners should be 90 degrees and opposite sides should be of the same length.
Finish the raw edges with the binding.
|
|
|
Your quilt is ready.
|
|
Enjoy!
|
|
Happy Stitching!
|
|
Back to Santa Calaus with Gifts, Old Saint Nick, Santa's Sleigh Set
|
Back to the Project Page
|


