Mobile Menu IconMenu
Advanced Embroidery Designs -- Online Center for Machine Embroidery Designs
July Flash Sale! 50% OFF EVERYTHING! 3 Days Only! Shop Now!

Thanksgiving Wall Quilt with Embroidery

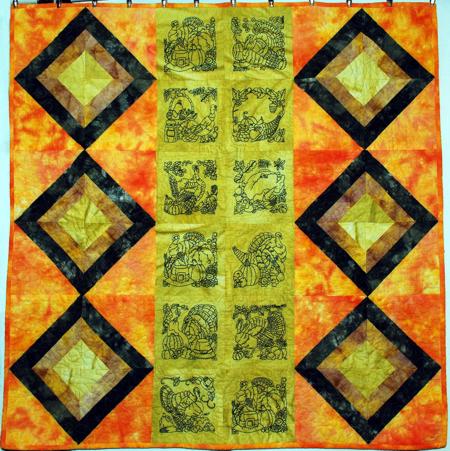
This colorful Thanksgiving quilt features the patterns from the Redwork Quilting Block Set II.

The finished size is about 39" x 39".

Thanksgiving Wall Quilt with Embroidery image 1

You will need:

  • embroidery thread (either polyester or rayon)
  • light-weight cut-away stabilizer,
  • 4 fabrics of autumn colors: about 1/2" yard each of light green, forest green, light brown fabric, about 1 yard of orange fabric;
  • batting and backing,
  • quilting thread to match the fabrics,
  • quilter's ruler and rotary cutter (or graphic pencil and sharp scissors);
  • graphic pencil or fabric disappearing marker and a ruler.

Emboridery

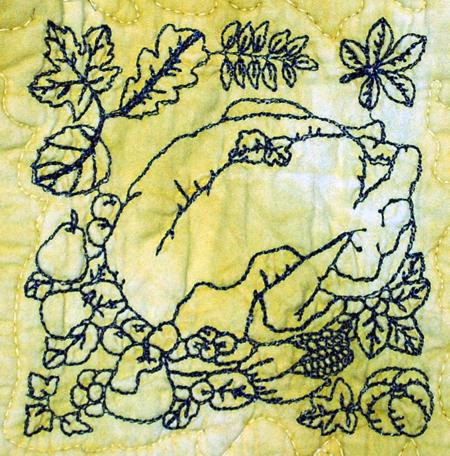
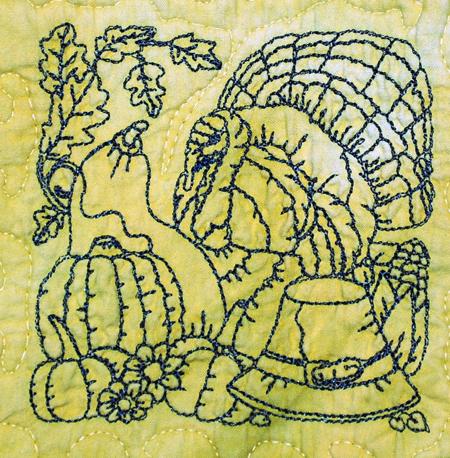
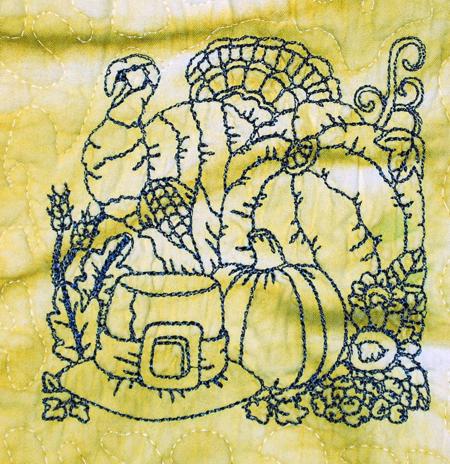
Stabilize the light green fabric with light-weight cut-away stabilizer for embroidery. Upload the designs into the machine and embroider them one by one with a dark thread - e.g black, dark brown, dark green.

Trim all stitch-outs to 7" x 7" squares.

Thanksgiving Wall Quilt with Embroidery image 2

Thanksgiving Wall Quilt with Embroidery image 3

Thanksgiving Wall Quilt with Embroidery image 4

Cutting:

Out of orange fabric, cut

  • 12 squares measuring 7 1/2" x 7 1/2",
  • 4 strips measuring 2 1/2" and the length of the width of the fabric for binding.
Out of dark forest green fabric cut 12 squares measuring 7 1/2" x 7 1/2".

Out of light brown fabric cut 24 squares measuring 5" x 5".

Out of light-green fabric cut 24 squares measuring 3" x 3".

Block:

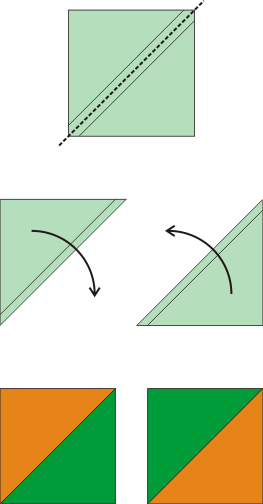
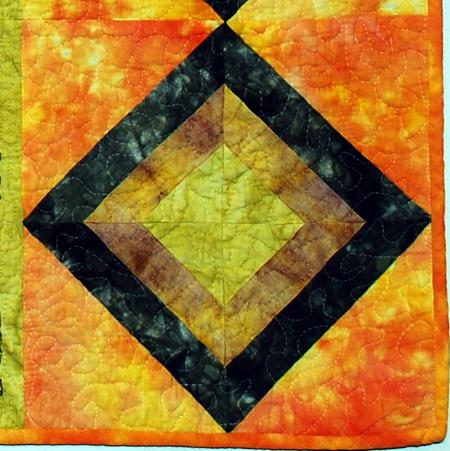
Place orange and green 7 1/2" x 7 1/2" squares in pairs face to face. Align the edges. With a marker draw a diagonal. Stitch 1/4" on each side of the diagonal.

Thanksgiving Wall Quilt

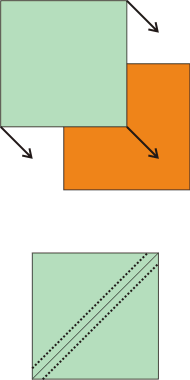
Cut along the diagonal. Open the new half-triangle squares. They should be 7" x 7". You'll have 24 of them.

Thanksgiving Wall Quilt

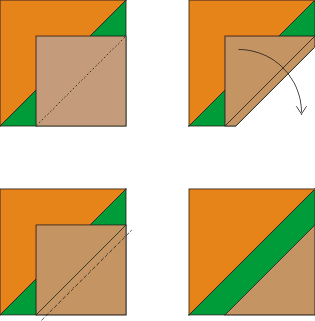
Position the light brown 5" x 5" squares in the corner of the green triangle. Align the sides. Draw a diagonal across the brown square. Stitch along the diagonal.
Cut away the corner with seam allowance 1/4".
Open and press.

Thanksgiving Wall Quilt

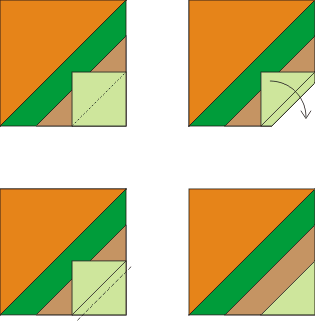
Position the light green 3" x 3" squares in the corner of the brown triangle. Align the sides. Draw a diagonal. Stitch along the diagonal.
Cut away the corner with seam allowance 1/4".
Open and press.

Thanksgiving Wall Quilt

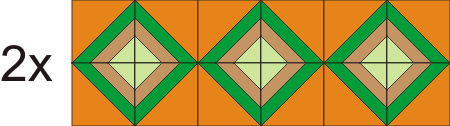
Sew the new squares in 6 blocks, 4 squares per block.

Thanksgiving Wall Quilt with Embroidery image 5

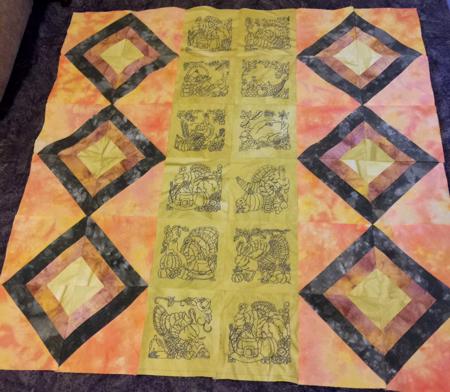
Assembly of the Top:

Sew all stitch-outs in pairs, then sew the pairs together to form a central panel.

Thanksgiving Wall Quilt

Sew the multi-colored blocks into 2 rows, 3 blocks per row.

Thanksgiving Wall Quilt

Sew the block rows to the left and right edges of the central part.

Thanksgiving Wall Quilt with Embroidery image 6

Quilting and Finishing:

Now place the backing on a flat surface (table) face down. Cover with batting. Spread your working piece over it.

Pin all three layers together with 1" pins and start quilting. We quilted with a meandering pattern all over the top.

After the quilting is finished, press the work with heavy steam and square the work -- all corners should be 90 degrees and opposite sides should be of the same length.

Finish the raw edges with the binding.

Thanksgiving Wall Quilt with Embroidery image 7


Your quilt is ready. Enjoy!

Enjoy!

Happy Stitching!

Back to Redwork Quilting Block Set II.

Back to the Project Page

Mailing List
Enter your e-mail for news, discounts and exclusive special offers.


Find us on Twitter

Special Offers
Bonus design on all orders over $50
Sunflower Set

Shop Now!

Announcement
Best Project Contest
The results are in!
Featured Project
Check out our latest project Birds and Blooms Quilted Tablerunner
Tutorials
Never heard of photo stitch? - Check out our What is Photo Stitch? page
Most Popular Designs
|| Home || Shop || Free Designs || New Designs ||
|| Projects || Tutorials || Links || About Us || Contact Us ||
|| Store Policy || Licensing || Accessibility ||

Social Media:

Copyright © Advanced Embroidery Designs. All Rights Reserved.