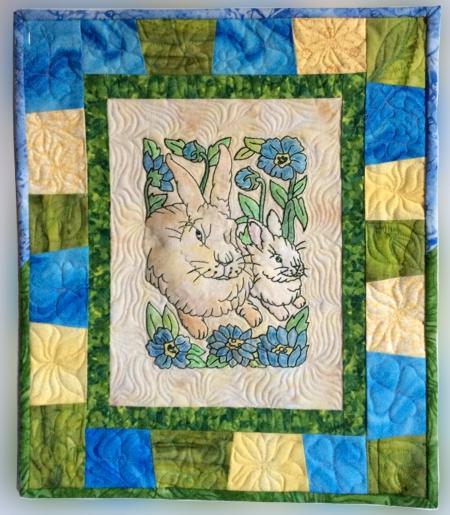
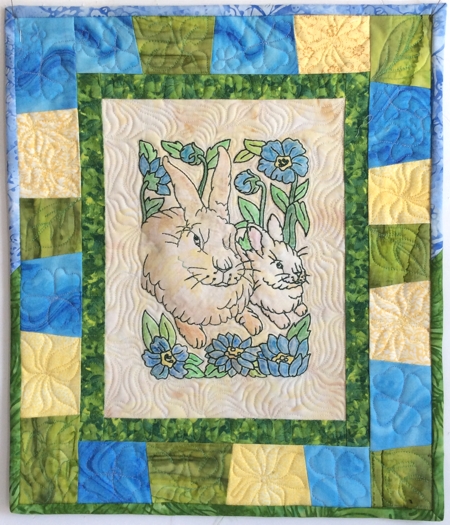
This charming Spring-themed project can easily be finished in one weekend. It's simple and fun to make. We used a design from the One Color Easter Rabbit Set for the mega hoop.
|
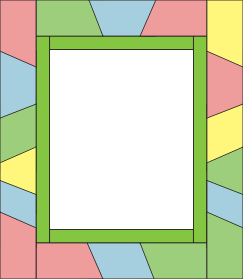
| The finished size of the wall hanging is about 14" x 16". |
|
Besides embroidery thread (either polyester or rayon), you will need
- light-weight cut-away stabilizer,
- 1 fat quarter, or a piece large enough to be hooped, of light-colored fabric for embroidery;
- scraps of yellow, blue, and green fabrics for the quilt;
- batting;
- fabric for the backing and binding;
- quilting threads (white and blue),
- quilter's ruler and rotary cutter (if you don't use a rotary cutter, you'll need a graphic pencil and sharp scissors);
- fabric pencils, markers or paints.
|
| Emboridery |
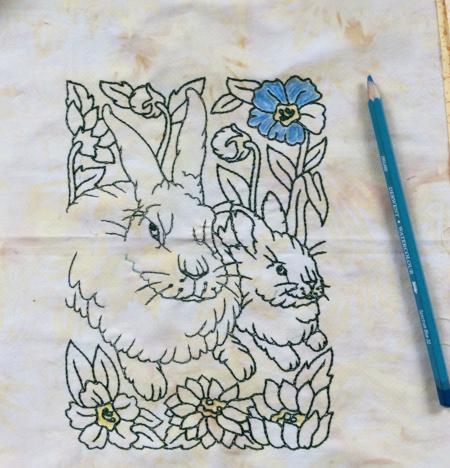
Embroider one of the rabbit designs from the One Color Easter Rabbit Set with dark green thread. Use light-weight cut-away stabilizer for embroidery.
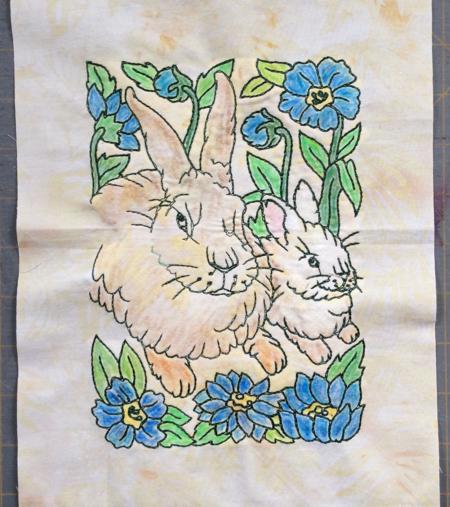
After the embroider is done, color the stitchout with fabric pencils, markers or paints. Follow the instructions of the dye's manufacture.
|
|
Trim the colored stitch-out to an 8 1/2" x 10 1/2" rectangle.
Remove the stabilizer around the embroidery. Do not remove the stabilizer under the embroidery. |
|
Cutting:
|
Out of green fabric, cut
2 strips measuring 1 1/4" x 8 1/2" , and
2 strips measuring 1 1/4" x 11 1/2".
Cut the scraps into strips 2 1/2" and different lengths from 2 1/2" to 4 1/2".
|
Assembly of the Top:
|
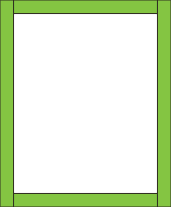
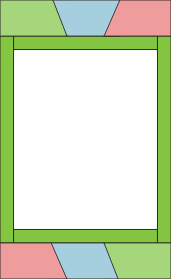
| Sew the 1 1/4" x 8 1/2" strips to the upper and lower edges of the stitch-out. Press the seams. |

|
| Sew the 1 1/4" x 11 1/2" strips to the left and right edges of the stitch-out. Press the seams. |
 |
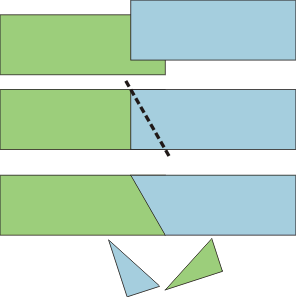
Place 2 scrap strips of contrast colors on the working table face up, 1"-1 1/2" overlapping.
Use a ruler and rotary cutter to cut a slanted line across the overlapping part.
Sew the parts together along the cut line. Press the seam. |
 |
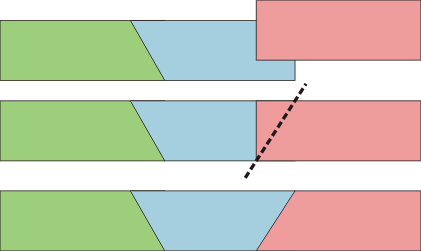
In the same way, attach the next 2 1/2" wide scrap to the end of this strip. Keep going until you have a strip measuring about 19" - 20".
Cut this strip into 2 strip measuring 9 1/2". |
 |
| Sew the new strips to the upper and lower edges of the central part. |
 |
Repeat the procedure with the 2 1/2" wide scraps to make 2 more strips 16" long each.
Sew the new strips to the left and right edges of the central part. |
 |
| Quilting and Finishing: |
Now place the backing on a flat surface (table) face down. Cover with batting. Spread your working piece over it.
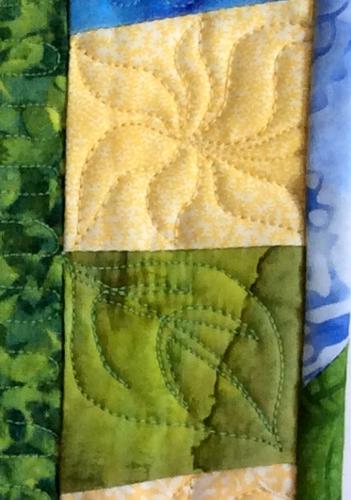
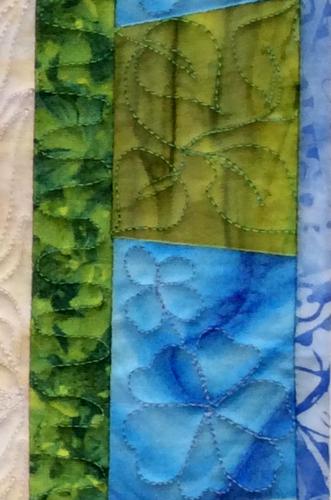
Pin all three layers together with 1" pins and start quilting. We in a free motion stipe around the embroidery. Then quilted each colored piece separately with flowers and leaves also in a free motion style. |
|
Over the white ends, we quilted a sashiko design in a free-motion style with blue thread.
|
|
After the quilting is finished, press the work with heavy steam and square the work -- all corners should be 90 degrees and opposite sides should be of the same length.
Finish the raw edges with the binding.
|
|
Your wall hanging is ready. Enjoy!
|
|
Enjoy!
|
|
Happy Stitching!
|
|
Back to One Color Easter Rabbit Set
|
Back to the Project Page
|


