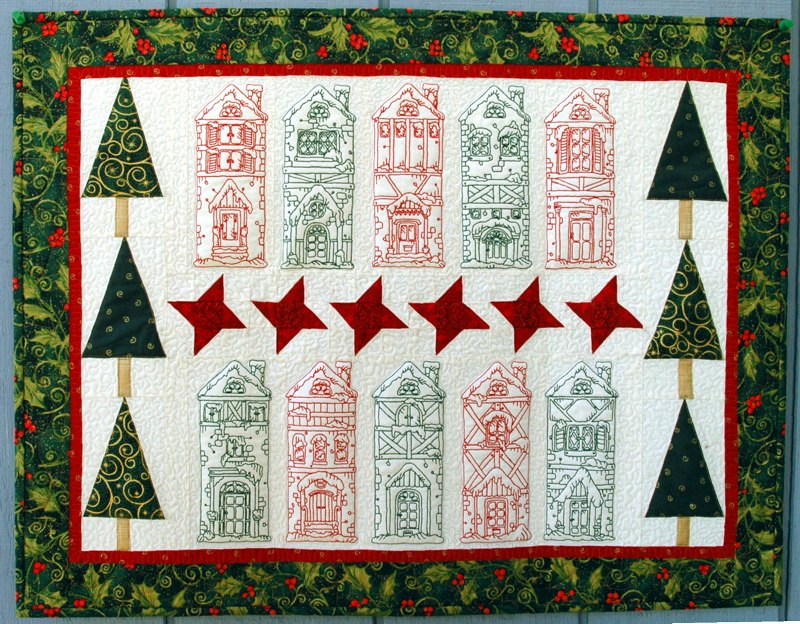
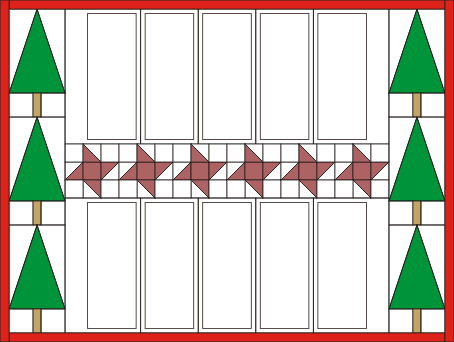
This fun wall quilt is a great celebration of the Winter holiday season. It's quick to piece together, even for a novice quilter, and we include templates to make this project even easier.
The finished size of the quilt is about 23" x 30".
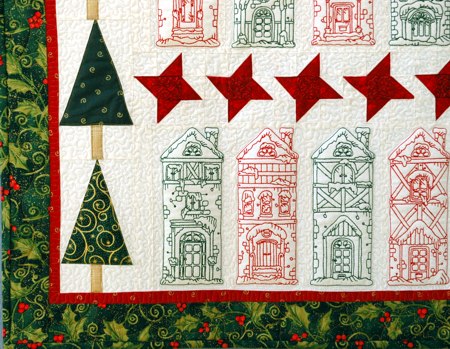
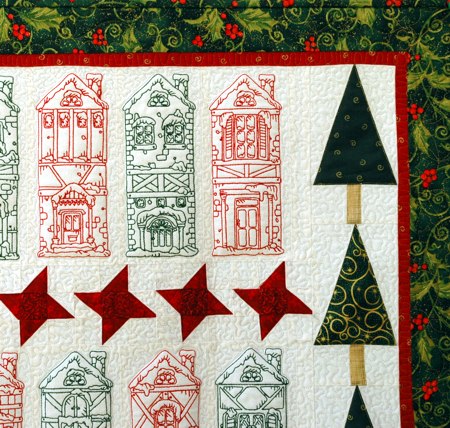
The designs are from the One-Color Winter Houses Set.
|
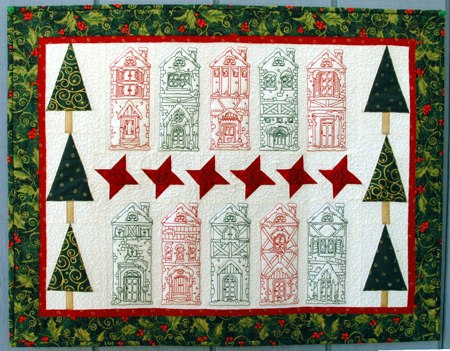
Click to enlarge |
You will need:
- embroidery thread (either polyester or rayon);
- light-weight cut-away stabilizer, or, if you want a trapunto embroidery, polyester craft felt;
- about 1 yard of light-colored cotton fabric for embroidery and quilt background,
- fabric for the borders and binding;
- scraps of cotton gold, red and green fabrics for star and tree blocks;
- batting;
- quilting threads to match the fabrics;
- quilter's ruler and rotary cutter (or graphic pencil and sharp scissors).
|
| Embroidery |
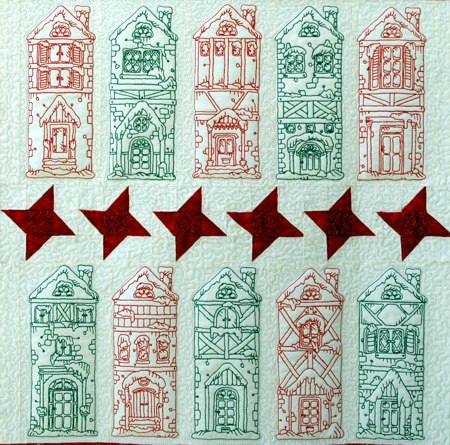
Stabilize the light-colored fabric with light-weight cut-away stabilizer for embroidery or polyester craft felt. Upload the designs into the machine and embroider them one by one in dark red, dark green or both. Do 5 stitch-outs in red and 5 stitch-outs in green.
|
|
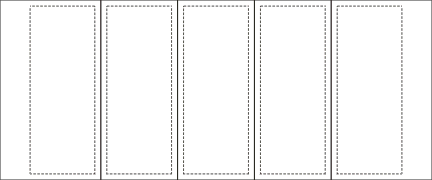
Trim 6 stitch-outs leaving 1/2" margins all around the embroidery.
Trim 2 stitch-outs leaving a 1 1/2" margin on the left and 1/2" margins on the top, bottom and right sides.
Trim the remaining 2 stitch-outs leaving a 1 1/2" margin on the right and 1/2" margins on the top, bottom and left sides.
Cut away the stabilizer or felt around the embroidery. |
| Sew the stitch-outs in 2 strips, 5 stitch-outs per strip. The stitch-outs with 1 1/2" left margins go on the left ends of the strips and the ones with 1 1/2" right margins go on the right ends of the strips. |
|
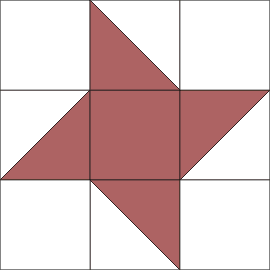
Star Block:
|
There are 6 star blocks in the center of the quilt. For the star block you will need, red scraps and the light-colored fabric of the background.
|
Out of red fabric, cut
- 6 squares measuring 1 1/2" and
- 12 squares measuring 2 7/8".
Out of light-colored fabric, cut
- 24 squares measuring 1 1/2" and
- 12 squares measuring 2 7/8".
|
Position the light-colored and red squares in pairs, face to face. Draw a diagonal. Stitch 1/4" on each side of the diagonal.
Cut along the diagonal. Unfold and press.
You'll have 24 half triangle squares for the star rays.
|

|
Assemble the elements of the block as shown on the picture below. First sew in strips, then sew the strips together.
|
|
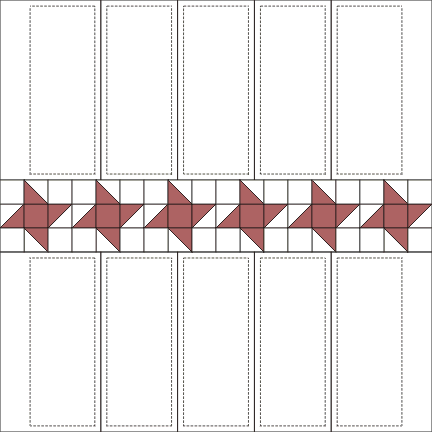
Sew all blocks into a row:
|

|
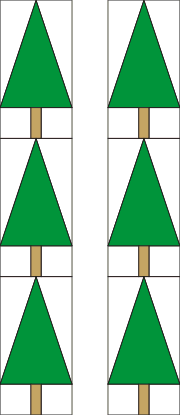
| Tree Block: |
| To make a tree block, download the templates. To open and print the template, which is a PDF file, you will need Adobe Reader or a similar program. The program is free to download and install. |
| Template Download (PDF file) |
Cut out the templates. Template A is for the tree. You need to cut 6 A pieces out of green scraps.
The templates B1 and B2 are for the background. You need to cut 6 of each from the background fabric.
For the lower part of the block, cut
- 12 squares measuring 2" x 2" out of the background fabric and
- 6 rectangles measuring 1" x 2" out of gold fabric.
|
| Sew the A, B1 and B2 pieces together and press. |

|
Take the background fabric squares and gold rectanges and sew these pieces into strips. Press.
|

|
| Sew both parts of the block together. |

|
| Sew the tree blocks into 2 strips, 3 blocks per strip. |
|
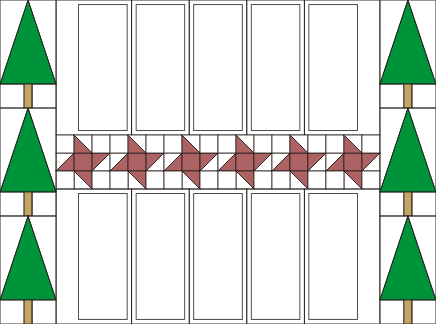
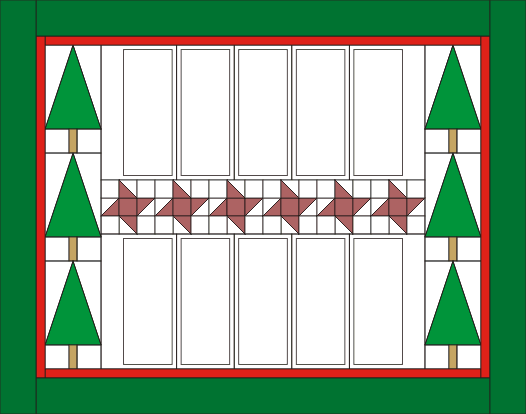
| Assembly of the Top: |
| Sew the star strip between the two strips with the houses. Press the seams. |
|
| Sew the tree strips to the left and right edges of the working piece. Press the seams. |
|
Now measure the piece. Our was 24 1/2" wide and 18 1/2" high.
The first red border will be:
- 2 strips measuring 1" x 24 1/2" and
- 2 strips measuring 1" x 20 1/2".
|
Sew the 1" x 24 1/2" strips to the upper and lower edges, press.
Sew the 1" x 20 1/2" strips to the left and right edges, press. |
|
For the outer border, out of patterned fabric, cut
- 2 strips measuring 2 1/2" x 25 1/2" and
- 2 strips measuring 2 1/2" x 24 1/2".
|
| Sew the 2 1/2" x 25 1/2" strips to the upper and lower edges and the 2 1/2" x 24 1/2" to the left and right edges. |
|
| Quilting and Finishing: |
Now place the backing on a flat surface (table) face down. Cover with batting. Spread your working piece over it.
Pin all three layers together with 1" pins and start quilting. We quilted in a free motion style all over the quilt. |
After the quilting is finished, press the work with heavy steam and square the work -- all corners should be 90 degrees and opposite sides should be of the same length.
Finish the raw edges with the binding.
|
|
|
Your quilt is done. Enjoy!
|
|
Back to One-color Houses under Snow Set.
|
Back to the Project Page
|