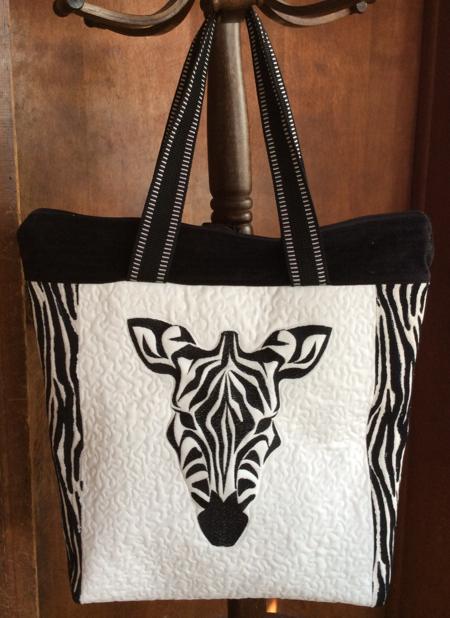
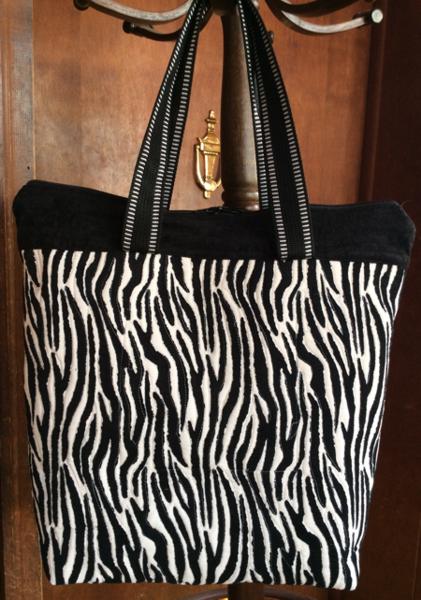
This fashionable, fun handbag is easy to put together. We used the design of the Zebra for a mega, 8" x 10" (200 x 250 mm), hoop.
|
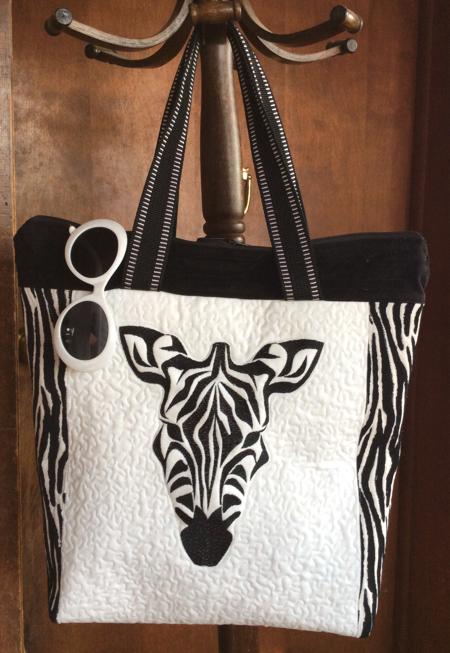
The finished size of the bag is about 15" high x 16" wide x 4" deep.
|
|
Besides embroidery thread (either polyester or rayon), you will need
- medium-weight cut-away stabilizer or polyester craft felt for embroidery;
- light-weight iron-on sewing interfacing, preferable black in color;
- 1 1/2 yard of black webbing for the handles;
- a fat quarter (18" x 20") of white cotton canvas;
- a fat quarter of black polyester suedette fabric ;
- 1/2 yard of fabric with zebra skin print suedette fabric;
- 1/2 yard of cotton fabric for the lining;
- batting,
- quilting threads (white and black), sewing threads (white and black);
- quilter's ruler and rotary cutter (if you don't use a rotary cutter, you'll need a graphic pencil and sharp scissors),
- 18"-long purse zipper.
Note: we purchased all of these materials at a Jo-Ann Fabrics store. Feel free to substitute the suedette fabric for a cotton one if you don't feel comfortable working with suedette.
|
| Emboridery |
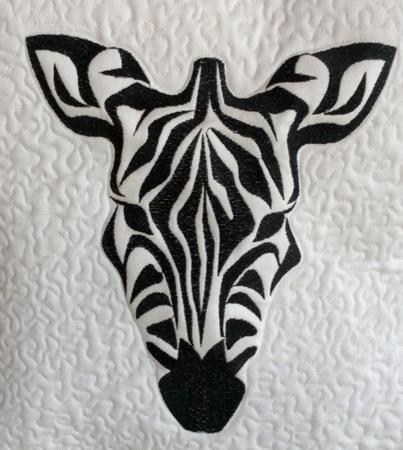
Embroider the Zebra design with black thread on white fabric. Use either medium-weight cut-away stabilizer or polyester craft felt for embroidery.
After the embroidery is finished, cut away the excess stabilizer around the embroidery. Using a ruler and a rotary cutter, trim the stitch-out to a 11 1/2" x 17" rectangle. The embroidery should be about 2" from the upper edge and 6" from the lower edge .
|
|
Cutting:
|
Out of black suedette fabric, cut 2 strips measuring 3 1/2" x 18".
Out of suedette fabric with zebra skin print, cut
- 2 strips measuring 3 1/2" x 17" and
- square measuring 18" x 18".
Out of the lining fabric, cut
- 2 strips measuring 3 1/2" x 18",
- 2 squares measuring 19" x 19", and
- a rectangle measuring 7 1/2" x 12 1/2" for the pocket.
Use the remaining fabric for the binding.
Cut the webbing in 2 pieces, each 27" long for the handles.
Out of batting cut 2 squares 19" x 19".
|
Assembly of the Front Panel and Quilting:
|
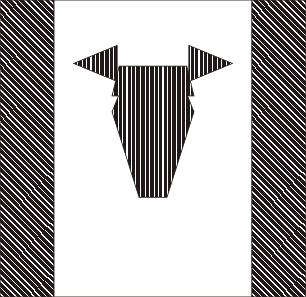
| Sew the zebra print 3 1/2" x 17" strips to the left and right edges of the stitch-out to make the front panel. |
|
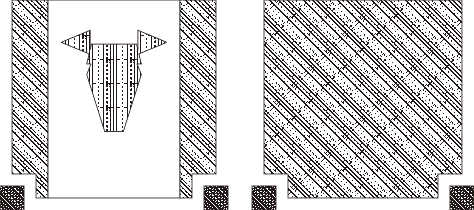
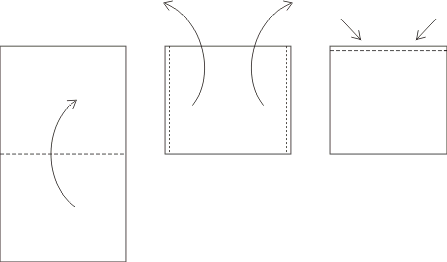
Place the lining squares on the table, face down. Cover with the batting. Cover one piece with the front panel, and the second one with the 18" x 18" zebra print square.
Pin all three layers together.
Quilt both pieces. We quilted in a free-motion style around the embroidery and along the zebra stripes. |
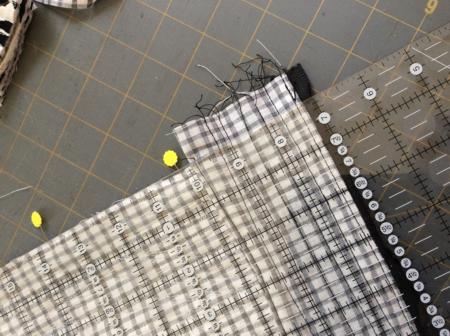
After the quilting is finished, press the work with steam and trim both pieces to 17" x 17".
Note: If you use suedette fabric, press the panels from the lining side.
Cut 2 1/2" squares in the lower corners of both panels. |
 |
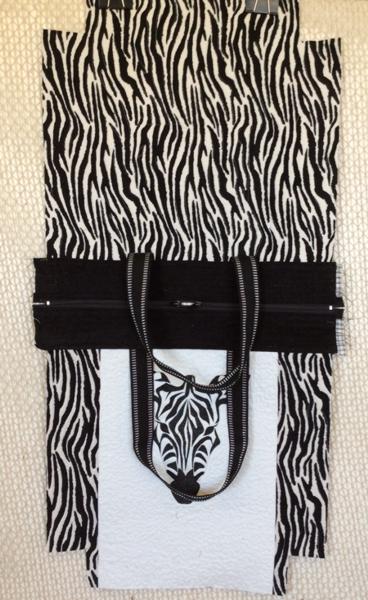
Sewing the Zipper Piece.
|
Stabilize the 3 1/2" x 18" suedette strips with the iron-on interfacing.
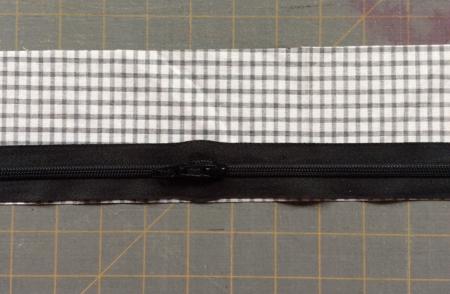
On the table, place one of the 3 1/2" x 18" lining strips, face up.
Place the zipper, face up, on the lower edge of the lining. Align the edges. |
|
Cover with the suedette strip, face down. Align the lower edges.
|
|
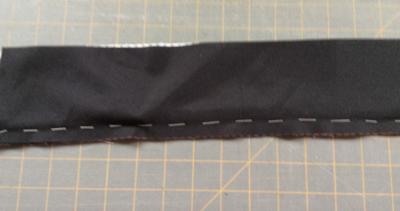
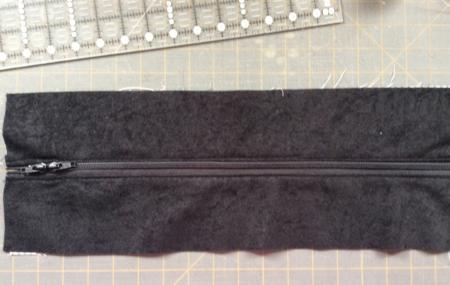
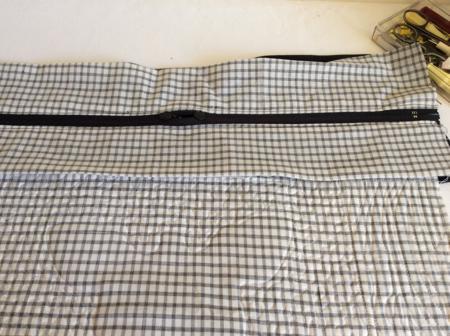
Baste the strips and zipper together about 1/8" from the zipper teeth. Topstitch along the baste. Remove the baste thread.
|
|
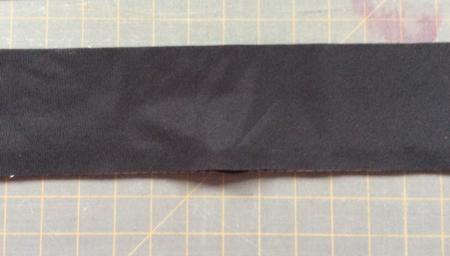
Fold both strips back. Press.Topstitch 1/8" along the upper edge.
|
|
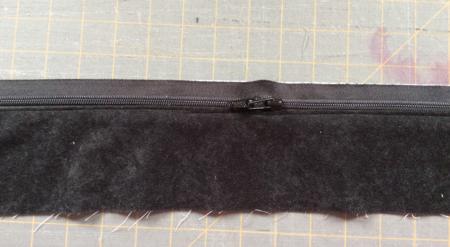
| Repeat for the second side of the zipper. |
|
| The Pocket |
| Fold the 7 1/2" x 12 1/2" lining strip in half widthwise, face inwards. Stitch 2 sides. Turn the piece right side out. Press. Tuck the raw edges 1/2" inside. Press. Topstitch. |
 |
| Position the pocket on the lining side of the back panel and topstitch it to the panel. |
Assembly of the Bag
|
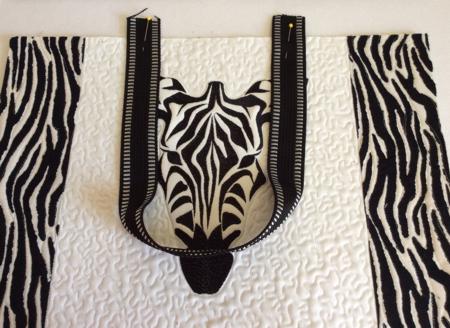
Position the front panel on the table, face up. Pin one handle to the upper edge - 5" from each side - as shown on the picture below: the ends of the handle should protrude 1" beyound the edge.
|
|
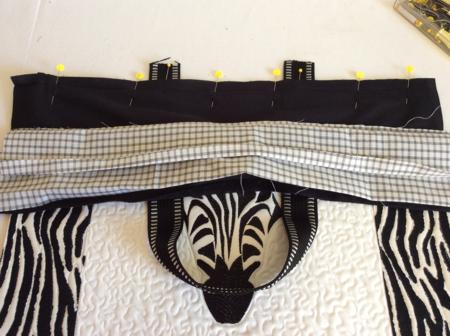
Position the zipper piece, face down, along the upper edge. Fold the lining back, align the edges and pin the pieces together.
Stitch the pieces together with seam allowance 1/2". |
|
| Turn the working piece with lining up. Fold the raw edge of the zipper lining inside and press. Then baste in place. |
|
| From the right side, quilt the attached side of the zipper part with several parallel lines. |

|
| In the same way attach the second handle, and the second half of the zipper part to the back panel. |
|
| With the zipper closed, fold the bag, face inwards, align all edges and pin them together. Cut away the protruding ends of the zipper part to make it line up with the edges of the bag. |
|
Stitch the sides together with seam allowance 1/2".
Open the zipper. Stitch the bottom with seam allowance 1/2". |
| Stitch closed the cut-out corners in the bottom to form box corners. Stitch 1/2" from the raw edges. |
| Finish all raw edges with the binding. |
| Turn the work right side out. |
|
The hand bag is ready Enjoy!
|
|
|
|
Happy Stitching!
|
|
Back to Zebra
|
Back to the Project Page
|


