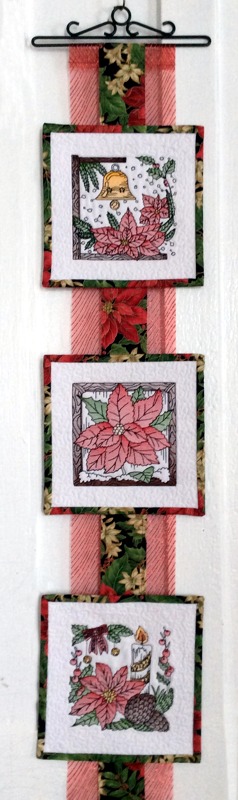
This charming wall hanging makes a great gift. It doesn't require a lot of fabric, and is easy to put together over the weekend.
We made it Christmas-themed, but you can apply the same idea to any kind of project.
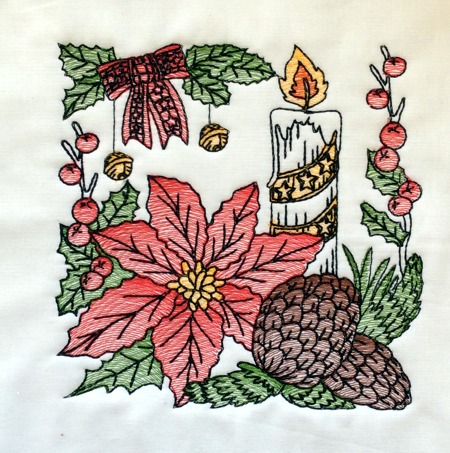
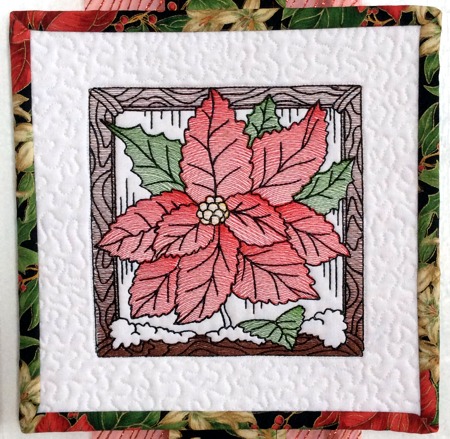
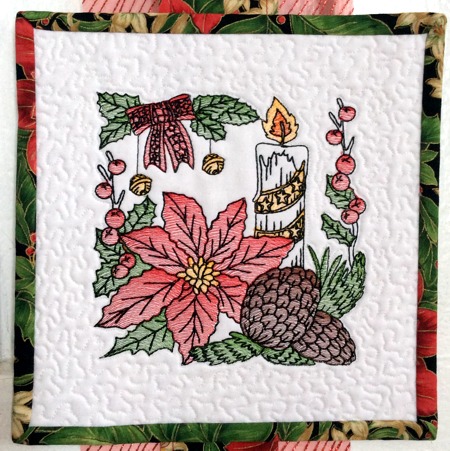
We used one-color designs from the Poinsettia Quilt Block Set for the mega hoop (6" x 10"). The designs for the large hoop (5" x 7") also work great for the project.
You will need
Embroidery:
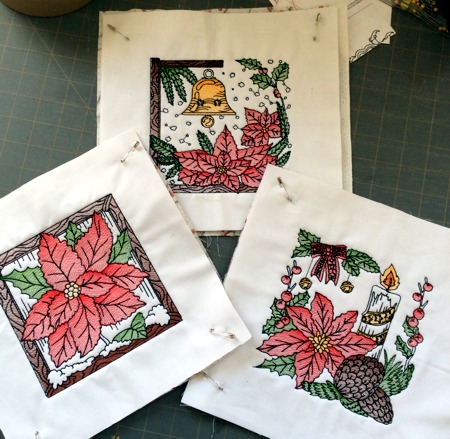
Stabilize the white fabric with medium-weight iron-on stabilizer and embroider 3 files from the Poinsettia Quilt Block Set.
Trim the stitch-out, leaving margins of about 2 1/2" around the embroidery.
Cutting:
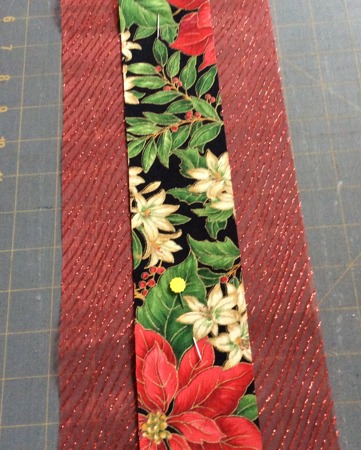
Cut the patterned fabric into 2 1/2" strips. For a 3-tile quilt, you'll need 3 strips for the binding and 1 strip for the background ribbon.
Cut a piece of tulle 6" wide and about 40-42" long.
Sewing:
Position the tulle piece on your working surface, face up. Position the strip of cotton fabric in the middle of the tulle, face up. Pin both layers.
On your sewing machine, topstitch the fabric strip to the tulle strip.
Fold the upper edge of the piece 1- 1 1/2" back. Press. Stitch along the edge to make a hanging sleeve.
Quilting:
Now place the backing on a flat surface (table) face down. Cover with batting. Spread your stitch-out over it.
Pin all three layers together with 1" pins and start quilting. We quilted with a meandering pattern around the embroidery and in a freemotion style.
After the quilting is finished, press the work with heavy steam. Trim the tiles again leaving 1 1/5" margins around the embroidery. You'll get 9" squares.
If you embroider the designs for a large hoop, leave 2" margins.
Finish the raw edges with the binding.
Sew the tiles to the background ribbon.
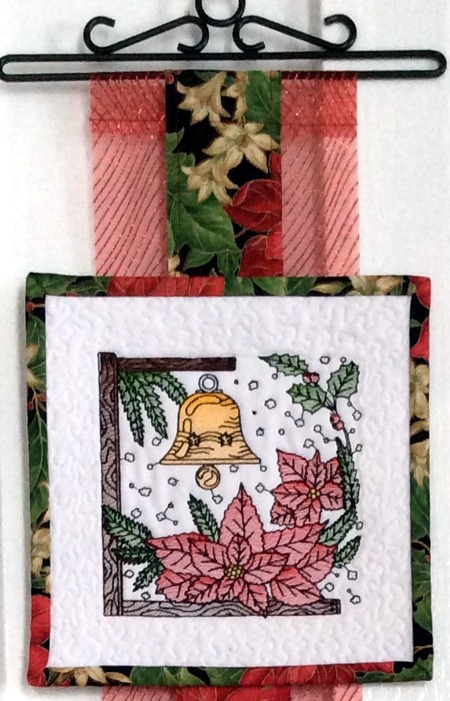
Alternatively, instead of sewing the tiles directly to the ribbon, you can attach snaps or pieces of velcro tape to the ribbon and to the backs of the tiles. Then you can change the tiles or move them around to your taste.
Your wall hanging is done. Enjoy!


