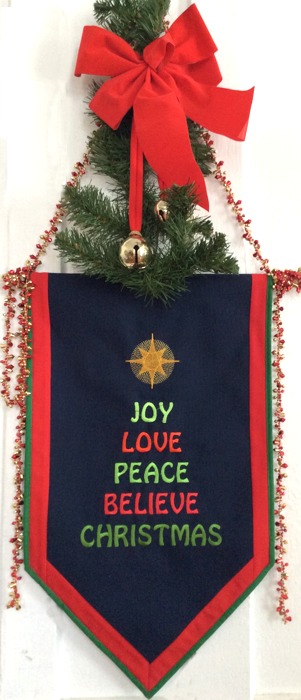
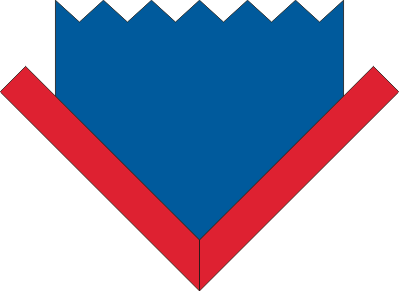
This small wall hanging is very quick and easy to make. It makes a great last-minute decoration for your home.
The design used is Christmas Wishes for the 8" x 12" hoop. The design is also available for the 5" x 7" hoop.
The finished size is about 13 1/2" x 23".
You will need
Embroidery:
Stabilize the navy blue fabric with medium-weight cut-away stabilizer. Upload the file Christmas Wishes into your embroidery machine and embroider it. You can select colors to your taste. We used 2 shades of red and 3 shades of green for the words and golden yellow for the star.

Cutting:
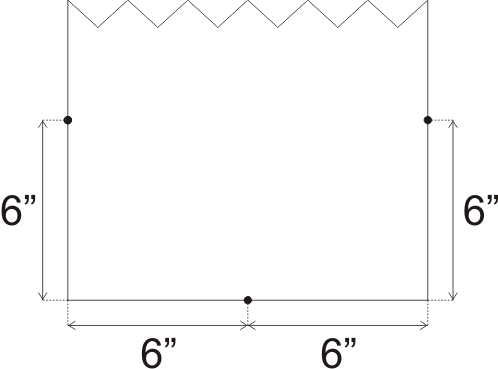
Trim the working piece to 12" wide by 25" long.
Using ruler and chalk marker, mark the center point of the bottom edge.
Now measure 6" from each of the bottom corners up along the long sides. Mark the points.
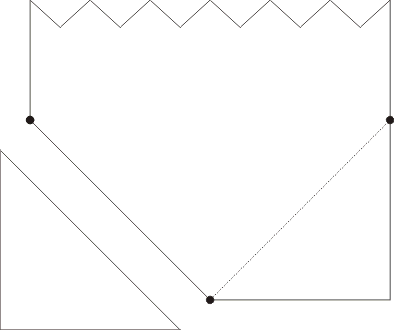
Use the ruler to connect the bottom edge center point with the left-side mark. Cut along the line. Repeat for the right side.
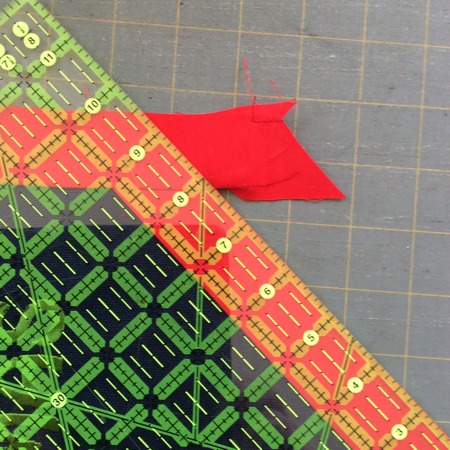
Out of red fabric, cut 2 strips measuring 2" x 12" and 2 strips measuring 2" x 22".
Out of green fabric, cut 2 strips measuring 2 1/2" and the length of the width of the fabric for the binding. You can also use ready bias tape binding.
Sewing the Banner:
Note: Seam allowance is 1/4". Press every seam after you make it.
Position one of the 2" x 12" red strips along the right bottom edge, so that the ends protrude about 2" beyond the blue fabric. Pin. Stitch, on the side of the blue fabric, along the edge, finishing 1/4" before the lower corner.

Repeat for the other side.
Unfold the strips and press the seams.
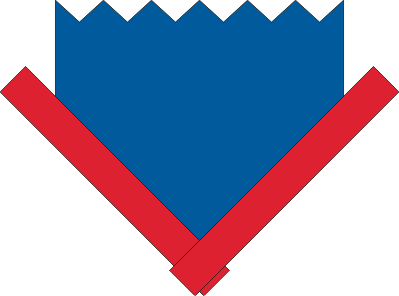
Connect the strips at the lower corner to make a mitered corner.
Cut the away the protruding ends of the strips on either side.

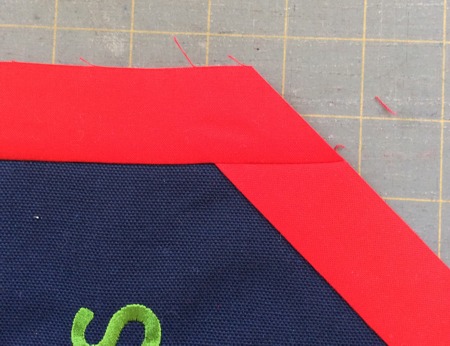
Position one of the 2" x 22" red strips along the right edge, so that the end of the strip protrudes beyond the working piece. Pin. Stitch together. Unfold the strip and press.

Cut away the protruding end of the strip.
Repeat for the other side.
Place the working piece on a piece of craft felt. Press with your hands - the felt will cling to the fabric, smooth all possible folds.
Quilt both layers in the ditch along the borders' seams.
Finish the raw edges with the binding.
Fold the upper edge 2" back. Topstitch along the edge, 1/4" -3/8" from the edge to form a hanging sleeve.
Insert a rod into the hanging sleeve.
Your banner is done. Enjoy!


