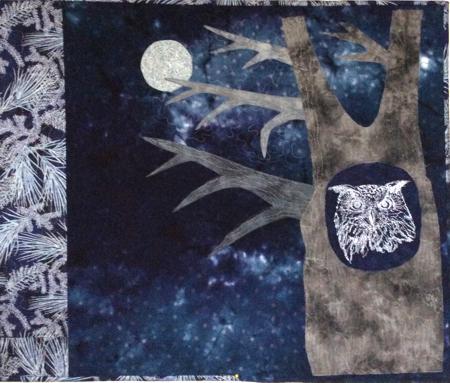
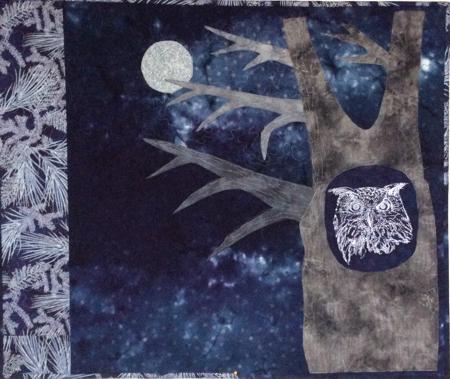
This charming art quilt was inspired by the night-time woods of New England. We created a set of templates to make putting the quilt together quick and easy.
We used a design from the Horned Owl Set.
The finished size of the quilt is about 22" x 26".
|
|
You will need
- embroidery thread (either polyester or rayon) - light grey, grey silver or snow white,
- light- to medium-weight tear-away stabilizer,
- Steam-a-Seam2, which is double sided fusible web for applique, or a similar product,
- a piece of dark blue batik or marble cotton fabric measuring 23" x 23" for the background,
- a piece of dark fabric with silver print for the left border and binding,
- scraps of grey fabrics for the tree, and a scrap of silver fabric for the moon.
|
Cutting:
|
Trim the fabric for the background to 23" x 23" square.
Out of fabric for the left border, cut a strip measuring 23" x 4". Cut the rest of the fabric into strips 2 1/2" wide and the length the fabric permits. Sew these strips into binding, you will need about 100" of the binding.
|
| Embroidery: |
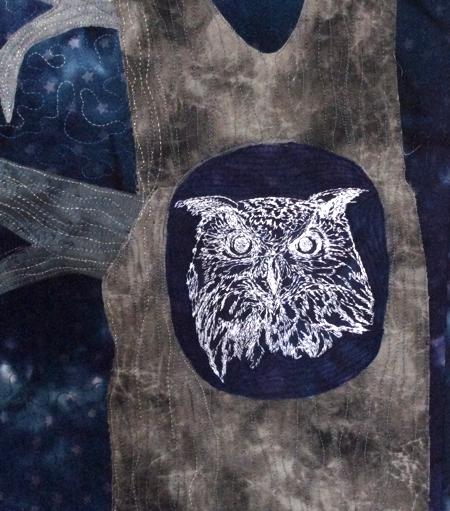
| On a piece of dark fabric, embroider the Horned Owl with light thread. |
| Making the Top: |
| Sew the 4" x 23" strip to the left edge of the 23" x 23" square. |
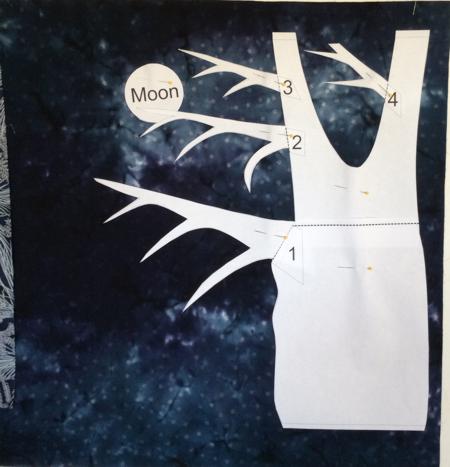
| Download the file with the templates. To open and print the template, which is a PDF file, you will need Adobe Reader or a similar program. The program is free to download and install. |
| Template Download (PDF file) |
Print out the templates and cut them out.
Position the templates on the quilt top. |
|
Working with one template at a time and following the instructions of the fusible web manufacture, adhere the applique fabric to the web. Place the templates over the fabric. Trace the outline of the templates on the fabric. Cut the fabric together with the web along the outlines, position them again on the quilt top and fuse them to the background.
|

|
| Cut the stitch-out into an oval shape. Using the fusible web, fuse the stitch-out to the tree trunk. |
|
| Quilting and Finishing: |
Now place the backing on a flat surface (table) face down. Cover with batting. Spread your working piece over it.
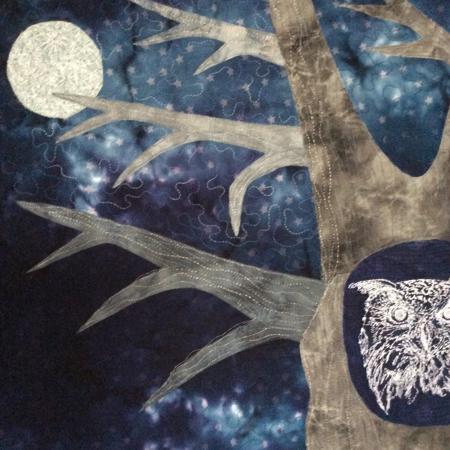
Pin all three layers together with 1" pins and start quilting. We quilted in a free motions style quilted with different threads all over the quilt. |
After the quilting is finished, press the work with heavy steam, trim it to desired size and square the work -- all corners should be 90 degrees and opposite sides should be of the same length.
Finish the raw edges with the binding.
|
 |
|
Your quilt is done. Enjoy!
|
|
Back to Horned Owl Set
|
Back to the Project Page
|


