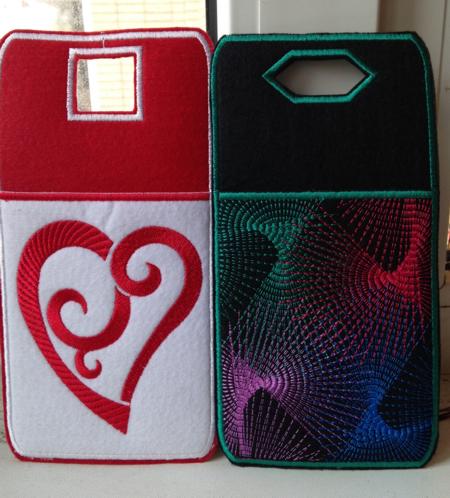
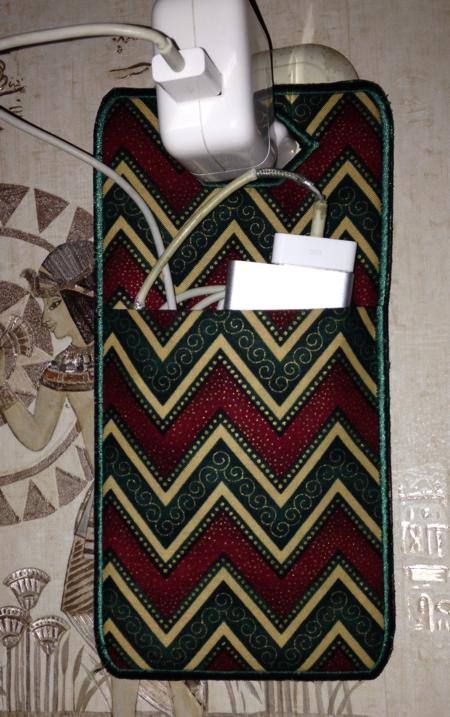
When your phone is charging, it can be quite the balancing act to find a convenient place for it to perch that's also close enough to the electrical outlet. This charger case solves that problem: the case hangs right from the charger, and the phone is slipped inside it. It also works great when you're travelling.
It's a fantastic gift for family or friends.
These are instructions on how to embroider the files from the Smartphone Charger Case Set II.
You will need
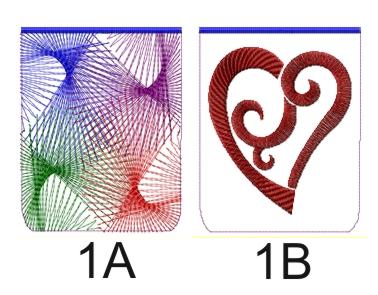
There are 6 files in the set: "part1A", "part1B", "part2A", "part2B", "part3A", "part3B".
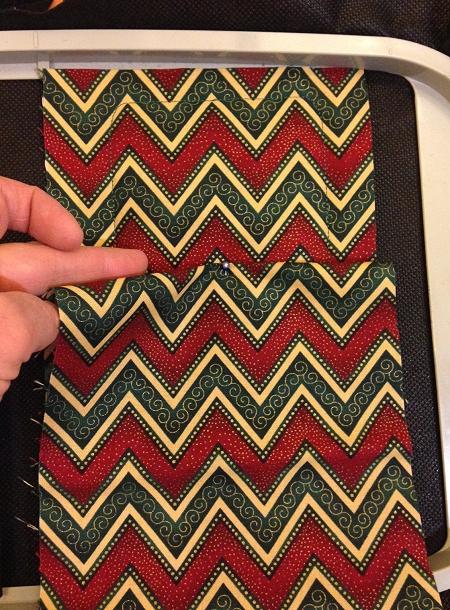
Files labelled "part1" contain the designs of the pocket with 2 different motifs: A features a geometric motif and B features a heart.
Choose either of them. You will need one Part 1 for each case. Stabilize the fabric, hoop it and embroider the file.
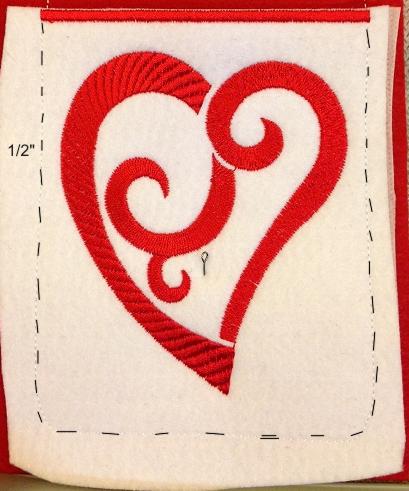
After the stitch-out is finished, take it out of the hoop. Cut it out, leaving about 1/2" (1 cm) margins on the bottom, left and right edges. Cut the fabric as close to the stitches as possible on the upper edge.
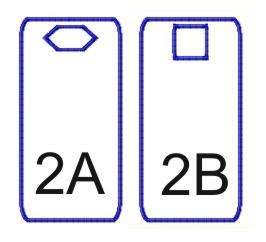
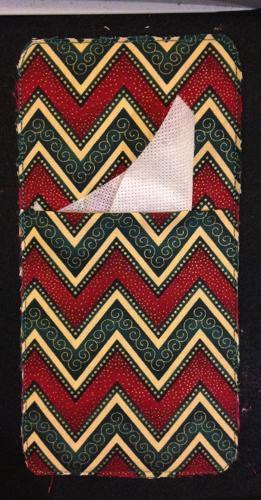
The files "part2A" and "part2B" are for the back of the case. File 2A is for an oval-shaped charger, file 2B is for a square shaped charger.
Hoop the fabric for the second file. Embroider the first color.
Position the stitch-out of Part 1 over the outline. Try to align the side and bottom edges of the embroidery with the outline. Pin Part 1 to Part 2 (which is in the hoop). Start the machine. The machine will embroider the same outline, stitching the two parts together.
to the stitches as possible.
Start the machine. The third color will finish the embroidery.
Cut out the fabric in the charger opening and around the stitch-out, keeping as close to the stitches as possible.
The files "part3A" (square opening) and "part3B" (oval opening) at first glance look like the part2 files, but they are designed in a different way, allowing you make the complete case with just one design.
For this, you'll need a piece of decorative fabric measuring 5" x 20" and a non-fraying dense fabric like polyester felt, thin leatherette, etc. We used medium weight polyester felt.
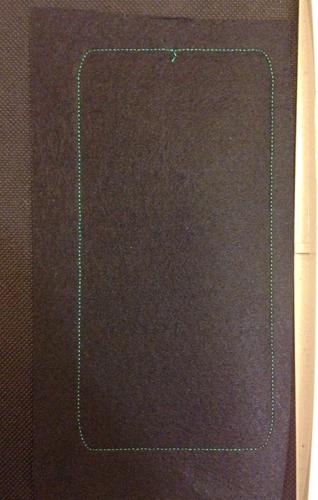
Upload any of the part 3 files. Hoop a piece of felt. Start the machine. It will embroider the outline of the panel.
Cover the outline with the fabric strip, fabric face up. Align the upper edge of the fabric with the upper edge of the hoop. The lower edge of the strip may protrude beyond the lower edge of the hoop. Start the machine, it will embroider the same outline over the fabric.
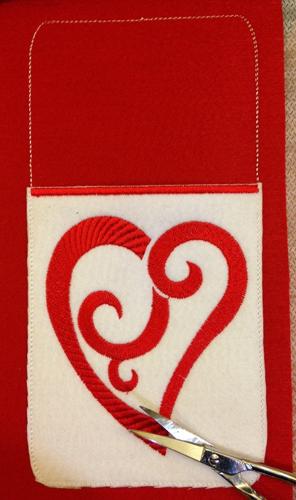
Fold the free end of the strip onto the stitch-out, then fold it back approximately 5" from the lower edge of the stitch-out and 3" from the upper edge of the stitch-out. Pin the folded edge. Spread the free end along the stitch-out.
Start the machine. It will sew all the layers together.
With a pair of sharp sccisors, cut away the fabric around the stitches, keeping as close to them as possible. Do not cut through the felt base!
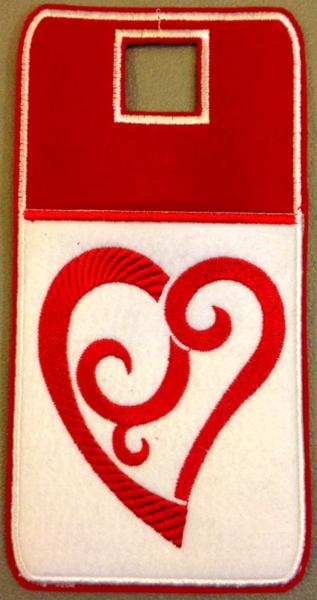
Return the hoop to the machine and start it. The fourth color will finish the raw edges of the case.
The fifth color will embroider the outline of the opening. Afterwards, cut out the fabric in the opening, but do not cut the felt base.
The last color will finish the raw edges of the opening.
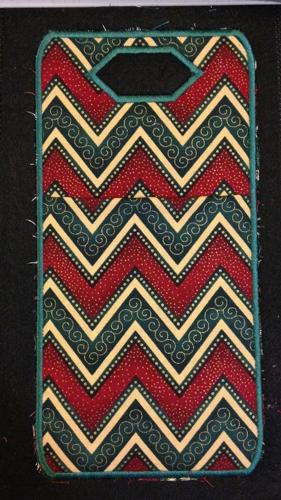
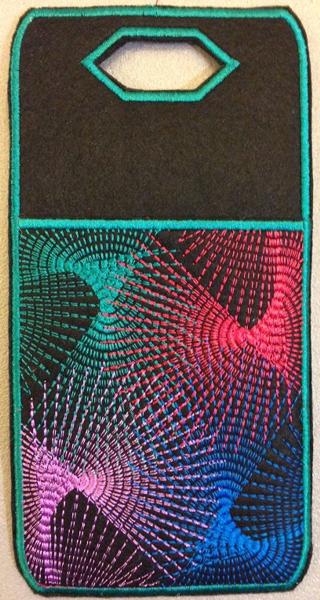
Take the work out of the hoop. Cut it out. You are done!
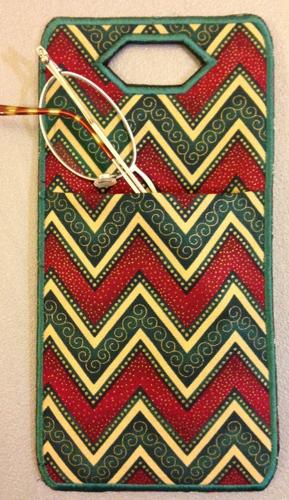
Your charger case is ready. You can also use it to store small items like glasses. Enjoy!


