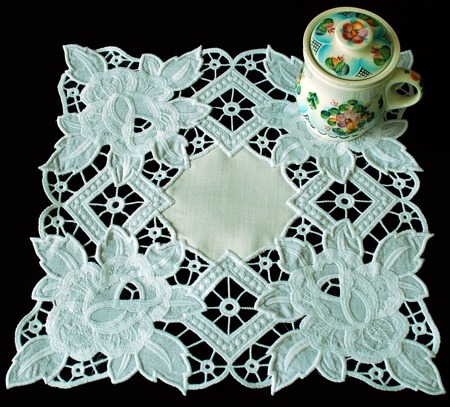
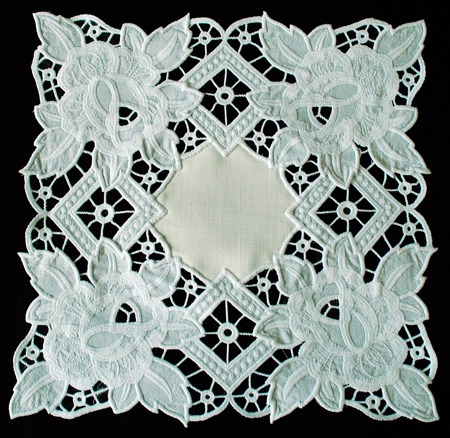
These are instructions on how to embroider and assemble the Cutwork Rose Doily. The design is available in 2 sizes: for the Large hoop (5" x 7") and Mega hoops.
If using the design for the Mega hoop, the finished size of the doily will be about 12 1/4" x 12 1/4". If using the Large hoop design, it will be about 9 3/4" x 9 3/4".
Mega Hoop:
Size: 148 x 231 mm (5.8" x 9")
Stitches: 43711
Colors: 1/3.
Large Hoop:
Size: 116 x 179 mm (4.5" x 7")
Stitches: 32979
Colors: 1/3
You will need:
We recommend to use water-soluble mesh, such as Vilene. Vilene D0102 is a non woven dissolvable stabilizer which is imported into the US, is sold in large rolls and is sometimes repackaged under different brand names.
Some of these brand names are Fabri-Solvy by Sulky, Avalon Plus by Madeira, Wash-Away, and Aqua Magic.
40-50-weight embroidery polyester threads are preferred for the project.
Rayon thread is softer and more sensitive to the chemicals in the water-soluble mesh. We do not like to use rayon thread for cutwork lace projects.
Please note: ALWAYS make a test stitch-out on scrap before you make a stitch-out on the final item.
Step One: Hoop 1-2 layers of water soluble mesh. Start embroidering. The first color will embroider the outline of the design.
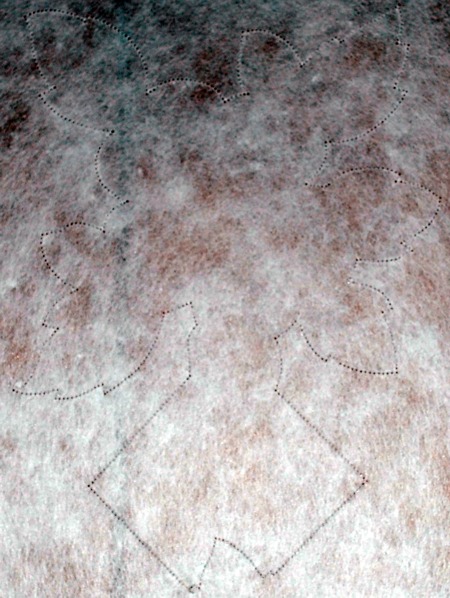
Step Two: Cover the outline with a piece of fabric and start the machine. It will embroider the same outline and some lines inside the outline over the fabric.

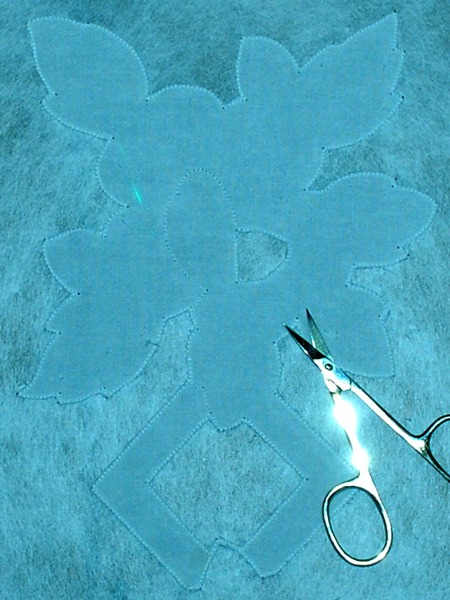
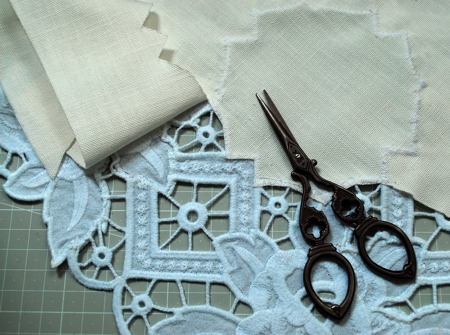
Step Three: Take the hoop from the machine. With a pair of sharp scissors cut away the fabric around the outline and inside in one place shown on the picture below.
Step Four: Return the hoop to the machine and finish embroidering. Embroider the file four times.

Washing Out the Stabilizer:
Rinsing away the stabilizer is also an important step, because the lace can be stretched or distorted if this is done incorrectly. We recommend to use a foam board and stainless pins.
Cut away the excess stabilizer close to the stitches. Take your time and carefully pin all the edges to the board.
Now place the board into a bowl with luke-warm water. Leave the board in the water for at least half an hour. Change the water a couple of times.
Take the board out of the water and leave to air dry. Do not unpin the lace until it's completely dry.
Press, if needed.
Assembly of the Border
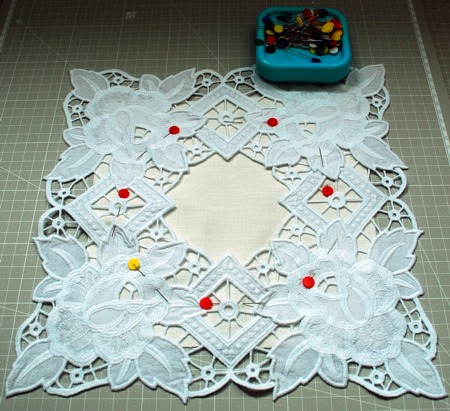
On your working table, lay out all parts as shown below.
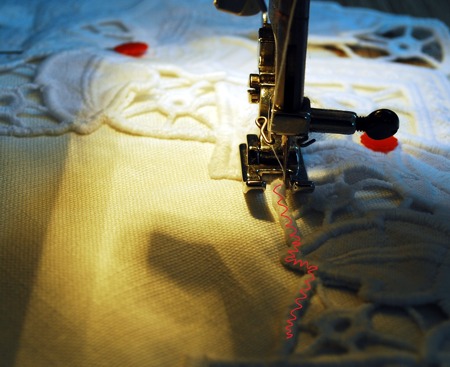
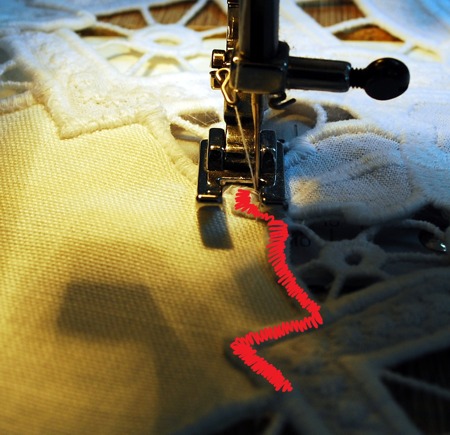
On your sewing machine, using the same thread with which you made the embroidery and the zig-zag stitch, stitch the parts together in the places marked in red.
Press.

Making the Doily.
Lay out the frame on a piece of fabric and pin in place.
On your sewing machine, using the same thread with which you made the embroidery and wide zig-zag, stitch along the inner edge of the frame.
Cut away the excess fabric on the back of the table runner.
Return to your machine and using very dense zig-zag, stitch again along the inner edge of the border.
The doily is ready. Enjoy!
Happy Embroidering!


