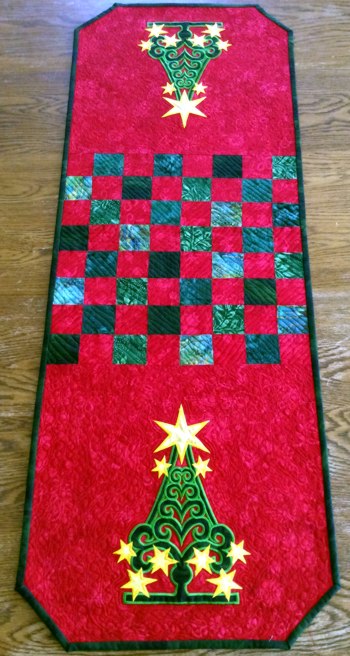
This festive table runner is quick and simple to put together. We used the design Applique Christmas Tree Ornament for the commercial (8" x 12") hoop.
The finished size of the table runner is about 16" x 48".
|
|

|
You will need :
- embroidery threads (either rayon or polyester),
- light-weight cut-away stabilizer,
- about 3/4 yard of red cotton fabric,
- scraps of green fabrics,
- 1 fat quarter each of yellow/gold and green fabric for the applique,
- batting,
- fabric for the backing,
- binding,
- quilting thread,
- quilter's ruler and rotary cutter, or pencil and scissors.
|
| Cutting: |
Out of red fabric, cut 2 squares measuring about 19" x 19", or large enough to be hooped in your largerst hoop. After embroidery these squares will be trimmed to 16 1/2" x 16 1/2".
Out of red fabric, cut 32 squares measuring 2 1/2" x 2 1/2".
Out of scraps of green fabrics, cut 32 squares measuring 2 1/2" x 2 1/2". |
Embroidery:
|
| Upload the file of the Applique Christmas Tree Ornament into your machine. Stabilize the red squares with light-weight cut-away stabilizer and embroider the file on the fabric. The file contains the instuctions on how to make a 3D ornament. Follow steps 1 through 9 of the instructions, but place the applique fabric on the top of the hoop only. You do not need to change the bobbin threads because this applique is one-sided. |

|
After the stitch-out is done, trim the stitch-outs to 16 1/2" x 16 1/2" squares.
|
Assembly of the Top:
|
| Note: seam allowance is 1/4", press each seam after you made it. |
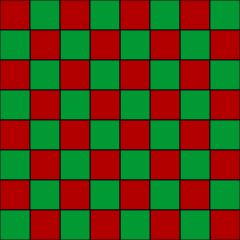
Sew the 2 1/2" red and green squares into 8 strips, 4 red and 4 green squares per strip:
|

|
| Sew the strips together to get the central part of the tablerunner. |
|
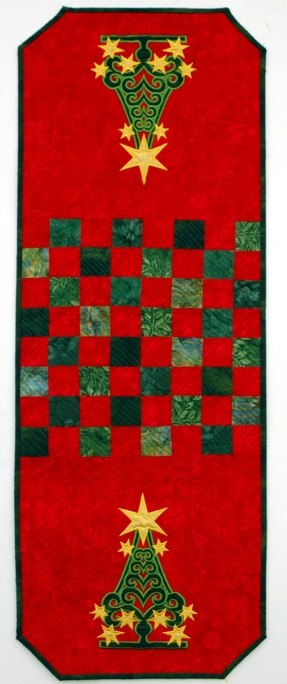
Sew the embroidered squares to the ends of the the central part.
|

|
| Quilting and Finishing: |
Now place the backing on a flat surface (table) face down. Cover with batting. Spread your working piece over it.
Pin all three layers together with 1" pins and start quilting. We quilted in a freemotion style all over the tablerunner. |
|
After the quilting is finished, press the work with heavy steam and square the work -- all corners should be 90 degrees and opposite sides should be of the same length.
You can leave the tablerunner with a recangular shape.
If you want it to have our shape, measure 3" along both sides of each corner, mark the place. With a rular connect both marks, draw a diagonal, cut along this diagonal. |
|
| Finish the raw edges with the binding. |
|
| Enjoy! |
|
|
Back to Applique Christmas Tree Ornament
|
Back to Projects Page
|


