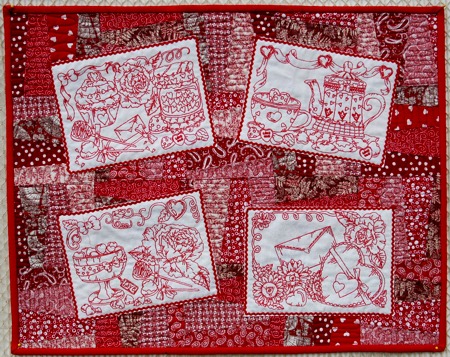
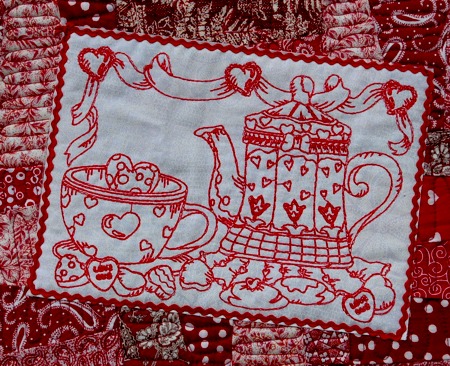
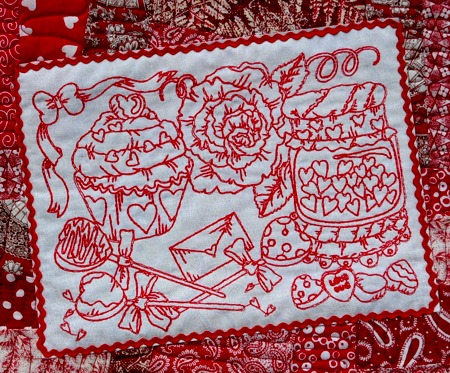
This charming quilt is easy to put together and features four designs from the One-Color Valentine Greeting Card Set.
The finished size is about 20" x 25".
|
|
|
You will need :
- embroidery threads (either polyester or rayon) of red shades,
- 1/4 yard of light colored (white, cream, pale yellow) cotton fabric,
- left-overs of different red fabrics,
- light-weight iron-on cut-away stabilizer for the embroidery,
- batting,
- fabric for the backing,
- binding or fabric for the binding,
- 1 pack of small rec ric-rac trim,
- temporary fabric adhesive,
- quilting thread,
- quilter's ruler and rotary cutter, or pencil and scissors.
|
Cutting:
|
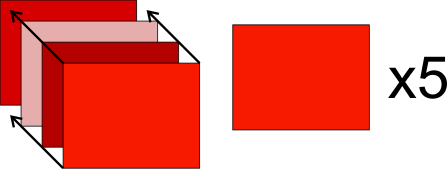
Out of the red fabrics, cut 20 rectangles measuring 5 1/2" x 7". The more different fabrics you have, the better. Do not use the same fabric for more than 5 rectangles!
|
Stack the rectangles in 5 stacks of 4 rectangles each. Each stack should have rectangles of different fabric. Align all edges.
|
|
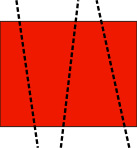
| Using a quilter's ruler and rotary cutter, make 3 cuts through each stack. Set the stacks aside, making sure not to mix up the pieces from each stack. |
|
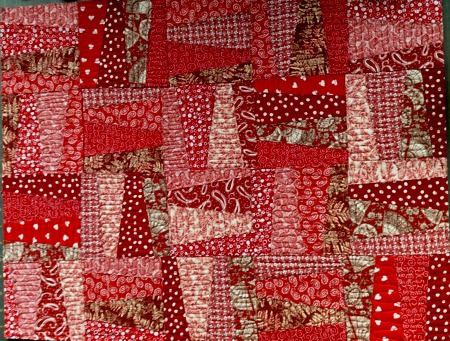
Assembly of the "Crazy" Block:
|
| Note: seam allowance is 1/4", press each seam after you make it. |
| Take one of the cut stacks and lay the pieces out as columns. |

|
| At random, take 1 strip from the first column, 1 strip from the second column, 1 strip from the third column and 1 strip from the fourth column. |

|
| Sew the strips together. |

|
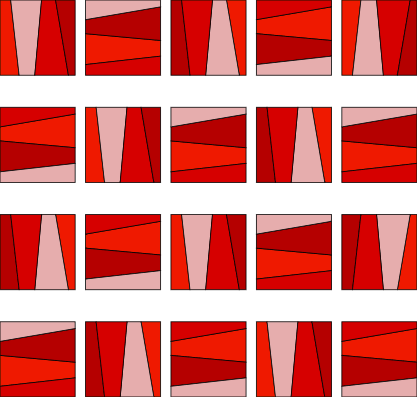
| Repeat with the remaining strips. You'll get four 5 1/2" x 5 1/2" "crazy" squares. |

|
| In the same way, cut and sew "crazy" blocks from the remaining stacks. In the end you should have 20 blocks. |
|
|
| Assembly of the Top: |
| Lay out the blocks in 4 rows of 5 blocks each. Rotate every other block 90 degrees. |
|
| Sew the blocks in rows. Then sew the rows together. |

|
|
| Quilting: |
Now place the backing on a flat surface (table) face down. Cover with batting. Spread your working piece over it.
Pin all three layers together with 1" pins and start quilting. We quilted all over the top in a freemotion style.
After the quilting is finished, press the work with heavy steam and square the work -- all corners should be 90 degrees and opposite sides should be of the same length.
Finish the raw edges with the binding. |
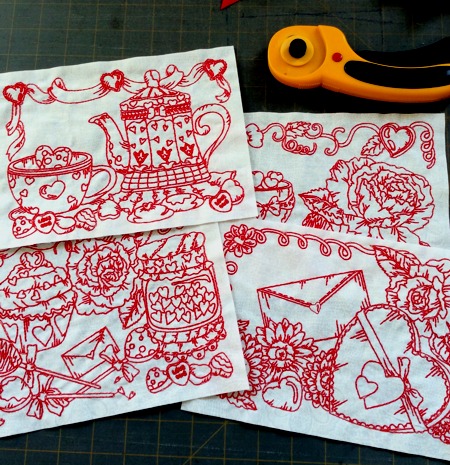
| Embroidery: |
| Select any four files from the One-Color Valentine Greeting Card Set and upload them into the embroidery machine. Stabilize the light-colored solid fabric with light-weight stabilizer. Embroider the files. |
| Press the stitch-outs. With the quilter's ruler and rotary cutter, trim the stitch-outs leaving 1/4" - 1/2" margins around the embroidery. |
|
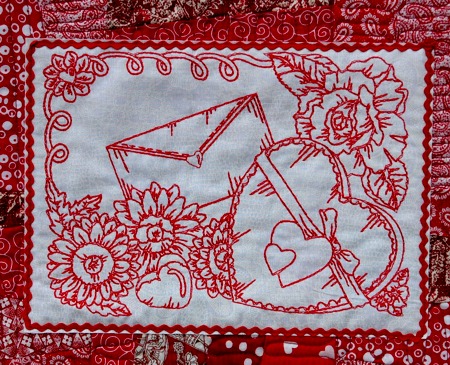
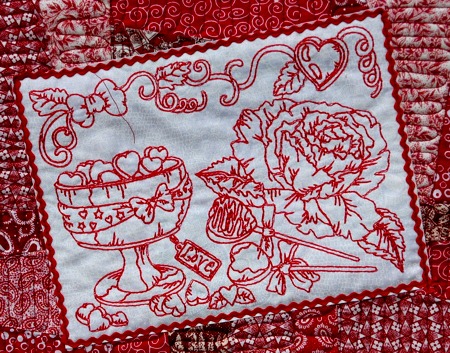
| Finishing: |
Lay out the stitch-outs over the quilted top. If you like the position of the embroidery on the top, spray the back of the stitch-outs with temporary fabric adhesive and press them onto the quilt.
|

|
Pin ric-rac trim along the raw edges of the stitch-outs. On your sewing machine, topstitch the tic-rac to the quilt.
|
|
|
|
| Your wall quilt is ready to decorate your house in February. Enjoy! |
|
|
|
Back to One-Color Valentine Greeting Card Set
|
Back to Projects Page
|


