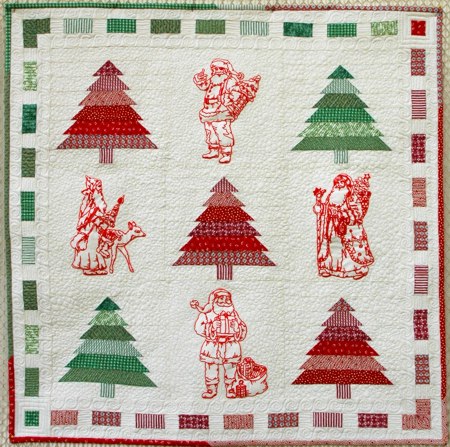
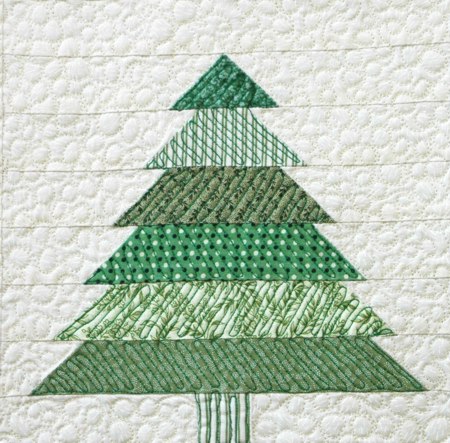
For this whimsical wall quilt, we used the designs from the One-Color Vintage Santa Set for the large (5" x 7") hoop. This is a more involved project that we recommend for experienced quilters only, but it's super fun and rewarding!
The finished size of the wall quilt is about 30" square.
|
|
|
You will need :
- embroidery thread (either rayon or polyester in a dark red hue),
- light-weight cut-away stabilizer,
- 1 yard of white or light cream cotton fabric,
- scraps of at least 6 red fabrics with a small print,
- scraps of at least 6 green fabrics with a small print,
- batting,
- fabric for the backing,
- quilting thread in white, green and red,
- quilter's ruler and rotary cutter, or pencil and scissors.
|
Cutting:
|
Out of white fabric, cut
- 4 squares measuring 8 1/2" x 8 1/2".
Cut several strips 1 1/2" wide and the length of the width of the fabric.
For the blocks, subcut these strips into the following:
- 5 strips 8 1/2" long,
- 10 strips 4 1/2" long,
- 20 strips 4" long,
- 10 strips 3 1/2" long,
- 10 strips 3" long,
- 10 strips 2 1/2" long,
- 10 strips 2" long.
Stack the strips of the same length and mark each stack with the length (we pinned a piece of paper to each stack.
For the borders, subcut the 1 1/2" wide white strips into the following:
- 8 strips 24 1/2" long,
- 6 strips 3 1/2" long,
- 2 strips 2 1/2" long,
- 38 squares 1 1/2" x 1 1/2".
|
For the 3 blocks with red trees, out of the red scraps, cut strips 1 1/2" wide and subcut them into the following pieces:
- 3 strips 2 1/2" long,
- 3 strips 3 1/2" long,
- 3 strips 4 1/2" long,
- 3 strips 5 1/2" long,
- 3 strips 6 1/2" long,
- 3 strips 7 1/2" long,
- 3 squares 1 1/2" x 1 1/2".
For the borders, out of red scraps cut strips 1 1/2" wide and subcut them into
- 17 strips 2 1/2" long,
- 2 squares 1 1/2" x 1 1/2".
|
For the 2 blocks with green trees, out of green scraps, cut strips 1 1/2" wide and subcut them into the following pieces:
- 2 strips 2 1/2" long,
- 2 strips 3 1/2" long,
- 2 strips 4 1/2" long,
- 2 strips 5 1/2" long,
- 2 strips 6 1/2" long,
- 2 strips 7 1/2" long,
- 2 squares 1 1/2" x 1 1/2".
For the borders, out of green scraps, cut strips 1 1/2" wide and subcut them into
- 17 strips 2 1/2" long,
- 2 squares 1 1/2" x 1 1/2".
|
| Assembly of the Tree Block: |
| Note: seam allowance is 1/4", press each seam after you make it. |
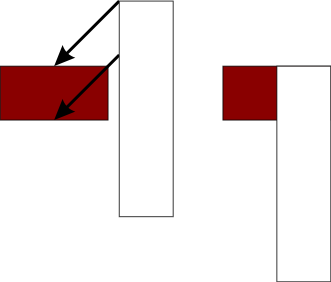
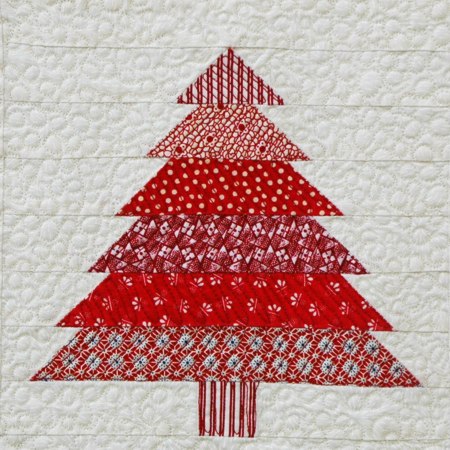
Each tree block uses either red or green fabric. These instructions are for a red tree, but the green trees are assembled the same way. Take 2 white 4 1/2" strips and a red 2 1/2" strip.
|
| Position the red rectangle on your working table, face up. Position one of the white strips, face down, perpendicular to and over the right end of the rectangle. Align the corner. (See diagram below.) |
|
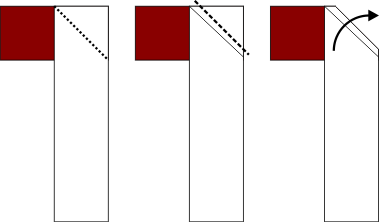
With a thin graphic pencil, draw a diagonal across the top end of the white rectangle.
Machine stitch along the diagonal.
Cut the excess fabric, leaving 1/4" seam allowance. |
|
| Unfold the fabric and press. |

|
| Repeat for the other side of the strip. |

|
In the same way, stitch:
3 1/2" red strip and two 4" white strips;
4 1/2" red strip and two 3 1/2" white strips;
5 1/2" red/green and two 3" white strips;
6 1/2" red/green and two 2 1/2" white strips;
7 1/2" red/green and two 2" white strips. |
| To make the last strip in the block, sew 4" long white strips to each end of the 1 1/2" red square. |

|
| Sew all the strips together into a block, starting with a white 8 1/2" long strip. |

|
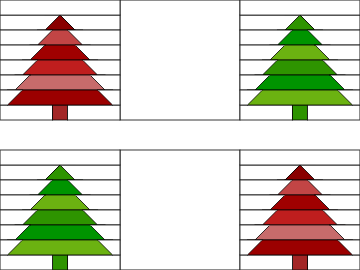
| Sew 3 red blocks and 2 green blocks (or vice versa, if you like). |
|
|
| Assembly of the Corner Blocks: |
| Two of the corner blocks feature green fabric, and two feature red fabric. We're describing how to put together red corner blocks, but they are assembled identically. |
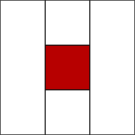
| For the first corner block, take one 1 1/2" red square and two 1 1/2" white squares. Sew them together: red square in the center, white squares on the upper and lower edges |

|
| Sew the white 1 1/2" x 3 1/2" strips to the left and right edges. |
|
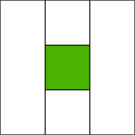
| Make another block featuring a green center. |
|
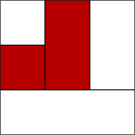
For the second corner block, sew a 1 1/2" red square to a 1 1/2" white square.
Sew a 2 1/2" red strip to the right edge. |

|
| Sew a 2 1/2" white strip to the right edge. |

|
| Sew a 3 1/2" white strip to the bottom. |
|
| Make a similar block featuring green fabric. |

|
| Assembly of the Borders: |
| Take 8 colored (red or green) 2 1/2" strips and 8 white 1 1/2" squares. Sew them into a strip: |

|
| Sew 4 such strips - 2 red and 2 green. |
| Sew white 24 1/2" strips to the long sides of each strip. |

|
| Take one red and one green border and sew the corner blocks to the ends of these 2 strips: |

|
| Assembly of the Top: |
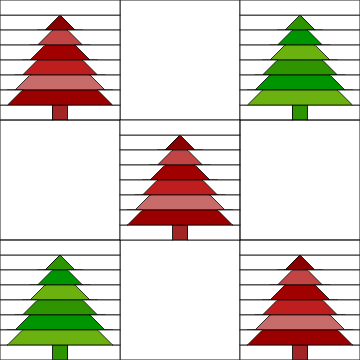
| Sew 2 tree blocks, one red and one green, respectively to the left and right edges of the white 8 1/2" x 8 1/2" square. Sew another similar row, but flip the position of the red and green blocks. |
|
| Sew two white squares to the left and right edges of the red tree square. |

|
| Sew all 3 rows together: |
|
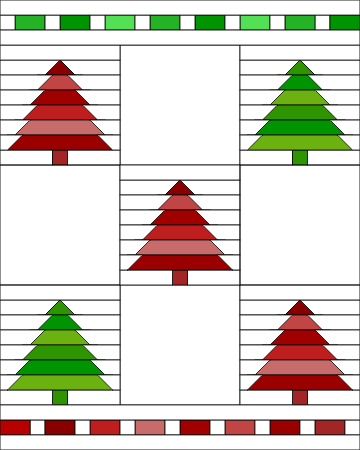
| Sew a green border to the upper edge of the top and sew a red border to the lower edge of the top. |
|
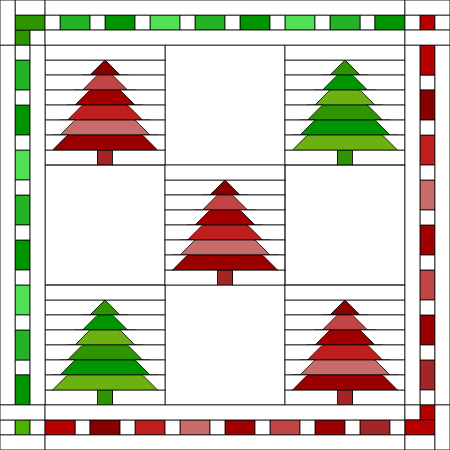
| Sew the red border with corner blocks to the right edge and the green border with corner blocks to the left edge of the top. |
|
| Embroidery: |
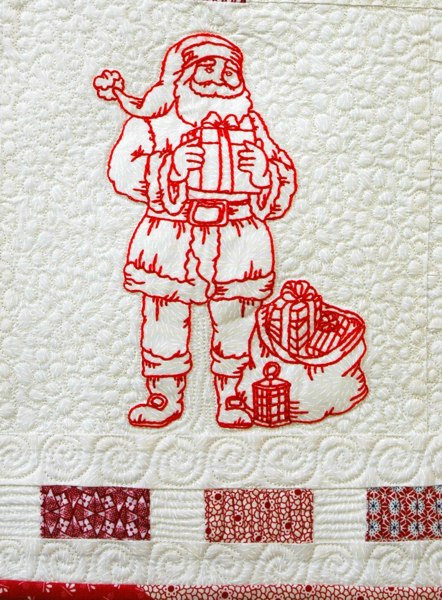
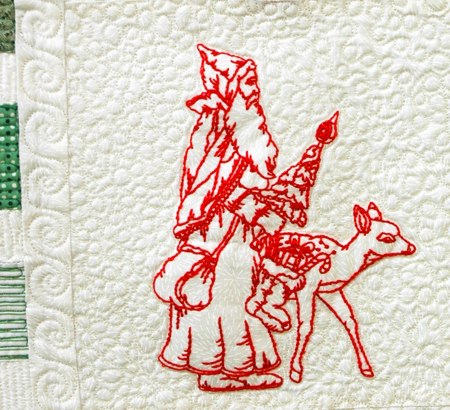
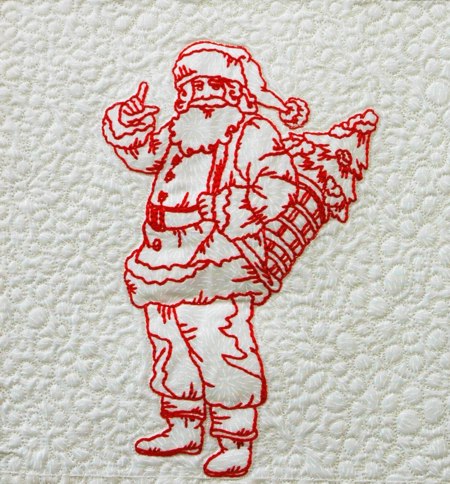
Choose any 4 Santas from the One-Color Vintage Santa Set
Upload the files into your embroidery machine.
Working with one square at a time, stabilize the white squares with light-weight stabilizer. Hoop and tighten the hoop.
Embroider the files. |
|
|
|
|
| Quilting and Finishing: |
Now place the backing on a flat surface (table) face down. Cover with batting. Spread your working piece over it.
Pin all three layers together with 1" pins and start quilting. We quilted in a freemotion style. |
|
| After the quilting is finished, press the work with heavy steam and square the work -- all corners should be 90 degrees and opposite sides should be of the same length. |
|
| Finish the raw edges with the binding. We made the binding out of the same red and green scraps that we used for the rest of the quilt, but you don't have to. |
|
| Enjoy! |
|
|
Back to One-Color Vintage Santa Set
|
Back to Projects Page
|


