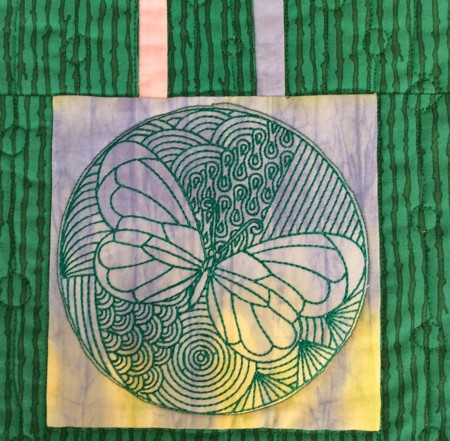
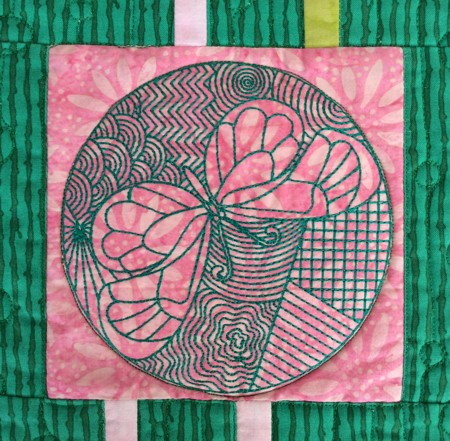
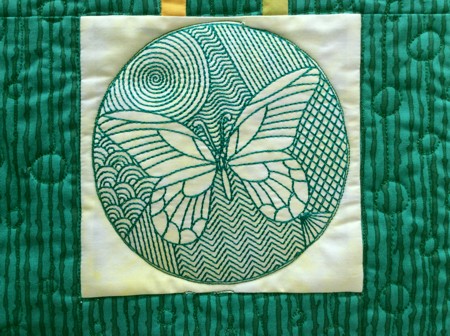
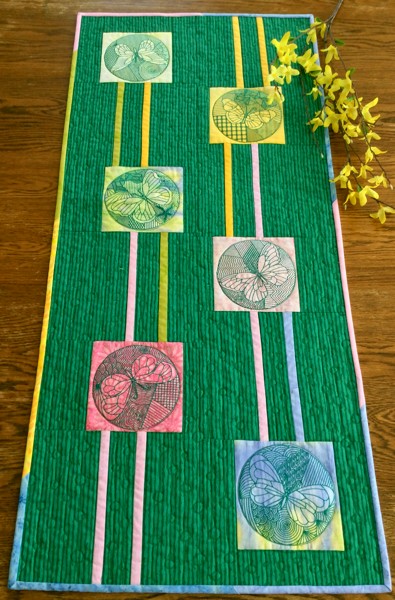
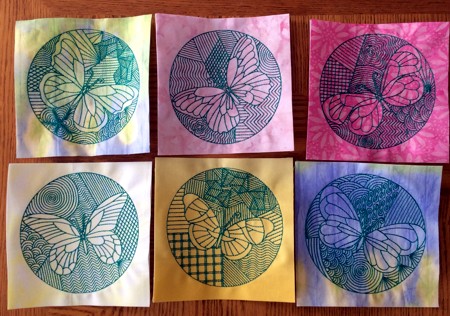
For this charming Spring-themed table runner, we used designs from the Art Deco Butterfly Set for the large size hoop (5" x 7").
The finished size of the tablerunner is about 20" x 43". If you add a hanging sleeve, you can also display this as a wall banner.
You will need :
Embroidery:
Choose any 6 files from the Art Deco Butterfly Set. Upload them into the machine and embroider them one by one on the differently colored fabrics stabilized with light-weight cut-away stabilizer.
After the embroidery is done, press the stitch-outs. Trim the stitch-outs to 6" x 6" squares. Remove the stabilizer around the embroidery.
Cutting:
Out of each of the cotton fabrics, cut:
Out of the green fabric, cut:
Also, out of the green fabric, cut:
Also, out of green fabric, cut
Still out of green fabric, cut
Assembly of the Top:
Note: Seam allowance is 1/4". Please press a seam immideately after you made it.
The top of the tablerunner consists of several blocks : A, B, C and D.
Block A:
Take 1 of each green strip from set "A" and 2 colored 1" x 8 1/2" strips. Sew them in the following order: 3 1/2" x 8 1/2" green strip - 1" x 8 1/2" colored strip - 2" x 8 1/2" green strip - 1" x 8 1/2" colored strip, 5 1/2" x 8 1/2" green strip.
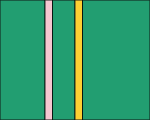
Make 4 blocks A.
Block B:
Take 1 of each green strip from set "B" and 2 colored 1" x 8 1/2" strips.
Sew them in the following order: 2 1/2" x 8 1/2" green strip - colored 1" x 8 1/2" strip - 2" x 8 1/2" green strip - 1" x 8 1/2" colored strip - 6" x 8 1/2" green strip.

Make 2 blocks B.
Block C:
Take 1 of each green strip from set "C" and a stitch-out square. Sew them together in the following order: 1 1/2" x 6" green strip - stitch-out - 4" x 6" green strip.

Make 4 blocks C.
Block D:
Take 1 of each green strips from the "D" group and a stitch-out square. Sew the 3" x 6" strip to the right edge of the stitch-out.

Sew the 3" x 8 1/2" strip to the lower edge of the working piece.
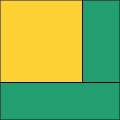
Sew the 2 1/2" x 8 1/2" strip to the left edge of the working piece.

Make 2 blocks D.
Assembly:
Sew the blocks together in 2 vertical pieces in the following order: block A - block C - block B - block C - block A - block D.
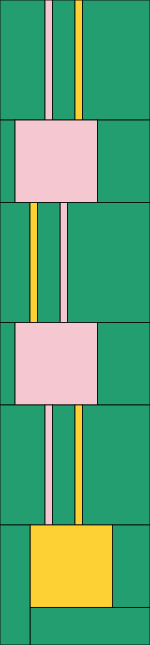
Now turn one piece upside down. Sew the two vertical pieces together.

Quilting and Finishing:
Now place the backing on a flat surface (table) face down. Cover with batting. Spread your working piece over it.
Pin all layers together with 1" pins and start quilting. We quilted all over the piece in a free-motion style.
After the quilting is finished, press the work with heavy steam and square the work -- all corners should be 90 degrees and opposite sides should be of the same length.
Sew the colored 2 1/2" strips together into a binding strip. Finish the raw edges with the binding.

Enjoy!