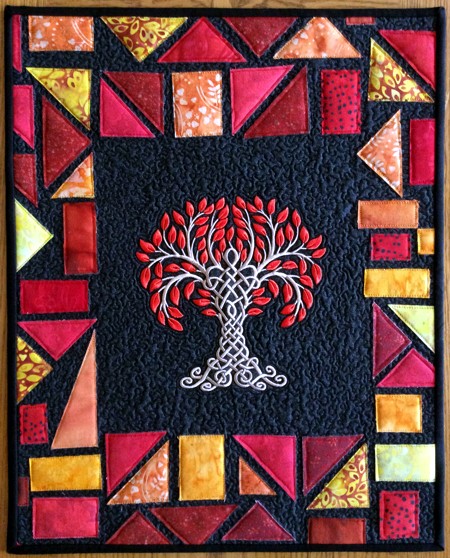
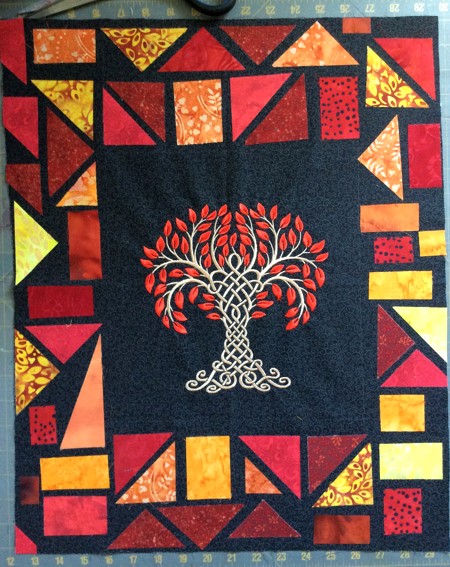
This super easy project needs minimal quilting skills! We used the design Celtic Tree of Life III for the commercial size hoop (8" x 12"). The design is also available for the large (5" x 7"), and mega (6" x 10") hoop. You can use any size.
The finished size of the quilt is about 17" x 21".
|
|
You will need :
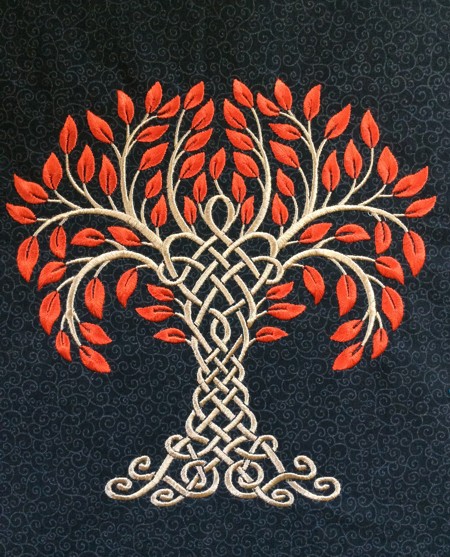
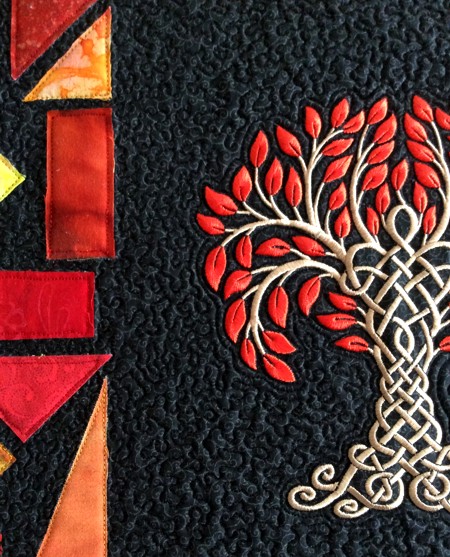
- embroidery thread, either rayon or polyester; the color is up to you. We picked red for the leaves and a light beige for the trunk
- medium-weight iron-on cut-away stabilizer,
- a fat quarter (piece of 18" x 22") of black quilt cotton fabric,
- black binding,
- scraps of bright fabrics from your stash,
- Steam-A-Seam2 double stick fusible web, or similar product,
- #14 quilting needles,
- quilting threads of matching colors,
- rotary cutter,
- quilter's ruler,
- scissors,
- batting,
- backing,
- iron.
|
Embroidery:
|
Stabilize the center of the black piece of fabric with medium-weight iron-on cut-away stabilizer. Hoop it tightly.
Choose threads. The first color of the design is for the leaves, the second one is for the tree trunk.
Upload the embroidery file of the Celtic Tree into the machine and embroider it.
|
After the embroidery is done, press the stitch-out and the fabric around it.
|
|
|
Making the Quilt Top:
|
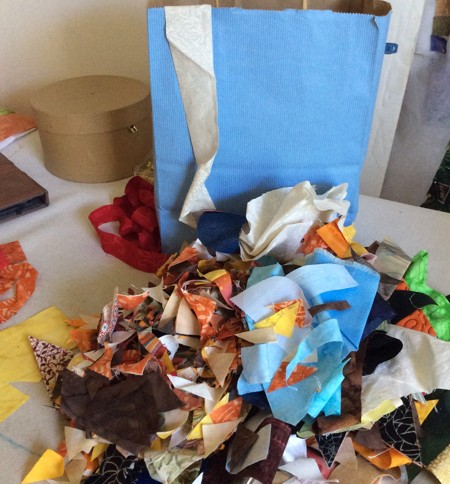
In my workshop, I keep a bag full of scraps that are usually too small to be useful. This time, they came in handy!
|
|
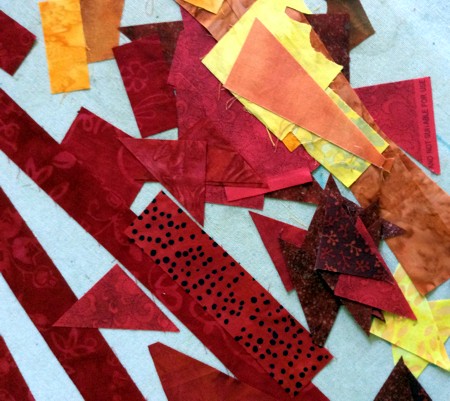
| Since my stitch-out is in red and beige, I selected red, orange, yellow and brown scraps to match the colors of the embroidery. I selected triangles, squares and rectangles of different sizes. |
|
| Arrange the scraps around the stitch-out. Feel free to play around until you have an arrangement you like. When you are satisfied with the layout, take the fusible web and use it to attach the shapes to the base fabric one by one. This is much faster than piecing, and works great for an art quilt like this one! |
|
| Following the manufacturer's instructions, press the shapes with hot iron to adhere them to the base fabric. |
| Quilting and Finishing: |
Now place the backing on a flat surface (table) face down. Cover with batting. Spread your working piece over it.
Pin all layers together with 1" pins and start quilting. We quilted with a free motion stippling pattern around the embroidery and all the black parts. Then we quilted along the edges of our fabric shapes. |
|
| After the quilting is finished, press the work with heavy steam and square the work -- all corners should be 90 degrees and opposite sides should be of the same length. |
| Finish the raw edges with the binding. |
|
| Enjoy! |
|
|
Back to Celtic Tree
|
Back to Projects Page
|


