Mobile Menu IconMenu
Advanced Embroidery Designs -- Online Center for Machine Embroidery Designs
Enter code ArborDay24 to get Crescent Moon Tree FREE with Any Order! Shop Now!

Halloween Tree

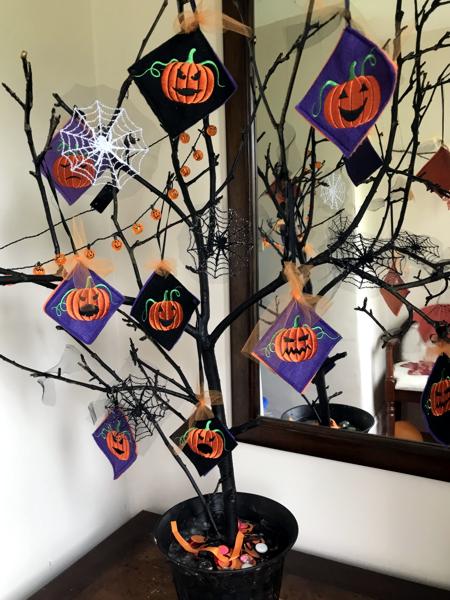
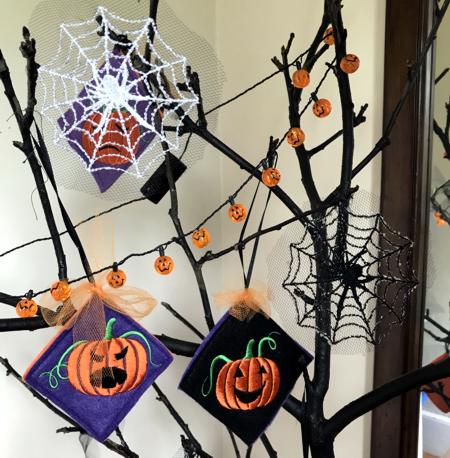
We put up a Christmas Tree every year, so why not a Halloween Tree for a change? This is a great project to put together with your kids.

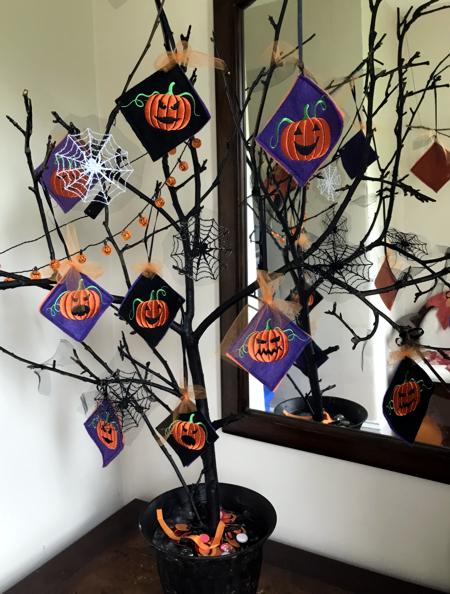
To make ornaments for the tree, we used the designs from the Jack-O-Lantern Set and Spider.

Halloween Tree ornaments image 1

You will need:

For the ornaments:

  • embroidery thread,
  • polyester craft felt (black and/or purple),
  • tear-away stabilizer,
  • narrow satin ribbon for the loops,
  • black or white tulle,
  • wash-away stabilizer,
  • rotary cutter or scissors,
  • quilter's ruler.
For the tree:
  • a tree branch,
  • black acrylic paint,
  • medium-size flower pot,
  • plaster of Paris (1 pack),
  • some pebbles,
  • a dropcloth or some newspapers to protect your working space

Emboidery:

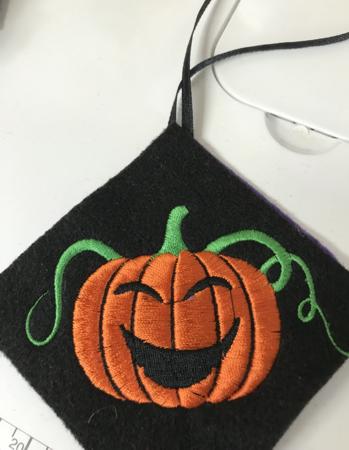
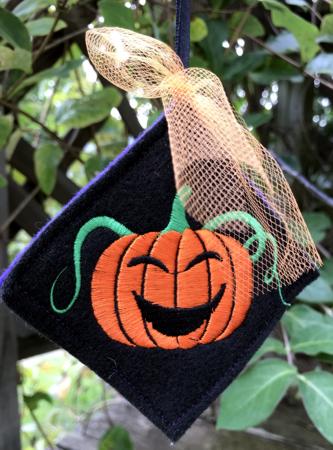
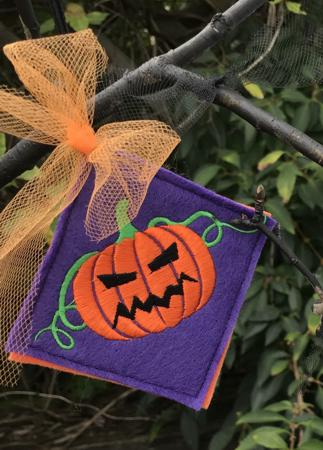
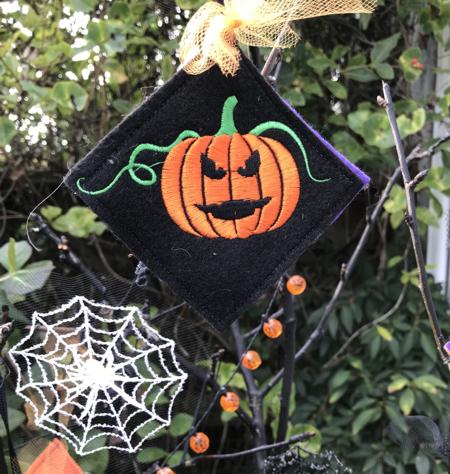
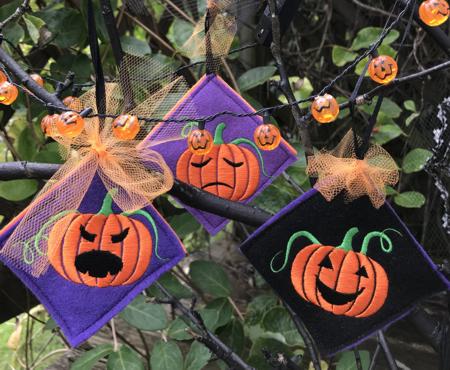
On black and purple felt embroider the small designs from the Jack-O-Lantern Set. Stitch the designs as many times as you like.

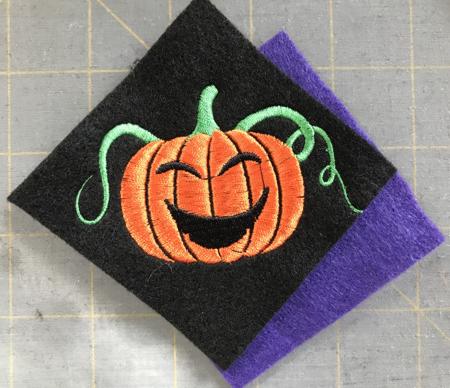
After you are done, trim the embroidered fabric to diamond shapes.

Halloween Tree ornaments image 2

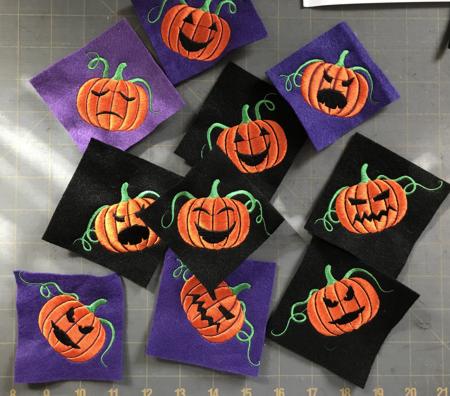
Out of felt scraps, cut the backings.

Halloween Tree ornaments image 3

Halloween Tree ornaments image 4

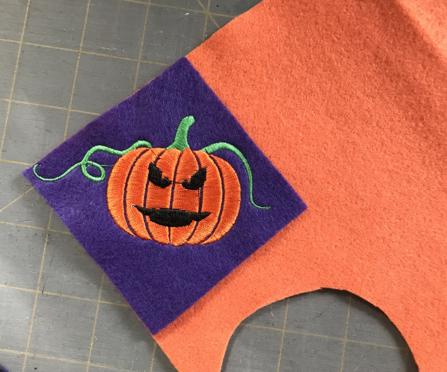
Cut the ribbon into pieces 10-12" long, fold them in half. Position the ends onto a corner of a backing diamond. Cover the backing with the embroidered piece.

Halloween Tree ornaments image 5

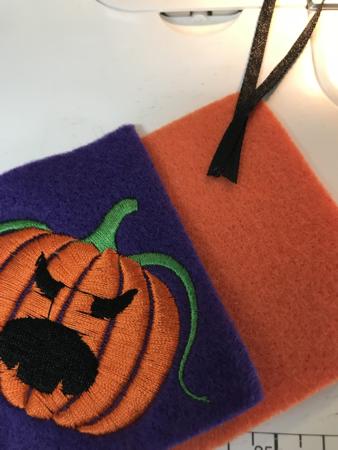
On your sewing machine stitch along the edges.

Halloween Tree ornaments image 6

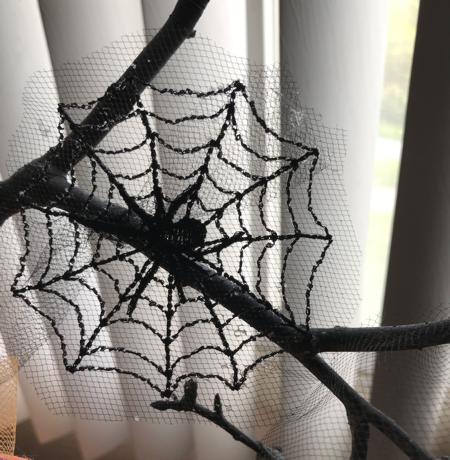
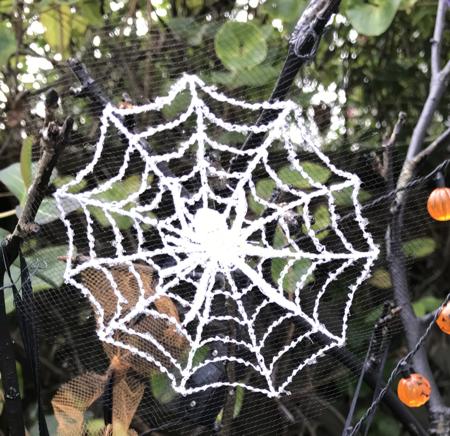
For the Spider ornament, hoop a piece of tulle with the wash-away stabilizer.

Please note that both the tulle and stabilizer are very thin. The hoop may not hold them tightly enough. We recommend to wrap the long sides of the lower frame with strips of muslin and pin the tulle ahd stabilizer to the wrapped sides.

Embroider the spider design. Wash away the stabilizer.

Halloween Tree ornaments image 7

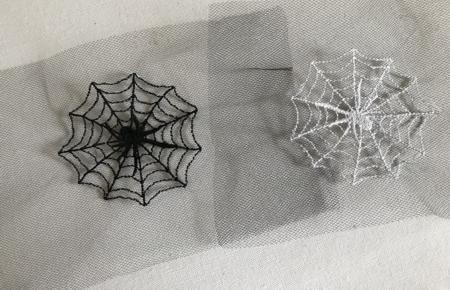
Cut out the stitch-outs leaving about 1/2" around the stitches. The tulle will cling to the branches, so we didn't use a hanging loop. However, if you feel like you need a hanger, some fine wire will do the trick.

Halloween Tree ornaments image 8

Halloween Tree ornaments image 9

Making the Tree:

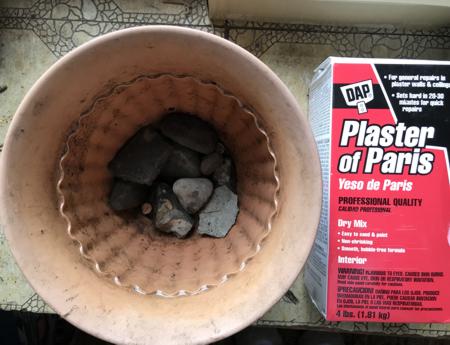
Do this part of the work outside. Place the pebbles into the flower pot. Following the manufacturer's instructions, mix the plaster of Paris with water and pour it into the pot.

Halloween Tree ornaments image 10

Insert the branch into the pot and hiold it for about 5 minutes until the plaster begins to dry. Leave to dry completely for 30-40 minutes.

After the plaster dries, the tree is ready to be painted.

Halloween Tree ornaments image 11

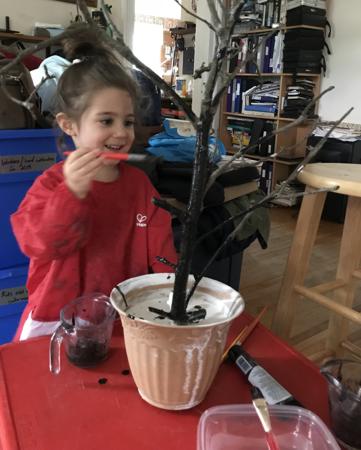
Paint the branches, the pot and the plaster. Leave to dry.

Decorate the tree with the ornaments:

Halloween Tree ornaments image 12

Halloween Tree ornaments image 13

Halloween Tree ornaments image 14

Halloween Tree ornaments image 15

Halloween Tree ornaments image 16

Halloween Tree ornaments image 17

Enjoy!

Back to Jack-O-Lantern Set and Spider.

Back to Projects Page

Mailing List
Enter your e-mail for news, discounts and exclusive special offers.


Find us on Twitter

Special Offers
Bonus design on all orders over $25
Coffee Coasters In-the-Hoop

Shop Now!

Announcement
Best Project Contest
The results are in!
Featured Project
Check out our latest project Birds and Blooms Quilted Tablerunner
Tutorials
Never heard of photo stitch? - Check out our What is Photo Stitch? page
Most Popular Designs
|| Home || Shop || Free Designs || New Designs ||
|| Projects || Tutorials || Links || About Us || Contact Us ||
|| Store Policy || Licensing || Accessibility ||

Social Media:

Copyright © Advanced Embroidery Designs. All Rights Reserved.