Mobile Menu IconMenu
Advanced Embroidery Designs -- Online Center for Machine Embroidery Designs
Enter code ArborDay24 to get Crescent Moon Tree FREE with Any Order! Shop Now!

Quilted-in-the-Hoop Fall Leaf Coasters

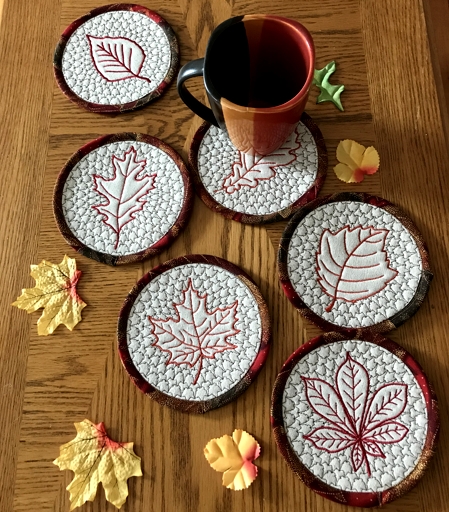
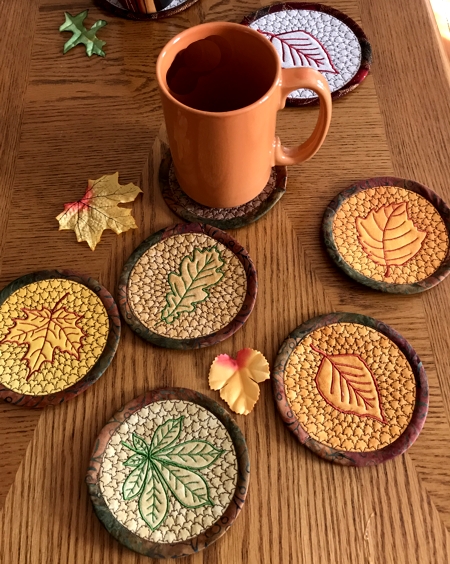
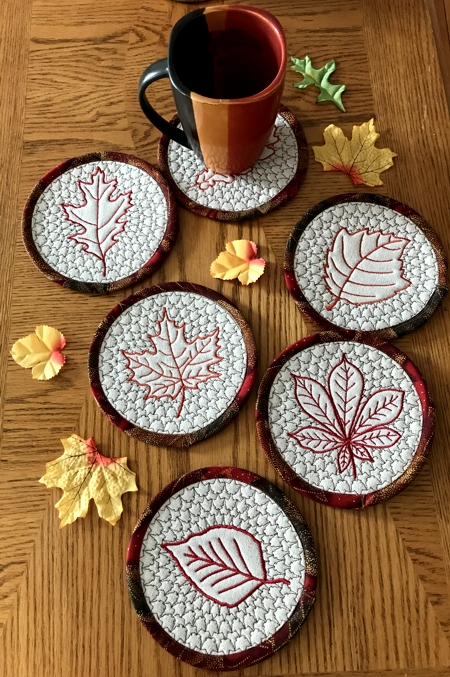
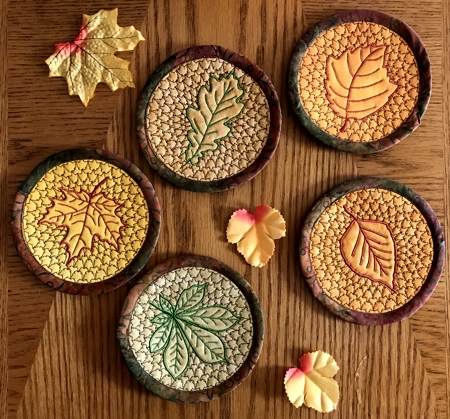
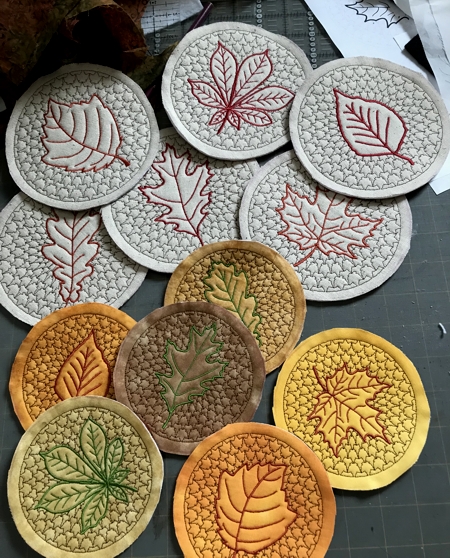
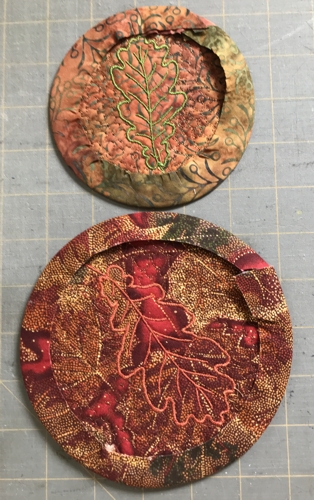
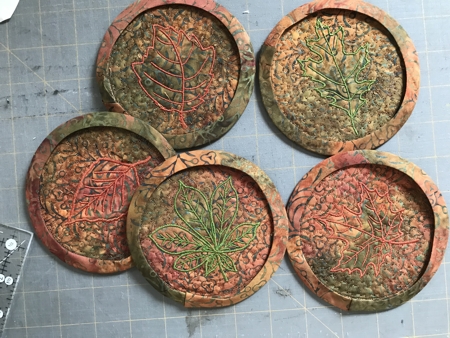
For these charming Fall coasters, the quilting is done for you by your embroidery machine! All you have to do is cut them out and finish the edges.

These are instructions on how to embroider and finish the designs from the Quilted-in-the-Hoop Fall Leaf Coasters. The sets are available for large (5" x 7") and small (4" x 4") hoops. The process for making them is the same.

Quilted in the Hoop Coasters image 1


You will need :

  • polyester embroidery threads, colors of your choice,
  • fabric for the embroidery,
  • polyester craft felt, which will serve as a stabilizer and batting,
  • fabric for the backing,
  • bias tape or fabric for the bias tape,
  • colored pencil or fabric marker,
  • scissors or rotary cutter,
  • sewing pins,
  • iron.

Embroidery:

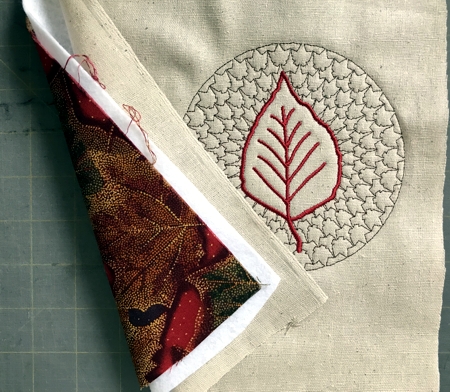
Out of top fabric, felt and backing, make a quilt sandwich: backing, right side down, then felt, then the top fabric, right side up. Hoop it tightly.

Upload one of the files from the Quilted-in-the-Hoop Fall Leaf Coaster Set into the machine and embroider it.

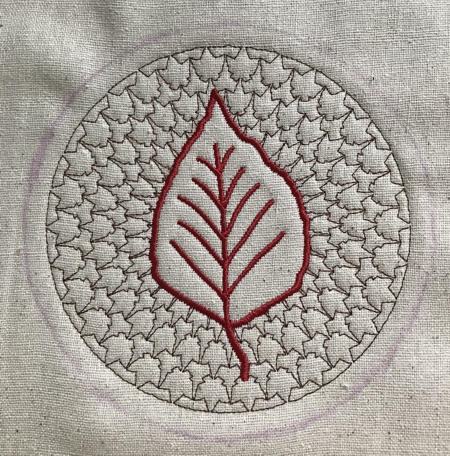
Take the stitch-out from the hoop and press.

Quilted in the Hoop Coasters image 2

Cutting out the Coaster:

Using a colored pencil or a fabric marker, draw a circumference around the stitch-out with 1/4" allowance.

Quilted in the Hoop Coasters image 3

Using either sharp scissors or rotary cutter, cut along the line.

Quilted in the Hoop Coasters image 4

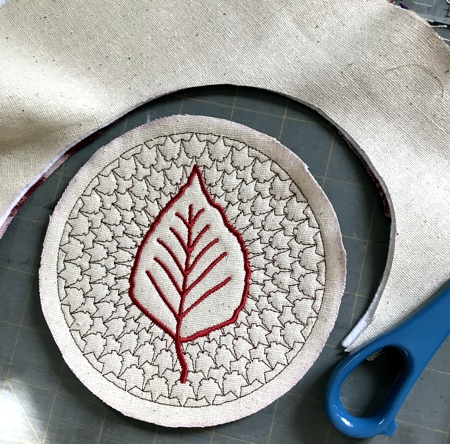
Your stitch-out is ready to be finished.

Quilted in the Hoop Coasters image 5

Preparing Bias Tape:

We used the same fabric for the backing and bias tape. Cut the bias 1.5" wide.

You can also use a ready-made bias.

It's very important to use bias binding! Regular binding will not work on a circular piece!

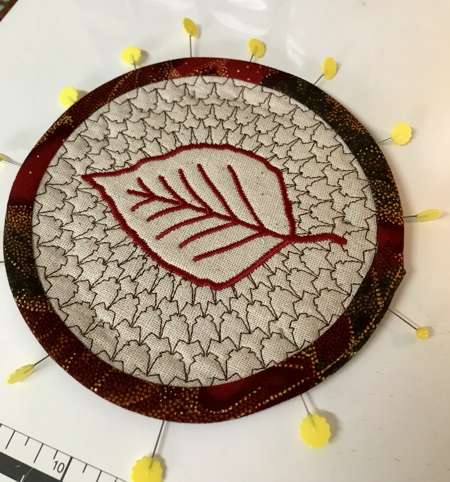
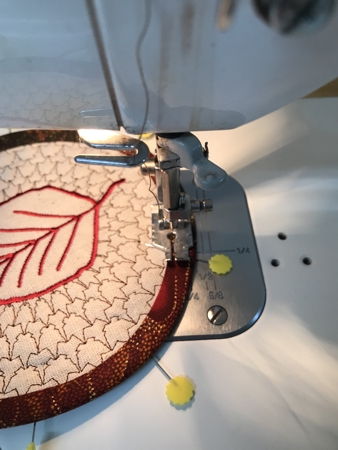
Pin the bias tape along the edges of the coaster.

Quilted in the Hoop Coasters image 6

Quilted in the Hoop Coasters image 7

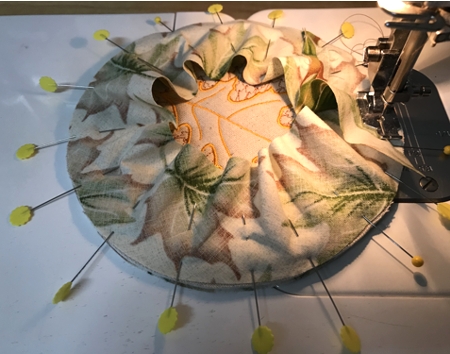
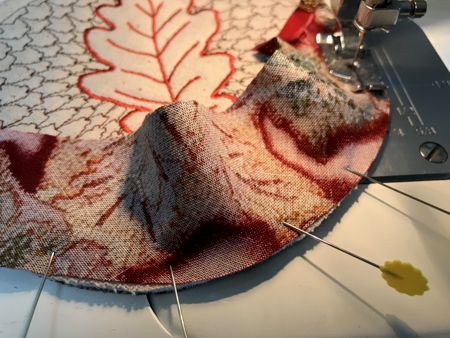
On your sewing machine, stitch along the edge qith 1/4" seam allowence. Use a 1mm stitch setting and work slowly to avoid stitching through the pleats.

Quilted in the Hoop Coasters image 8

Quilted in the Hoop Coasters image 9

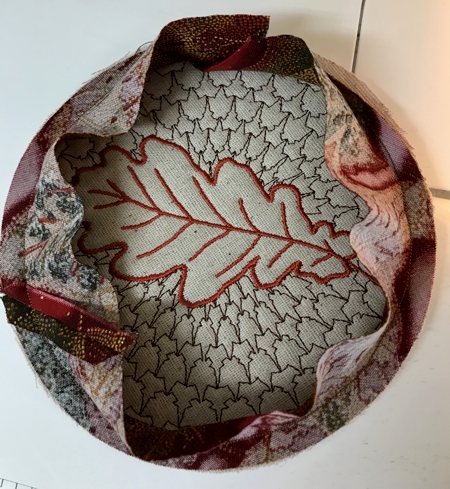
Fold the the binding onto the back of the coaster and press.

Quilted in the Hoop Coasters image 10

Turn the raw edge of the binding 1/4" under the binding and press again.

Quilted in the Hoop Coasters image 11

Quilted in the Hoop Coasters image 12

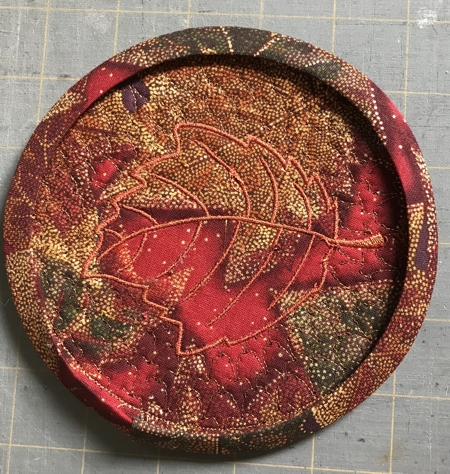
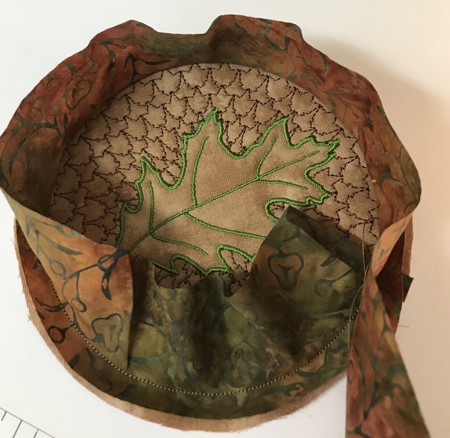
Pin the folded edge of the binding in place.

Quilted in the Hoop Coasters image 13

Turn it right side up.

Quilted in the Hoop Coasters image 14

Working from the right side, using 1 mm stitch, topstitch along the inner edge of the binding, close to the inner edge. Stay on the binding fabric. Gradually remove the pins while stitching.

Quilted in the Hoop Coasters image 15

Your coasters are ready. Enjoy!

Quilted in the Hoop Coasters image 16

Quilted in the Hoop Coasters image 17

Quilted in the Hoop Coasters image 18

Quilted in the Hoop Coasters image 19

Quilted in the Hoop Coasters image 20


Back to Quilted in the Hoop Fall Leaf Coasters

Back to Projects Page

Mailing List
Enter your e-mail for news, discounts and exclusive special offers.


Find us on Twitter

Special Offers
Bonus design on all orders over $25
Coffee Coasters In-the-Hoop

Shop Now!

Announcement
Best Project Contest
The results are in!
Featured Project
Check out our latest project Birds and Blooms Quilted Tablerunner
Tutorials
Never heard of photo stitch? - Check out our What is Photo Stitch? page
Most Popular Designs
|| Home || Shop || Free Designs || New Designs ||
|| Projects || Tutorials || Links || About Us || Contact Us ||
|| Store Policy || Licensing || Accessibility ||

Social Media:

Copyright © Advanced Embroidery Designs. All Rights Reserved.