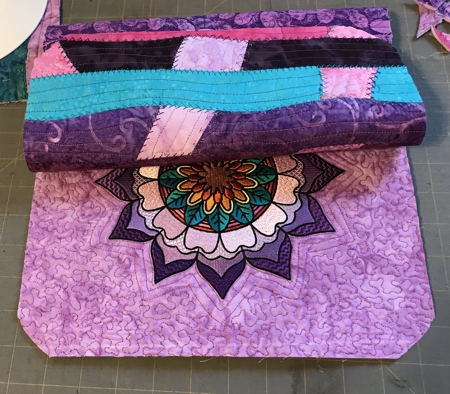
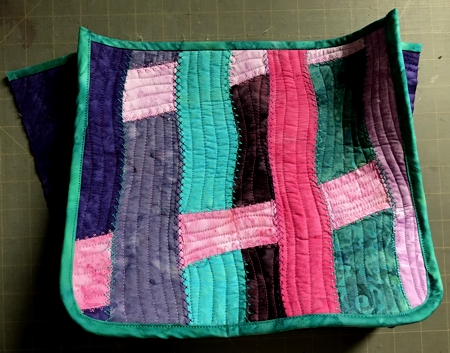
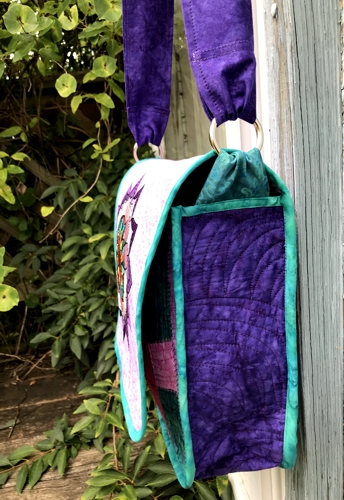
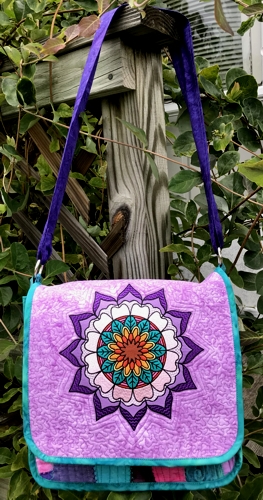
This stylish shoulder bag is fun to piece and sew.
It features the design Mandala Flower for the commercial size hoop (8" x 12").
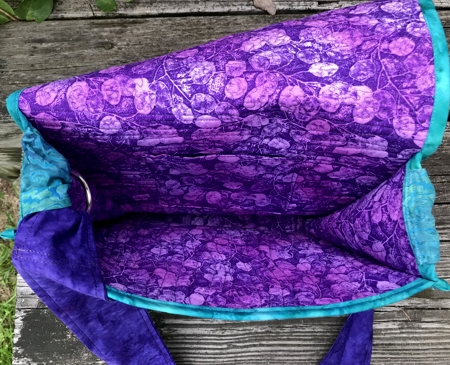
The finished size of the bag is about 12" wide x 4" deep x 11" high.
|
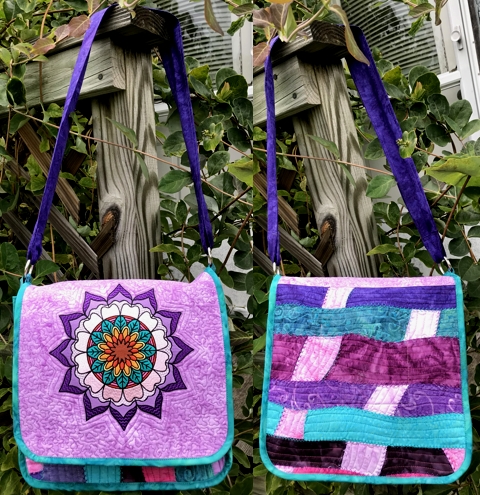
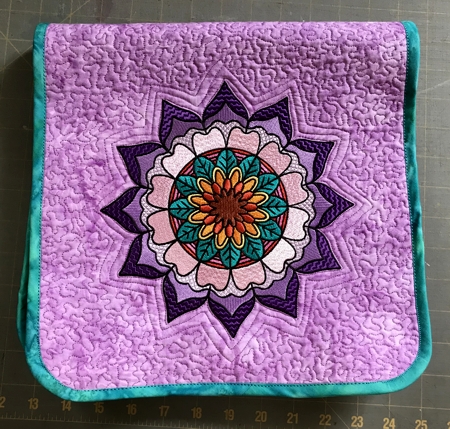
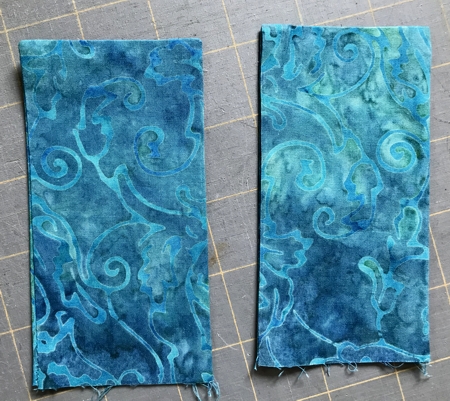
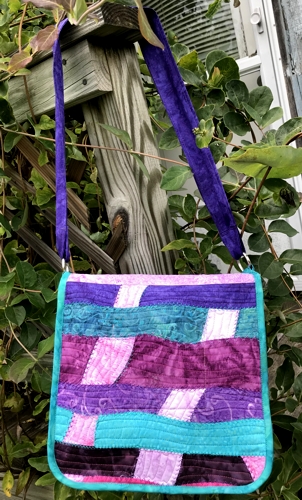
The front and back of the purse
|
|
You will need :
- embroidery threads according to the color card of the design,
- light-weight iron-on sewing interfacing,
- EITHER medium-weight iron-on cut-away embroidery stabilizer OR white polyester craft felt (the difference is explained later in the tutorial),
- 1 fat quarter of light-colored fabric for the embroidery (we used a light lilac),
- fabrics to match the colors of the embroidery; we used 9 batiks in jewel tones; you will need about 1/4 yard of 2 of them (for the side panel, handle and bias tape) and 1 fat quater or less of the rest;
- about 1/2 yard of fabric for the lining (color is not important);
- batting;
- #14 quilting needle;
- quilting threads of matching colors;
- rotary cutter;
- quilter's ruler;
- curved safety pins;
- straight pins;
- chalk pencil;
- curved blades scissors;
- #16 universal sewing needle;
- 2 rings 1 1/2" wide;
- EITHER sew-on snap, size 4, OR 2 pieces of self-adhesive Velcro tape;
- iron
|
Embroidery:
|
As a stabilizer for embroidery we recommend either medium-weight iron-on cut-away embroidery stabilizer or polyester craft felt. Using the first, will give you a regular stitch-out. Using the latter will give you more of a "puffy" trapunto effect. The decision is up to you. We used craft felt.
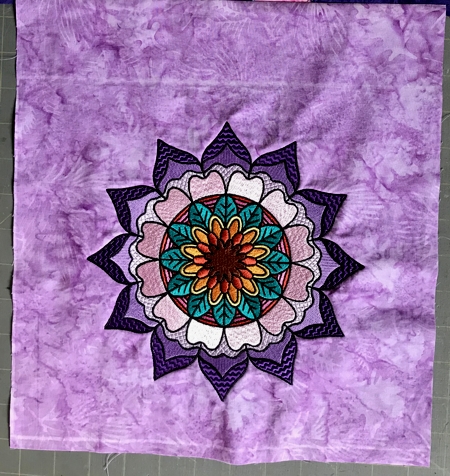
Stabilize the center of the light-colored piece of fabric. Hoop it tightly.
Print out the JPG color card and select threads according to it (not by the screen of your machine!). In this particular case, you can also choose and select your own colors for the mandala.
Upload the embroidery file of the Mandala Flower into the machine and embroider it.
|
| After the embroidery is done, press the stitch-out and the fabric around it. Trim the fabric, leaving margins of 2"-2 1/2" on the left, right and bottom, and a margin of 3 1/2" above the stitch-out. |
|
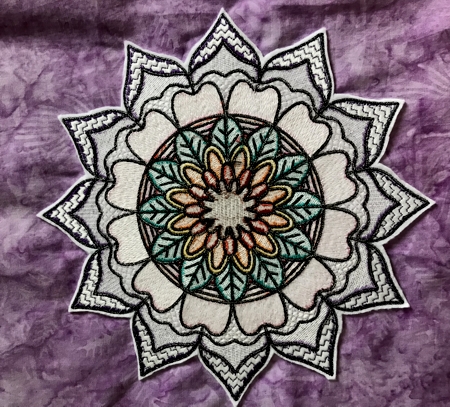
With a pair of sharp scissors, cut away the felt around the embroidery. This is what the back of the stitch-out looks like after you cut away the excess felt.
|
|
Piecing the Bag Panels:
|
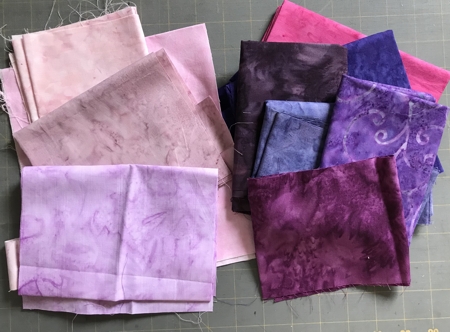
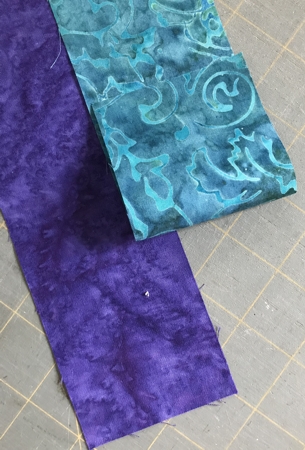
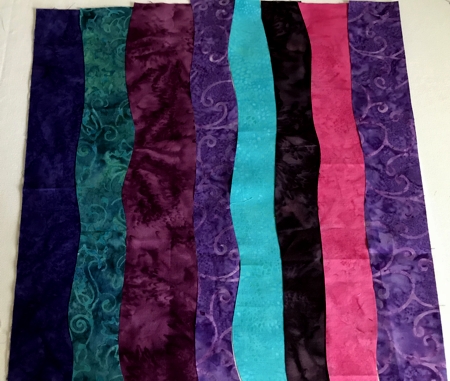
Out of your stash, select fabrics matching the colors of the embroidery.
|
|
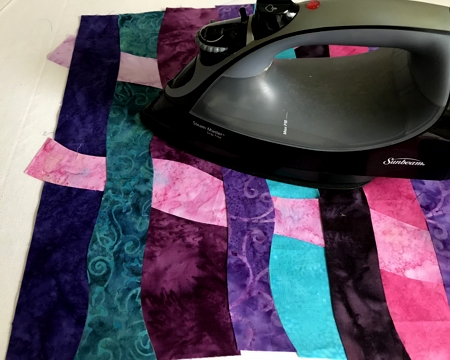
Cut strips 2"- 2 1/2" wide and 13" long. Out of light-weight iron-on interfacing, cut 2 pieces about 13" x 14". Lay the strips out in the order you want to see them on the finished piece.
|
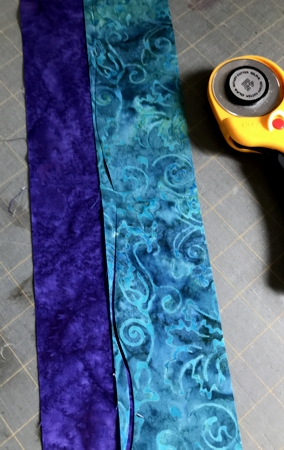
| Take the first two strips. Lay them flat on a cutting table, overlapping them about 1/2" - 1". |
|
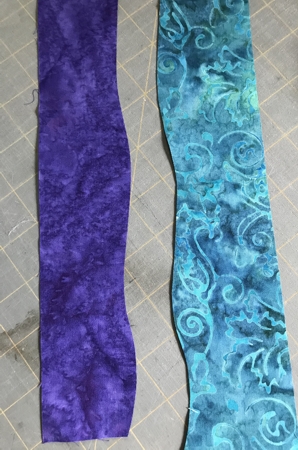
| With a rotary cutter, cut a wavy cut through overlapped fabrics. If you feel uncomfortable freehanding this, you can first draw a wavy line with a chalk pencil. |
|
|
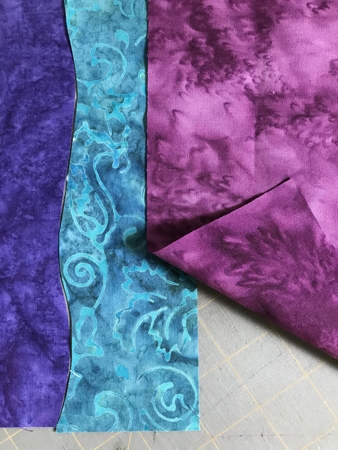
| Overlap the third strip with the second one. |
|
| Cut them as described above. |

|
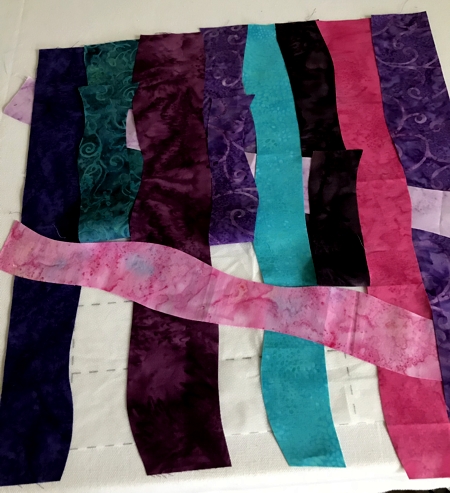
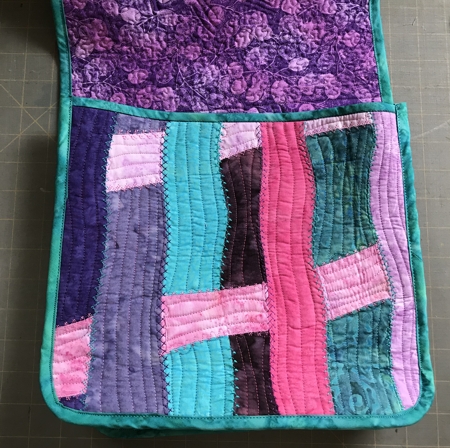
| Continue until you have a 14" wide panel of wavy strips. Lay them out on a base of iron-on intefacing, align all the edges (they should not overlap!) These are the warp strips. |
|
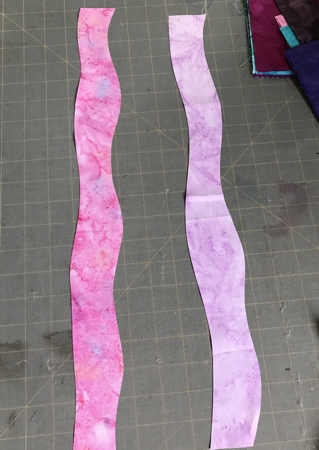
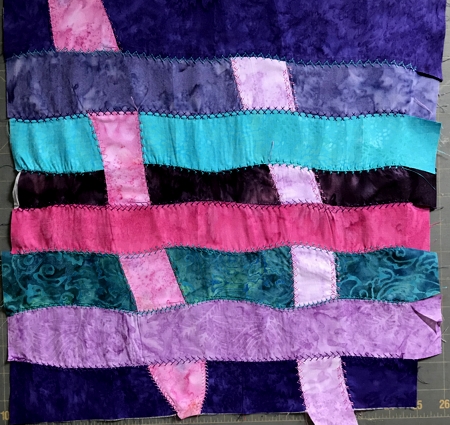
Cut 2-3 weft strips - the edges of these strips do not have to line up, so cut each strip as you like.
|
|
| Weave weft strips through the warp strips. |
|
|
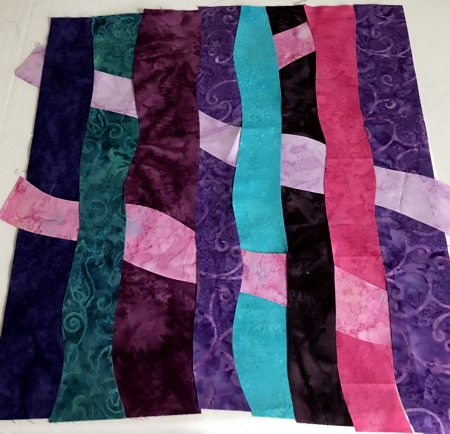
| Now press the strips to the interfacing. |
|
| Make 2 panels using both intefacing pieces. |
| On your sewing machine, add decorative stitches - machine stitch along the edges of all strips, so the stitches cover both neighboring strips. |
|
| Press again. Decide which panel will be the back panel and pick the edge you want to be the top edge. Trim this edge. |

|
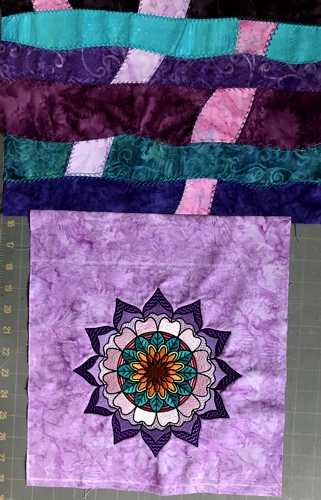
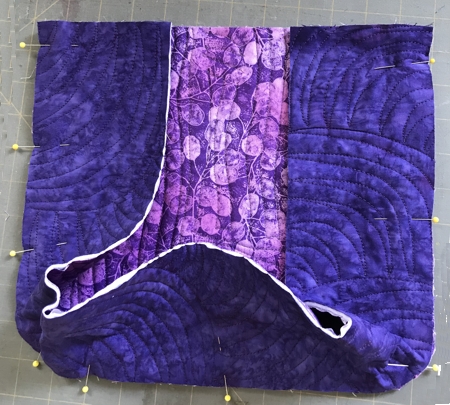
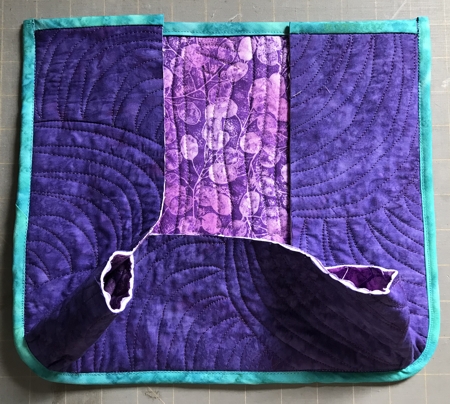
| The Back Panel and the Flap. |
| Sew the upper edge of the embroidered piece (flap) to the trimmed edge of the back panel. |
|
| Quilting |
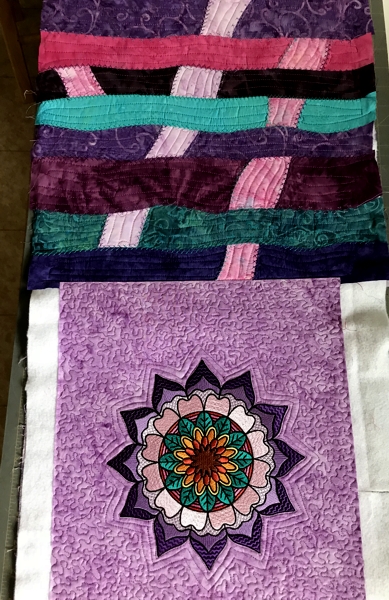
Now place the lining on a flat surface (table) face down. Cover with batting. Spread your working piece, flap with back panel, over it.
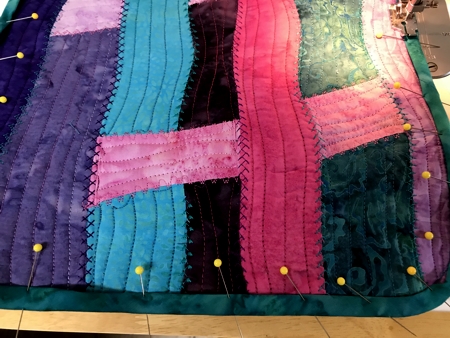
Pin all layers together with 1" pins and start quilting. We quilted around the embroidery with echo stitches, then with a stippling pattern. We quilted the strips with parallel lines in a freemotion style. |
|
| In the same way, quilt the front panel piece. First sandwich the lining, batting and "woven" top, then quilt it in a free motion style. |
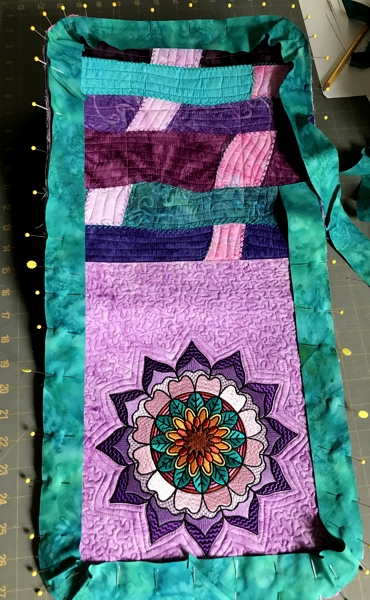
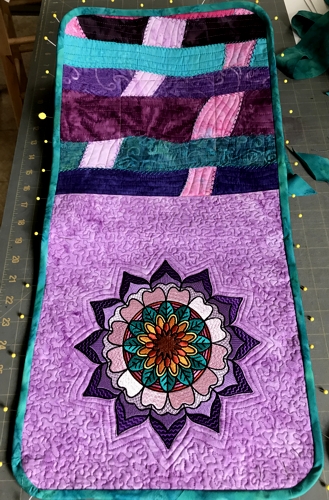
| After the quilting is done, press both pieces with steam and square them - all corners should be 90 degrees and opposite sides should be of the same length. Trim the back panel with the flap to 12" x 23" and the front panel to 12" x 10". |
| Rounding the Corners: |
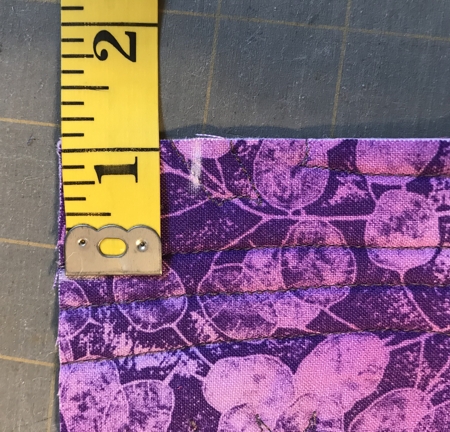
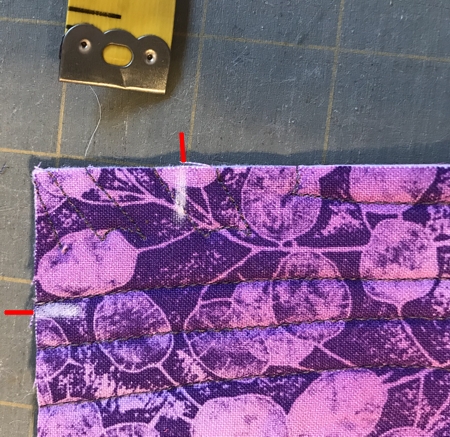
| To round the corners, measure 1" from each corner along both sides and mark with a chalk pencil. |
|
|
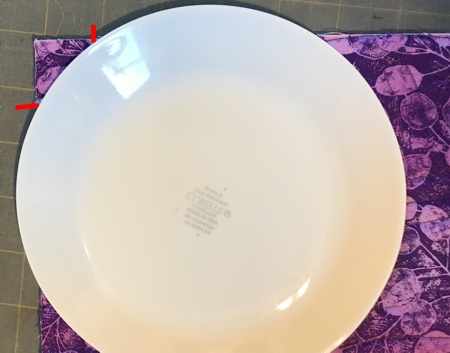
| Position a small plate over the corner so the marks match the edge of the plate. |
|
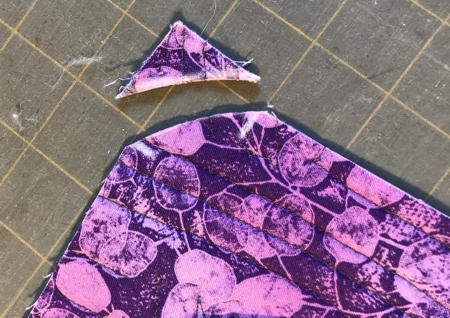
| Cut the corner away with a rotary cutter. |
|
| Repeat for all corners of the back panel and 2 lower corners of the front panel. |
|
| Pocket: |
For the pocket, out of the fabric for the lining, cut a strip 5" x 11". Fold the piece widthwise, face inside.
Stitch along the long sides, seam allowance 1/4", leaving one side open. |
|
| Turn right side out. Press. Tuck the raw edges 1/2" inside, press and topstitch. |
|
Position the pocket on the lining side of the back panel, 4" from the lower edge and equal distance from the sides. Pin.
Top-stitch the pocket in place. |

|
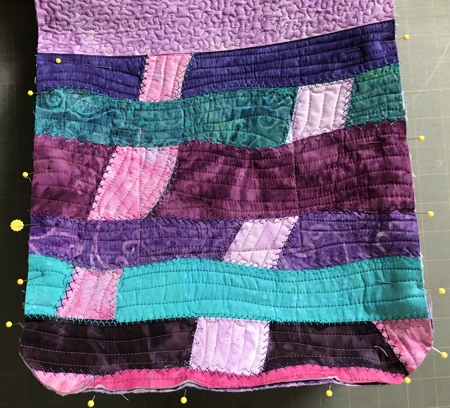
| Sides and Bottom Panel: |
| For the sides and bottom panel, out of one of the fabrics for the top, out of fabric for the lining and out of batting cut 3 strip measuring 5" x 33" each. |
| Sandwich the strips together. Quilt the strip. Press. Trim the long edges and one of the short edges. |
| With wrong sides facing, pin the side panel along the edges of the front panel. Check that they are of the same length. Trim the second short edge of the side panel. Unpin. |
|
| Cut bias tape 1 1/2" wide. |
| Finish the upper edge of the front panel and the short edges of the side panel with bias tape. It is easier to finish the edges before the panels are sewn together |
| Now pin the side panel back to the front panel. |
|
| Topstitch, seam allowance 1/4". |
|
| Pin bias tape along the edge of the side panel, right sides facing. |
|
| Topstitch, seam allowance 3/8". |
|
Fold the tape onto the front panel, tuck the raw edge inside, press, working slowly.
Fold the upper, protruding, edges of the tape and tuck them under. Pin in place. Topstitch. |
|
| The finished front panel with the side panel attached: |
|
|
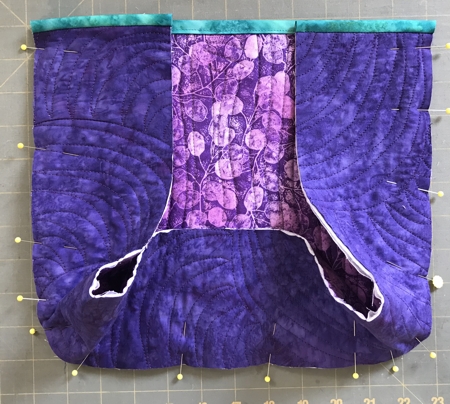
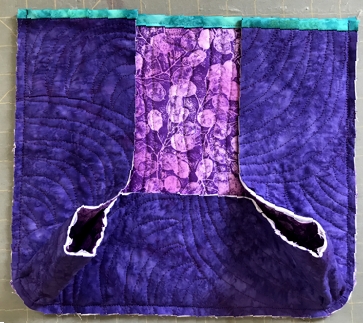
Now pin the back panel to the side panel. Align bottom and side edges.
Topstitch, seam allowance 1/4". |
|
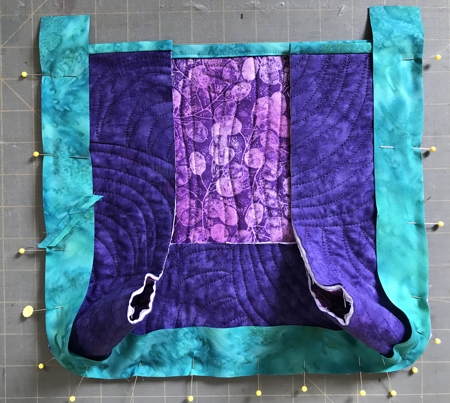
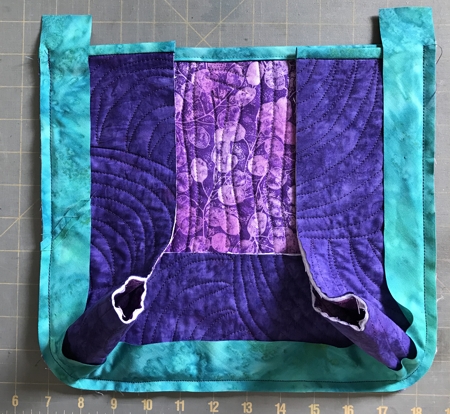
| Finish the raw edges with the bias tape. |
|
|
|
|
| Strap: |
Out of fabric, cut
- 2 strips, each 3" wide and 10" long and
- 2 strips 3" wide and length of the width of the fabric (about 42"-44").
Out of light-weight iron on interfacing, cut 1 strip 2 3/4" wide and 42"-44" long.
Fold the shorter strips widthwise, face inside. Stitch the side edges, leaving the lower side open.
Turn right side out. Press. Tuck the raw edges 1/2" inside, press. |
|
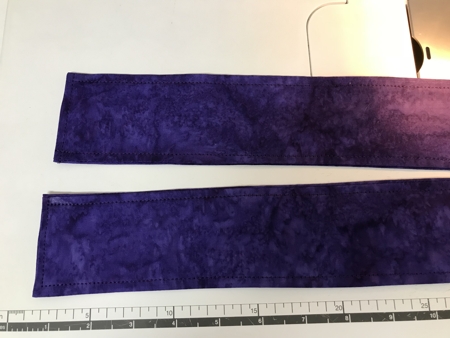
| Insert the strip into rings. Align the short ends and topstitch them together. |
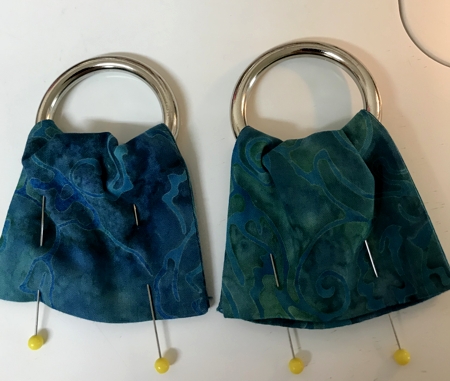
|
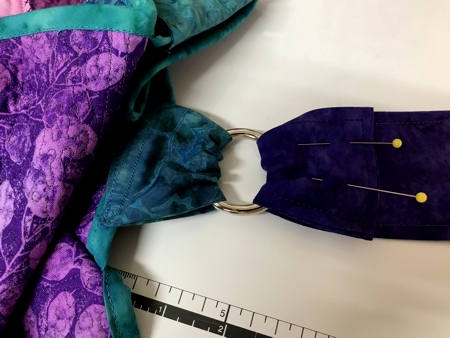
| Position each strip with the ring on the inner side of the side panel, pin. Top-stitch in place. |
|
|
Press the interfacing strip onto the wrong side of one of the long fabric strips. Pin the long fabric strips with right sides facing, align the edges.
Stitch the long sides. Seam allowance 1/4". |
|
Turn right side out. Press. Tuck in the raw edge 1/2" inside, press.
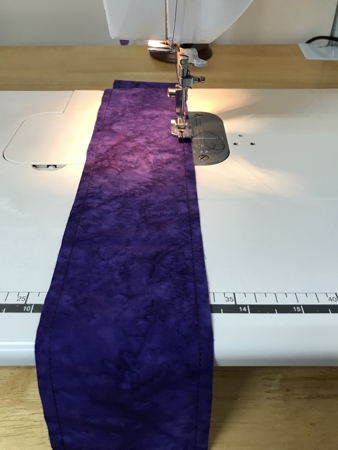
Topstitch along all edges, seam allowance 1/4". |
|
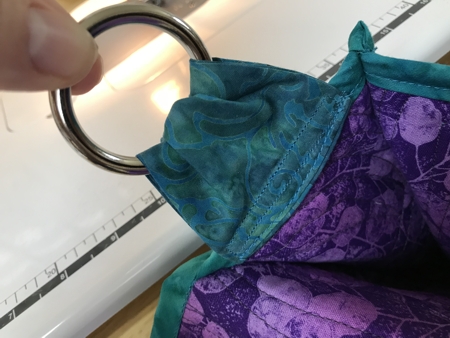
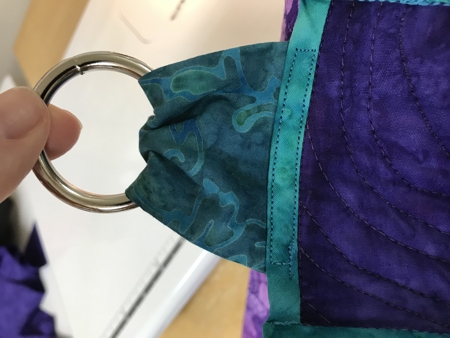
| Thread the ends of the strap into the rings and pin. Adjust the length of the strap by folding the ends back around the ring. Pin. Topstitch in place. |
|
|
| You can leave the flap as it is, or you can sew on a snap, or adhere a piece of Velcro to the flap and front panel. |

|
|
|
|
| Enjoy! |
|
|
Back to Mandala Flower
|
Back to Projects Page
|


