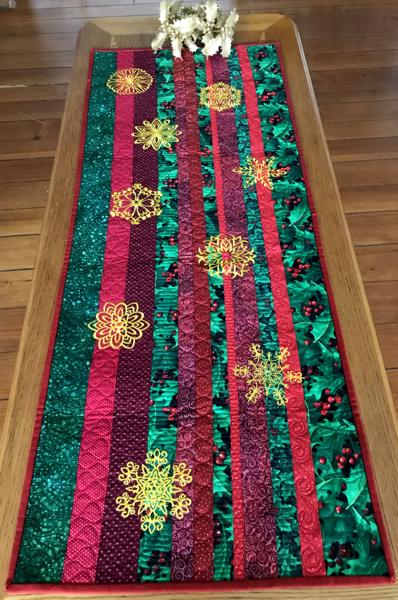
This is a super easy project! The background is pieced from scraps and the embroidery is made over the assembled top.
We used embroidery designs from the Snowflake Set for the small hoop (4" x 4").
The finished size of the table runner is about 17" x 40".
We made the table runner in Christmas colors - red, green and gold. If you want more of a winter-themed than Christmas-themed table runner, we suggest using white and blue colors.
|
|
You will need :
- embroidery threads for the embroidery,
- #12 embroidery needle (if using metallic thread, use a #12 metallic needle),
- light-weight cut-away stabilizer,
- strips of green and red fabrics of different width,
- batting and fabric for the backing,
- fabric for binding,
- #12 universal sewing and quilting needles,
- quilting threads of matching colors,
- rotary cutter,
- quilter's ruler,
- iron.
|
| Cutting: |
Make sure your scrap strips are the same length (41"-42"). The width doesn't matter. If your strips are shorter than that, sew 2-3 strips of the same color together to get the needed length.
You need enough strips to make a 18" - 19" wide top.
|
| Sewing the Top: |
| Lay out the strips in the order you want to sew them together. Be sure to alternate the colors and widths. |
| Sew the strips together, with seam allowence 1/4". Press all seams. |
Embroidery:
|
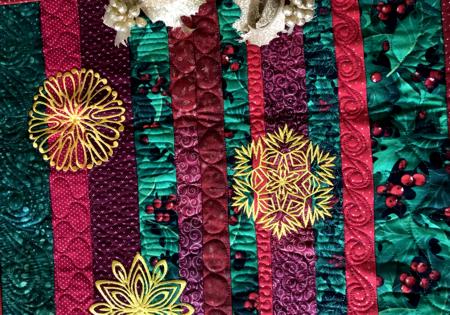
Decide where you'd like to place the snowflakes - paper templates are very helpful for this. Use light-weight cut-away stabilizer. Hoop the frame tightly.
Upload the embroidery files from the Snowflake Set into the machine and embroider them one by one. Cut away the excess stabilizer after each design.
|
|
|
| Quilting and Finishing: |
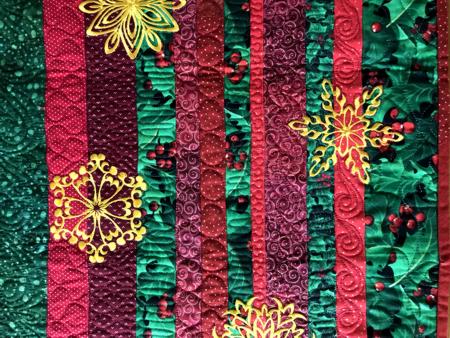
Now place the backing on a flat surface (table) face down. Cover with batting. Spread your working piece over it.
Pin all layers together with 1" pins and start quilting. We quilted each stripe in a free motion style with threads of matching colors.
|
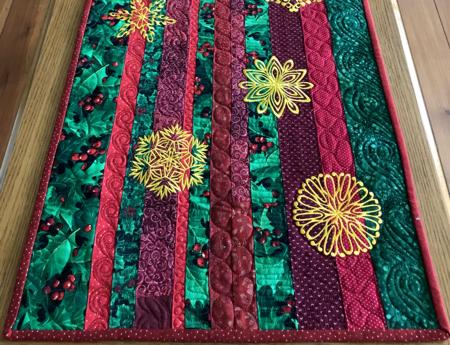
| After the quilting is finished, press the work with heavy steam and square the work -- all corners should be 90 degrees and opposite sides should be of the same length if you are up to classic look. Alternatively, you can make the sides of different lengths to give it a more casual look. |
| Finish the raw edges with the binding. |
| Enjoy! |
|
|
|
Back to Snowflake Set
|
Back to Projects Page
|


