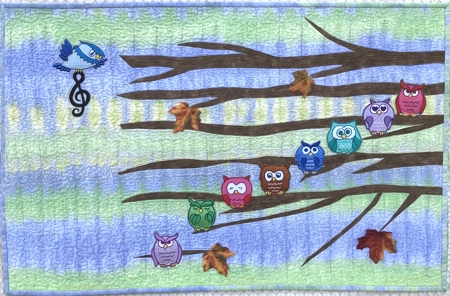
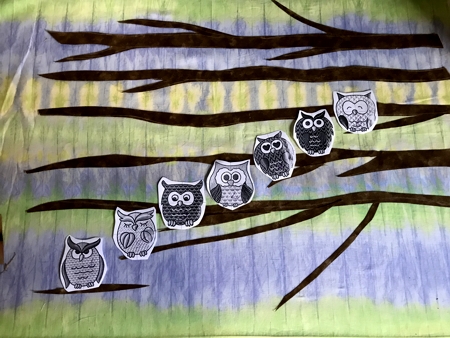
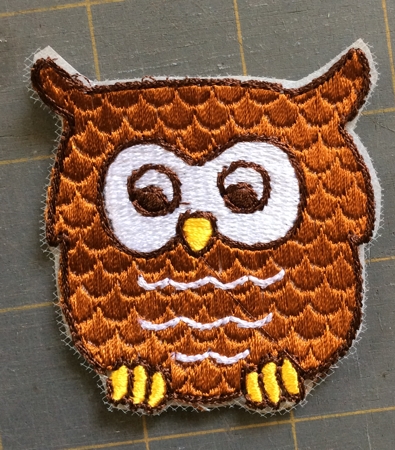
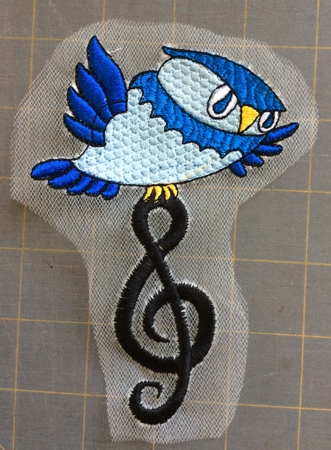
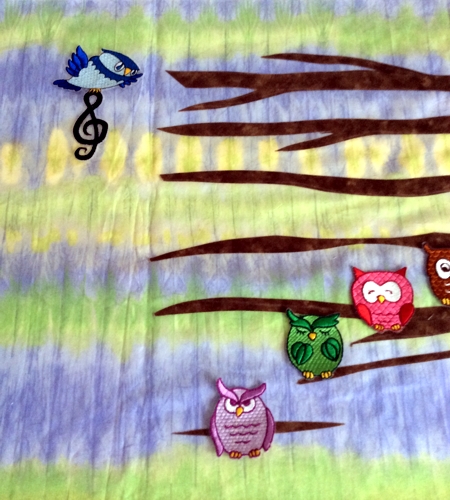
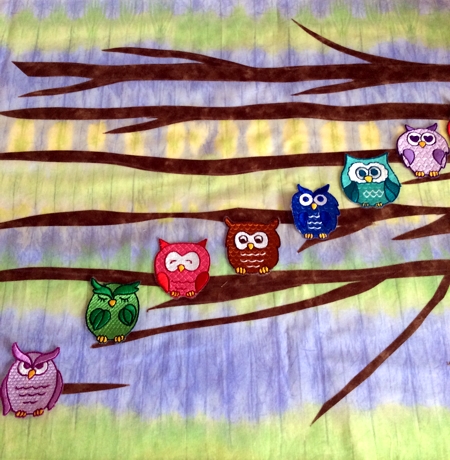
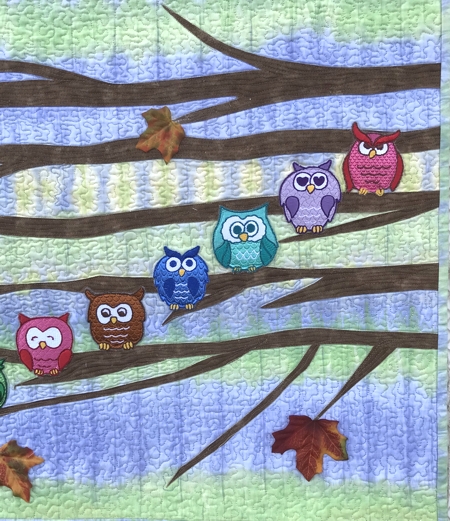
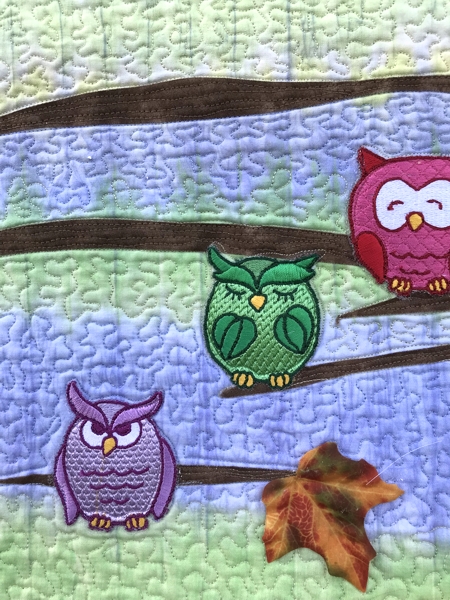
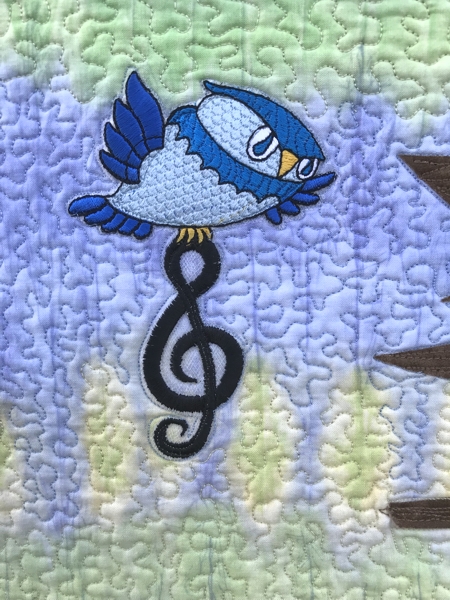
This whimsical art quilt features 8 owls representing musical notes, arranged on a five-line staff of branches. A ninth owl carries a treble clef on the left. The quilt uses designs from the Cute Owl Set for the small hoop (4" x 4") and Owl with Treble Clef for the large hoop (5" x 7").
We arranged our notes in a simple scale starting and ending at "do". Another idea is to arrange them into a tune that you are familiar with.
This quilt is super-easy to put together, and doesn't require any traditional quilt piecing!
The finished size of the quilt is about 31" x 20", but you can make it larger or smaller.
|
Click to enlarge
|
|
You will need :
- embroidery threads according to the color card of the designs; since the designs are in the satin-stitch technique, you can choose your own colors,
- light-weight tear-away stabilizer,
- a spool of light-colored tulle fabric,
- a piece of quilting cotton fabric measuring not less than 30" x 20" for the background of the scene; we used a fabric featuring lines of green, blue and cream
- 1 fat quarter of brown fabric for the tree branches,
- Steam-A-Seam2 double stick fusible web, or similar product,
- batting,
- backing,
- binding,
- #14 quilting needles,
- quilting threads of matching colors,
- rotary cutter,
- quilter's ruler,
- a chalk pencil,
- scissors,
- construction paper,
- a pencil,
- iron,
- small silk leaves (optional)
|
| Preparing the Templates: |
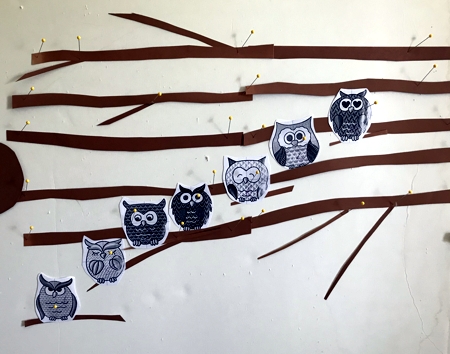
Print out templates of the designs. If you do not have a printer, out of paper, cut out 8 rectangles the size of the designs - 2" x 2 1/2", and one rectangle measuring 4" x 5 1/2".
Out of construction paper, cut out strips imitating branches. Lay everything out on your working table or designer wall. |
|
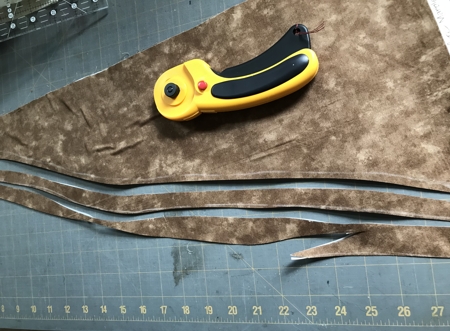
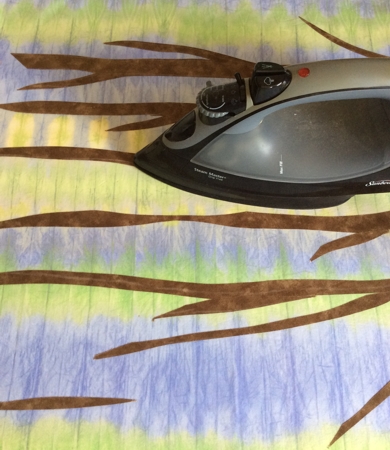
Take 1-2 sheets of Steam-a-Seam2 fusible web. Remove the protective paper from one of the sides. Spread the brown fat quarter over the web. DO NOT press with an iron yet!
If you like your branches, copy the templates using a chalk pencil to the brown fat quarter mounted on the web.
Using a rotary cutter, cut out the branches. |
|
| Remove the protective paper from the back of the branches and position them on the background. Using the owl templates check the layout of the branches and re-arrange if needed. |
|
| When you are satisfied with the arrangement, press the branches in place. The web will melt and permanently adhere the branches to the background fabric. |
|
Embroidery:
|
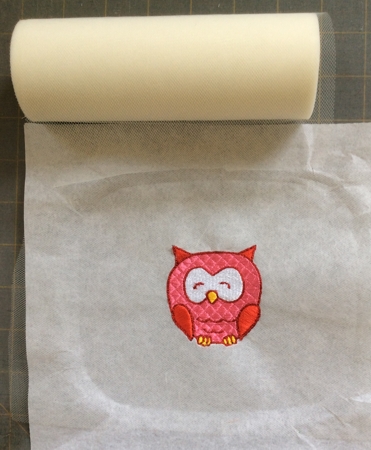
For the embroidery, we used tulle and tear-away stabilizer. Stabilize a piece of tulle with light-weight tear-away stabilizer. Hoop it tightly.
Print out the color card, select threads by the color card, (not by the screen of your machine!). You can also choose your own colors, if you wish.
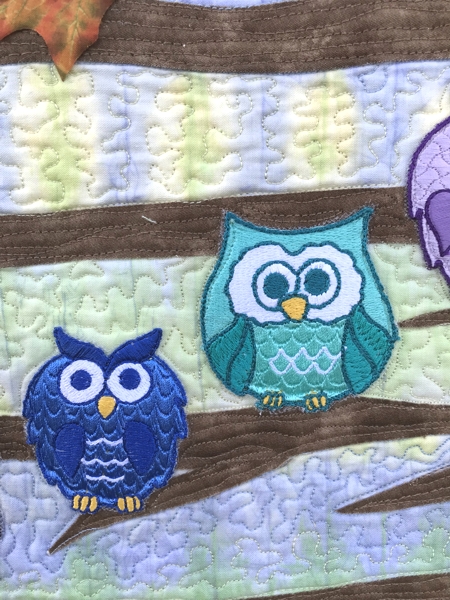
Upload the embroidery files of the Cute Owl Set and Owl with Treble Clef into the machine and embroider them one by one. Choose which owl represents the note C / "do" and embroider it twice, but in different colors.
|
|
| Making the Wall Quilt: |
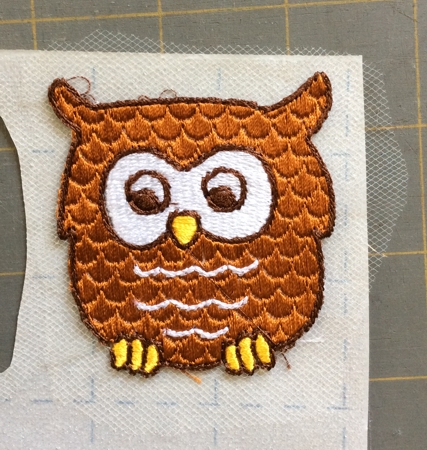
After the stitch-out is finished, tear away the stabilizer.
|

|
| Cut away the netting around the stitch-out, but not too close to the stitches. Remove the protective paper from one side of the Steam-a-Seam2 web and place the stitch-out onto it. Firmly press with your fingers. |
|
| Now cut away the excess tulle/netting and sticky web around the stitch out. |
|
Remove the protective paper from the other side of the web, position the owl on the branch and press with fingers. Repeat with each owl. It's very easy.
It's trickier to deal with the owl with the treble clef.
After you embroider it, remove the stabilizer around the owl and from the clef's outer edges:
|
|
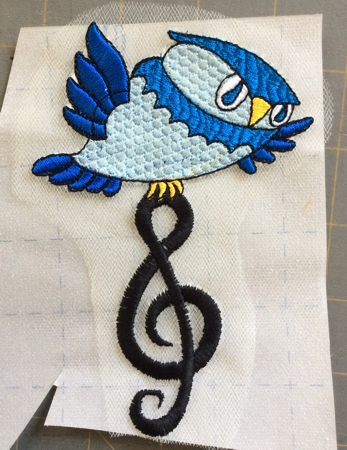
Adhere the stitch-out to the Steam-a-Seam2 web.
|
|
| Cut away the tulle/netting and web around the stitch-out, but do not do this inside the clef. |
|
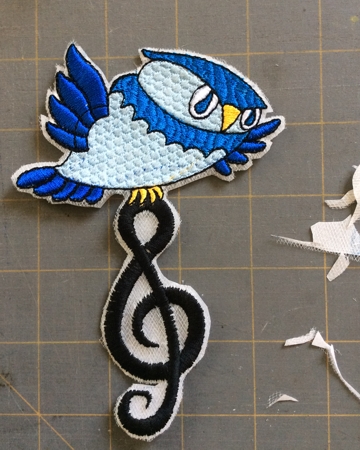
| Arrange all owls on the branches. |
|
|
| Press with iron to permanently adhere the owls in place. |
| Quilting and Finishing: |
Now place the backing on a flat surface (table) face down. Cover with batting. Spread your working piece over it.
Pin all layers together with 1" pins and start quilting. To quilt through all layers, you'll need a #14 quilting needle. We quilted through the embroidery with invisible (polyamide) thread in a freemotion style. Then we quilted all over the quilt with a free motion stippling pattern. |
|
| After the quilting is finished, press the work with heavy steam and square the work -- all corners should be 90 degrees and opposite sides should be of the same length. |
| Finish the raw edges with the binding. |
|
|
| Enjoy! |
|
|
|
Back to Cute Owl Set or Owl with Treble Clef
|
Back to Projects Page
|


