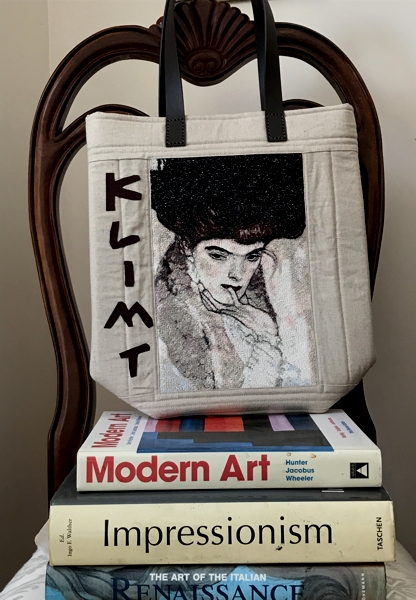
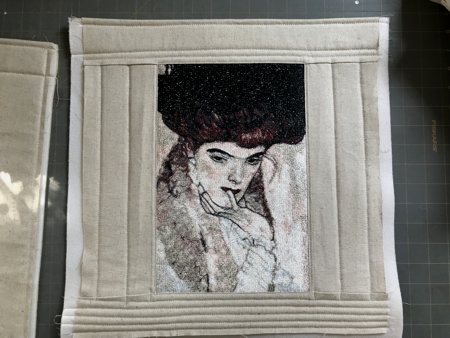
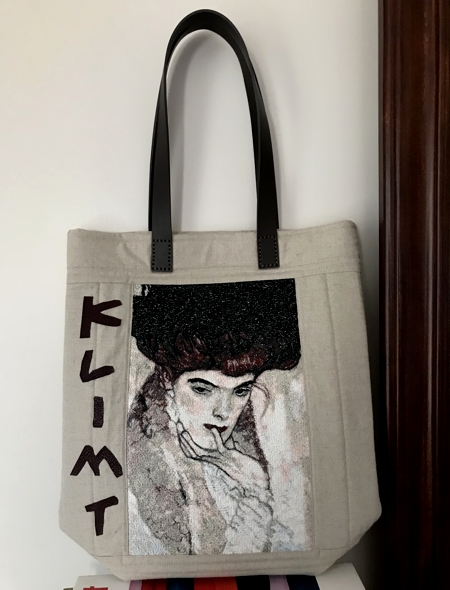
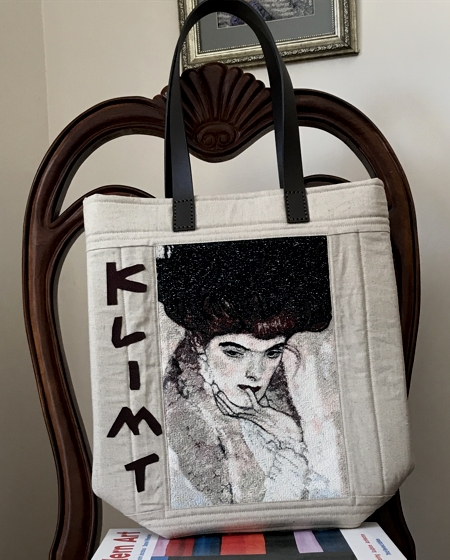
For this eye-catching quilted bag, we used the design Woman in Black Feather Hat by Gustav Klimt.
The finished size of the bag is about 15 1/2" H x 14 1/2" W. |
|
|
You will need :
- embroidery threads according to the color card of the design,
- heavy-weight cut-away stabilizer or polyester craft felt (we used it as stabilizer),
- about 1 yard of natural colored medium-weight linen fabric, or cotton/linen blend,
- fabric for the lining (we used Osnaburg),
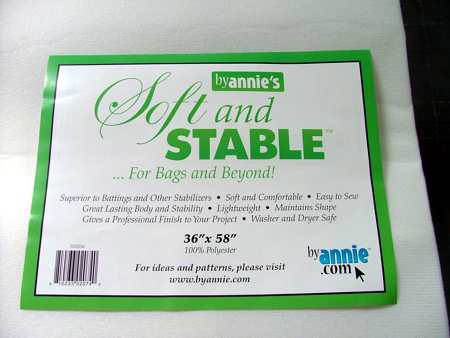
- batting, we used "Soft and Stable" batting specially designed for bags By Annie (www.byannie.com), purchased in our local quilting store (see picture below),
- #12 and #14 universal sewing and quilting needles,
- quilting and sewing threads of matching colors,
- rotary cutter, quilter's ruler, graphic pencil, scissors, iron,
- leather handles,
- upholstery thread of the color matching the handles,
- Sew-on Soft and Flexible Velcro tape, 1/2" wide,
- a small piece of faux leather for lettering (optional) and universal glue (optional).
|
|
| Embroidery: |
Open the JPG color card of the design Woman in Black Feather Hat by Gustav Klimt, and select threads according to it. You have to follow the JPG color chart for Fine Art designs.
Stabilize a piece of linen fabric with polyester craft felt or heavy-weight stabilizer.
Upload the embroidery file into the machine. Embroider the file. |
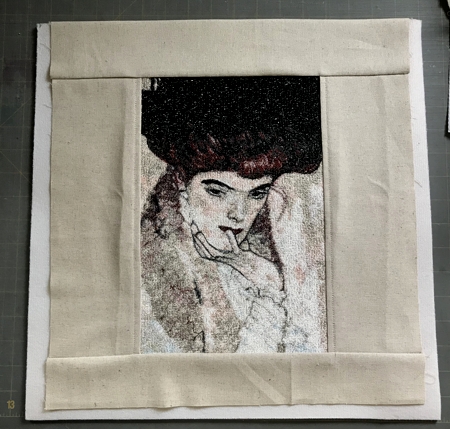
| Trim the stitch-out leaving 1/4" margins around it. |
| Cutting: |
Out of linen fabric,
- for the front panel, cut:
- 2 strips measuring 4 1/2" x 11 1/2",
- 1 strip measuring 2 1/2" x 16" ,
- 1 strip measuring 4 1/2" x 16";
- for the back panel, cut a piece measuring 16" x 18".
|
Out of fabric for the lining, cut
- 2 pieces measuring 16" x 18" and
- 1 strip measuing 12" x 16" for the pocket.
|
| Out of batting, cut 2 pieces measuring 16" x 16". |
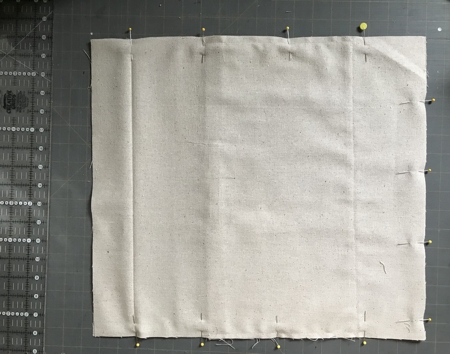
| Assembly of the Front Panel: |
Sew the 4 1/2" x 11 1/2" strips to the left and right edges of the embroidery.
Sew the 4 1/2" x 16" strip to the upper edge of the embroidery.
Sew the 2 1/2" x 16" strip to the lower edge of the embroidery.
Seam allowance slightly larger than 1/4".
Press seams. |
| Quilting: |
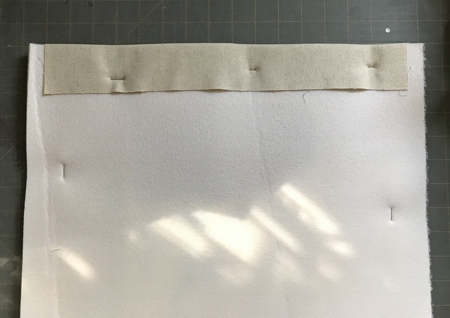
Fold the upper edge of the front panel 2" back and lightly press. Unfold.
Position the front panel over a piece of batting, aligning the upper edge of the batting along the folded line. |
|
| Fold the upper edge of the front panel back over the batting. Pin from the right side. |
|
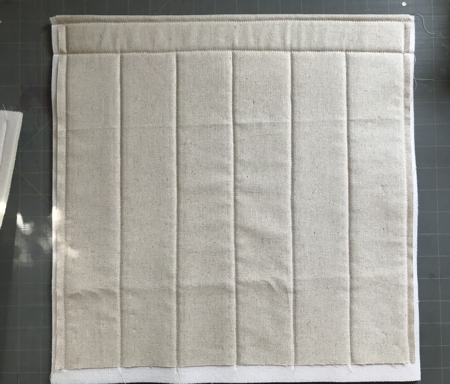
Quilt with straight lines.
|
|
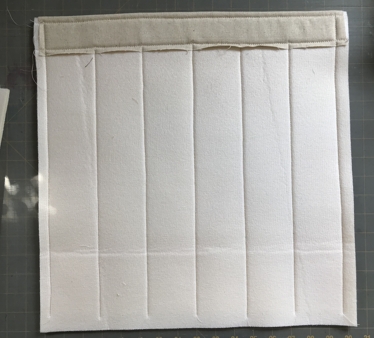
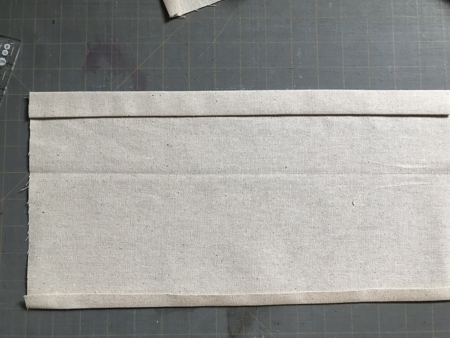
| In the same way, prepare and quilt the back panel. |
|
This is the back panel from the wrong side after quilting.
|
|
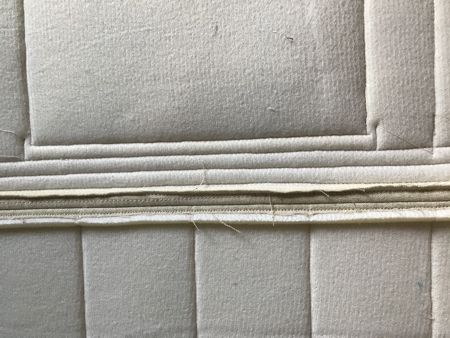
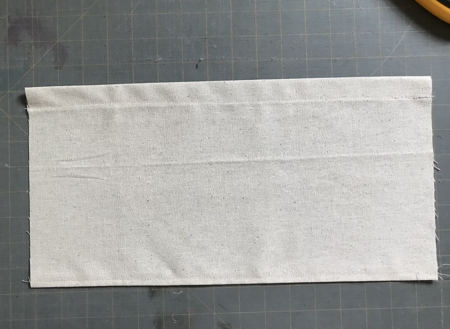
After you are done with quilting, press the working pieces and square them. Make sure that the panels are of the same size. The panels are approximately 16" square.
|
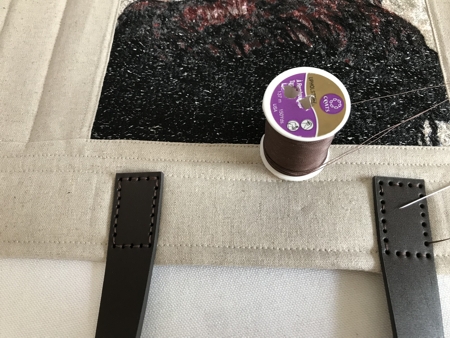
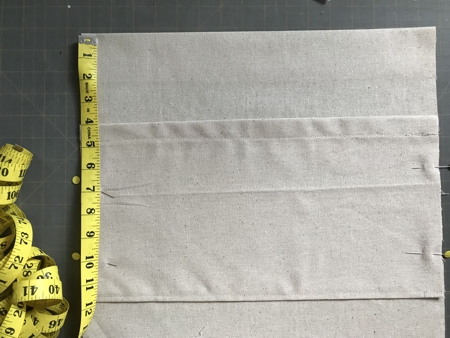
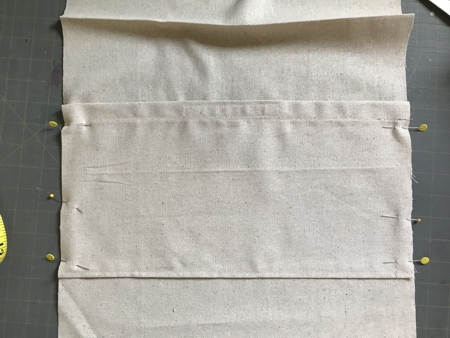
| Attaching Handles: |
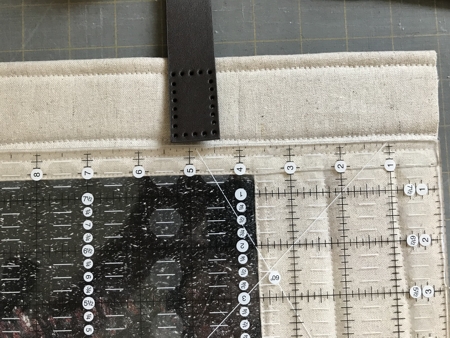
| Measure 4 1/2" from the side edges. Mark the places. |
|
Using upholstery thread, hand-stitch the handles in place both on the front and back panels.
|
|
|
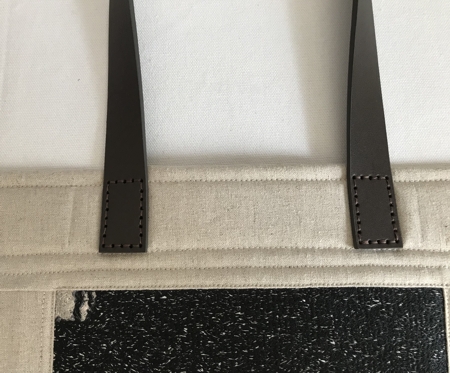
| The back side of the panels after the handles are attached. |

|
| Sewing the Outer Bag |
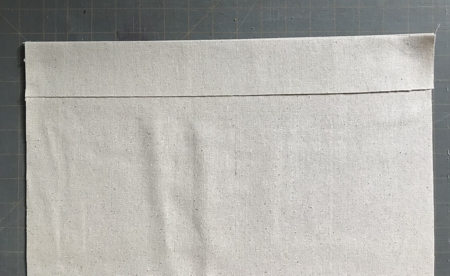
Position the panels face to face aligning all edges.
Topstitch along the bottom, seam allowance 1/2". Open and press the seam allowance and top-stitch 1/4" on each side from the central seam. |
|
| Fold the bag, wrong side facing, align the sides. Stitch the sides together, seam alowance about 1/2". Open the seam allowance and press. |
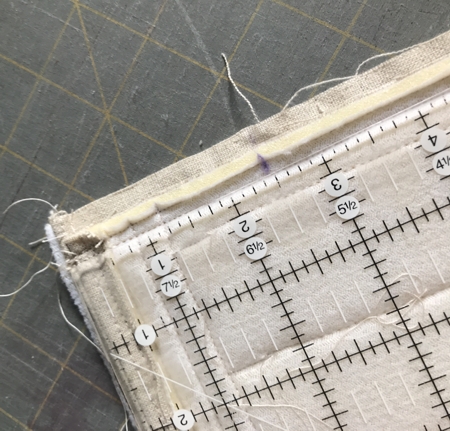
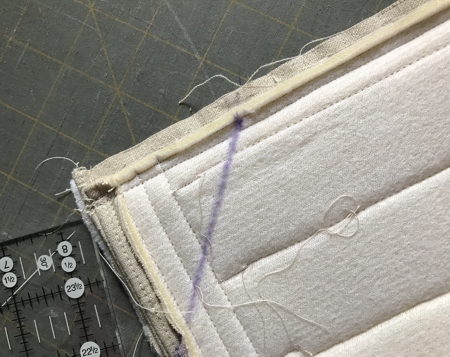
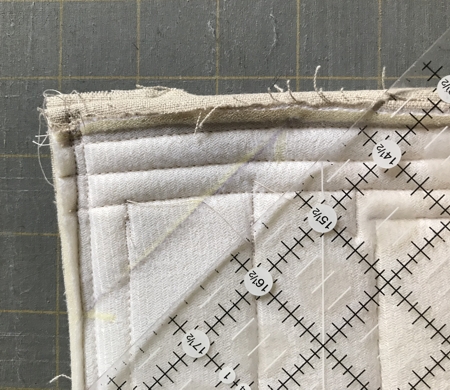
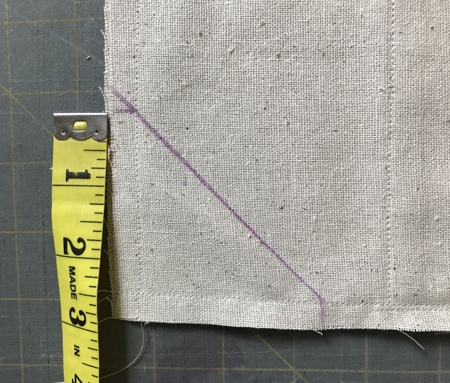
| Working with the bottom corners of the bag, one at a time, measure 2 1/2" from the corner along the side and bottom seams. Mark the points. |
|
| Connect both points with the ruler and draw a line. |
|
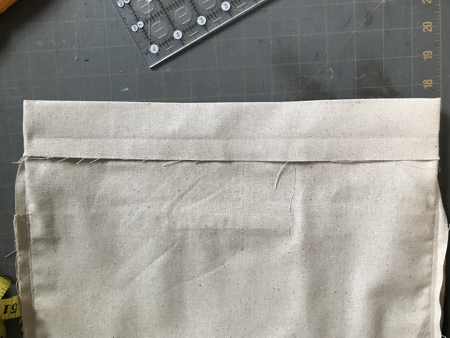
| Topstitch along the line through all layers of the bag. |
|
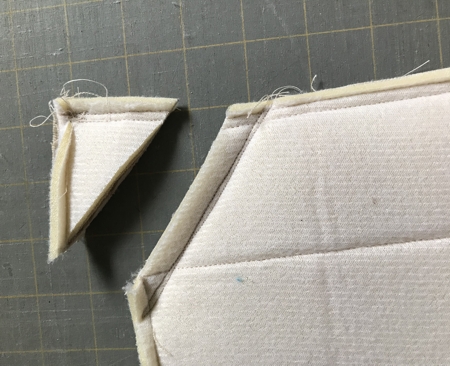
| Cut away the corner about 1/2" from the stitch line. Repeat for the second corner. |
|
| Turn the back right side out. |
Lining
|
| Fold the upper edges of the lining panels 2" back. Press. |
|
| Foldthe lower and upper edges on the pocket piece 1/2" back, press. Fold the upper edge of the pocket back 1". Press. |
|
| Topstitch the folded upper and lower edges in place. |
|
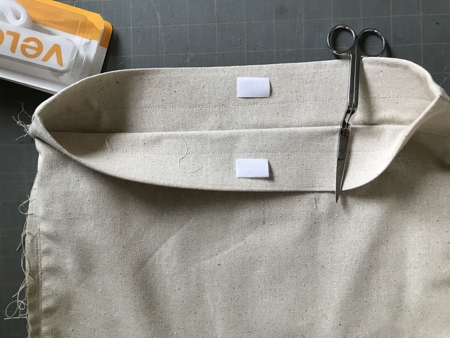
| Position the pocket on the back lining panel 4" from the folded upper edge. Pin. |
|
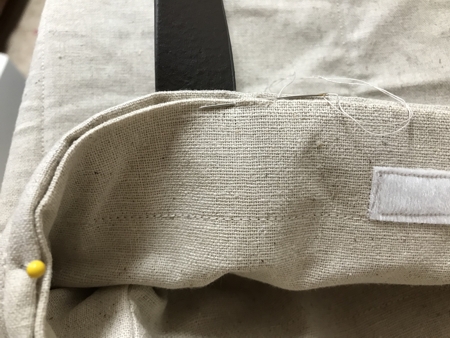
Cut a piece of Velcro, about 2" long.
Unfold the upper edge of the pocket and pin one part of Velcro to the pocket. Pin another part of the tape to the panel. |

|
| Topstitch the Velcro in place. Fold the pocket back and close it. |
|
| Unfold the upper edges of the panels, place them face to face, align all edges. Pin. Then topstitch the sides and bottom together. |
|
Measure 2 1/2" from the bottom corner along the side and bottom seams. Make marks. Connect the marks with a line.
Topstitch along the line. Cut away the corner with seam allowance about 1/2".
Press side seams open. |
|
| Fold the upper edges back along the pressed line. Topstitch in place. |
|
| Cut a piece of Velcro tape, about 1" long. Sew it to the upper edges of the lining. |
|
| Insert the lining into the bag. Align the side seams. Pin the upper edges together. The lining edge should be 1/4" from the bag's edge. |
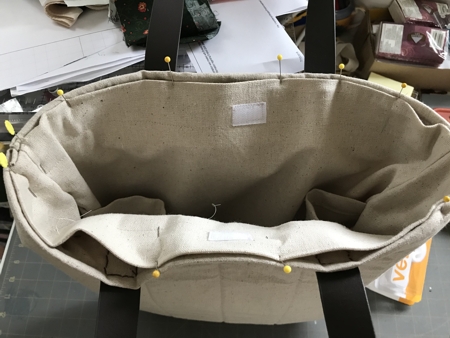
|
| Handstitch the lining to the bag. |
|
| Optional: |
| Copy this picture and print it out. Copy the letters to faux leather and cut them out. Using either universal or leather glue, adhere the letters to the front panel. |

|
| You're done, have fun! |
|
|
|
Back to Woman in Black Feather Hat by Gustav Klimt.
|
Back to Projects Page
|


