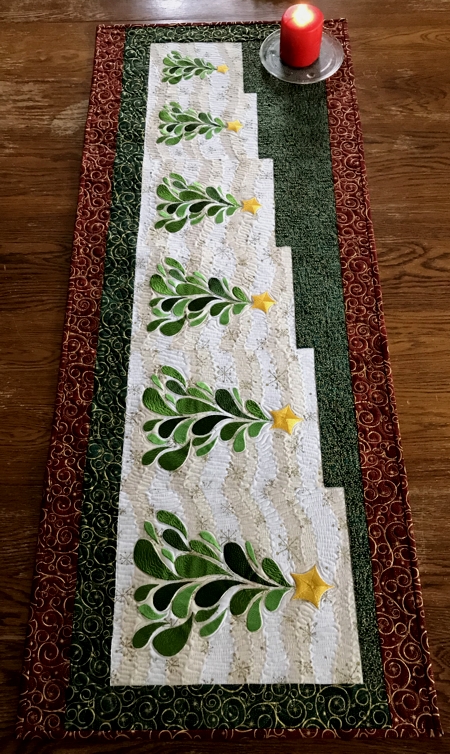
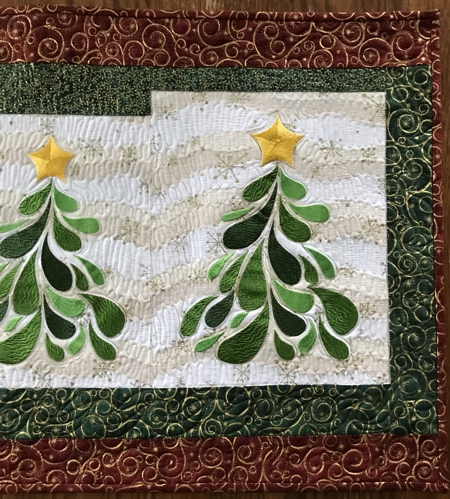
For this simple yet elegant table runner we used the design Christmas Tree in all 6 available sizes. Each set contains the files in 3 sizes.
The finished size of the table runner is about 19" x 46".
|
|
You will need :
- embroidery threads either polyester or rayon,
- Light-to medium-weight cut-away embroidery stabilizer,
- 1/2 yard of light-colored fabric for the background,
- about 1/2 yard each of red and green fabrics with Christmas pattern,
- batting and backing,
- iron.
|
|
Embroidery
|
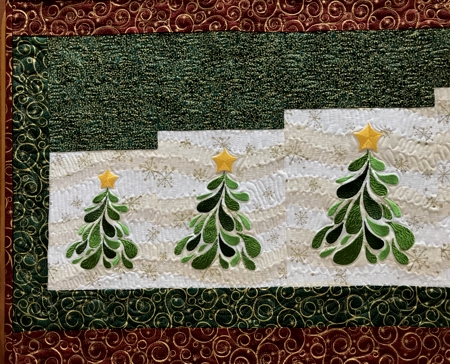
Upload the files of the Christmas Tree into the machine. Stabilize the background fabric with embroidery stabilizer and embroider them one by one starting fom the smallest tree and finishing with the biggest tree.
Trim the stitch-outs in the following way:
- block with smallest tree to 6" (W) x 7" (H),
- block with next smallest tree to 7" x 8",
- next block to 7 1/2" x 9",
- next block to 7 1/2" x 10",
- next block to 7 1/2" x 11",
- last block to 9 1/2" x 12".
|
|
Cutting:
|
Out of green fabric, cut the following pieces:
- 6" (W) x 6 1/2" (H);
- 7" x 5 1/2";
- 7 1/2" x 4 1/2";
- 7 1/2" x 3 1/2";
- 7 1/2" x 2 1/2";
- 9 1/2" x 1 1/2",
- a strip measuing 2 1/2" x 42 1/2" and
- 2 strips measuring 2 1/2" x 15".
Out of red fabric, cut 2 strips measuing 2 1/2" x 46 1/2". Use the remaining red fabric for the binding.
|
Assembly:
|
| Note: Seam allowance is 1/4", press a seam immedistely after your made it. |
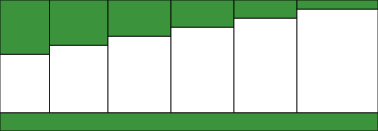
| Sew the block with the smallest tree to the first green piece. Sew the block with the next smallest tree to the second green piece. Continue until you have sewed each embroidered block to a green piece. |

|
| Sew all pieces together. |

|
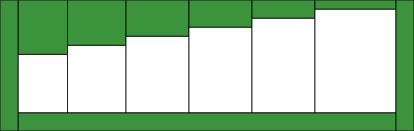
Sew the 2 1/2" x 42 1/2" green strip to the lower edge of the working piece.
|
|
| Sew the 2 1/2" x 15" green strips to the left and right edges of the working piece. |
|
Sew the red strips to the long edges of the working piece.
|

|
| Quilting and Finishing: |
Now place the backing on a flat surface (table) face down. Cover with batting. Spread your working piece over it.
Pin all layers together, start quilting. We quilted with golden metallic thread, so we used a #14 needle.
We quilted in a free-motion style all over the table runner. |
|
| After the quilting is finished, press the work with heavy steam from both sides (front and back), and square the work -- all corners should be 90 degrees and opposite sides should be of the same length. Finish the raw edges with the binding. |
|
Have Fun!
|
|
Back to Christmas Tree
|
Back to Projects Page
|


