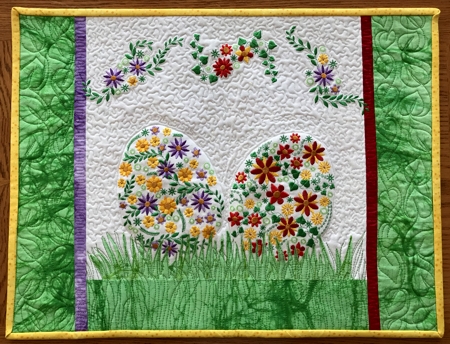
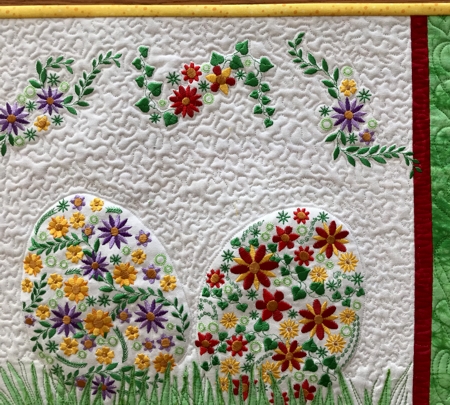
This small and easy, yet cheerfull quilt will bring the spirit of Spring into your home! We used designs from the Easter Flower Egg Set.
The finished size of the quilt is about 16" x 20".
|
|
You will need :
- embroidery threads, either polyester or rayon, for the embroidery,
- light-weight cut-away stabilizer,
- a fat quarter of white fabric for the embroidery,
- scrap strips of lilac and red fabrics at least 16 1/2" long,
- a fat quarter of green fabric for the borders,
- fabric for the backing and binding,
- batting,
- #14 quilting needle,
- #12 universal sewing needles,
- quilting threads of matching colors,
- Steam-A-Seam2 double stick fusible web, or similar product,
- rotary cutter,
- quilter's ruler,
- iron,
- scissors.
|
Embroidery:
|
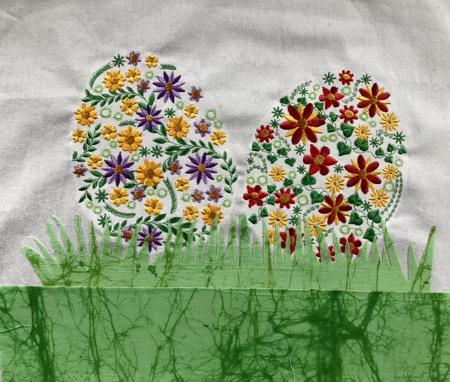
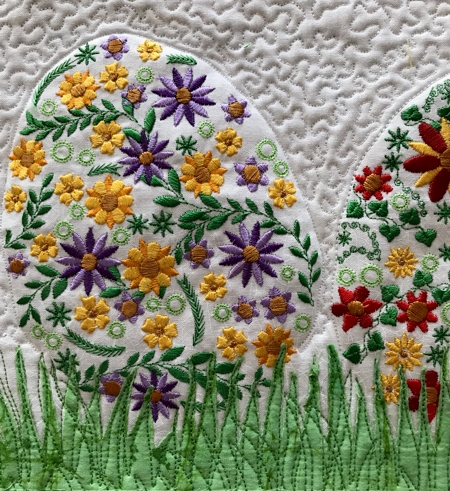
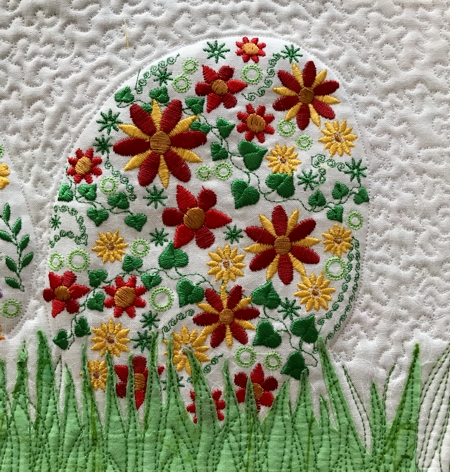
Stabilize the lower part of the white fabric with light-weight cut-away stabilizer. If you have a hoop large enough to embroider both egg designs at the same time, do so. If not, you will have to re-hoop for the second egg. Remember that the eggs are slightly tilted!
Upload the first egg from the Easter Flower Egg Set to the machine and embroider it. You can use the recommended thread colors, or pick your own.
Re-hoop the fabric, if using a smaller hoop. Now embroider the second egg with a slight tilt to the right.
Cut away the stabilizer around the embroidery. Leave the stabilizer inside the embroidery.
|
| Assembly of the Top: |
| Note: Seam allowance is 1/4", press each seam immediately after you make it. |
| Out of green fabric, cut a strip 2 1/2" wide and about 12" long. |
Remove protective paper from one side of the Steam-A-Seam2 film and with your fingers, press the strip to the film.
With scissors, make cuts along one long side of the strip to imitate grass. |
On your working table, position the stitch-out face up. Place the "grass" strip along the lower edge of the embroidery.
You can move and reposition the "grass" until you like its placement.
After this, press it in place with a hot iron. |
Trim the lower part, then trim the right and left edges. The width of the piece should be 13 1/2".
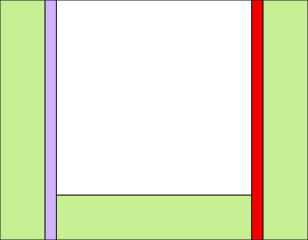
Out of green fabric, cut a strip measuring 3 1/2" x 13 1/2" and sew it to the lower edge. |
|
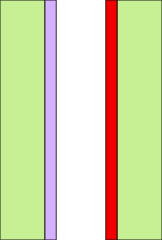
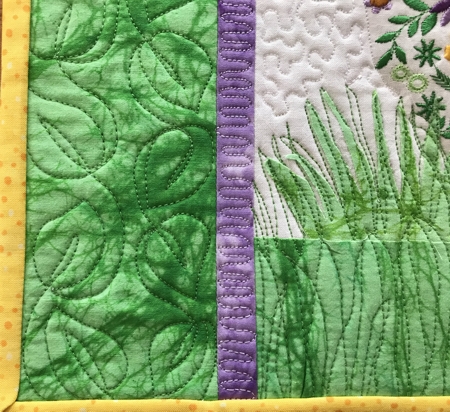
Measure the height of the working piece. Out of lilac and red fabrics each, cut strips 1 1/4" wide and the height of the working piece.
Out of green fabric, cut 2 strips measuring 3 1/2" and the height of the working piece. |
| Sew the lilac strip to one of the green strips and the red strip to the other green strip. |
|
| Sew the lilac-green strip to the side with the lilac egg and the red-green strip to the side with the red egg. |
|
| Embroidery: |
| Stabilize the upper white part of the top, embroider several flower branches to form garland over the eggs. |
| Cut away the stabilizer around the embroidery. |
|
| Quilting and Finishing: |
Now place the backing on a flat surface (table) face down. Cover with batting. Spread your working piece over it.
Pin all layers together. We quited in a free-motion style all over the quilt. |
|
Press the quilt with heavy steam and square it.
Finish the raw edges with the binding. |
|
|
| Enjoy! |
|
|
|
Back to Easter Flower Egg Set
|
Back to Projects Page
|


