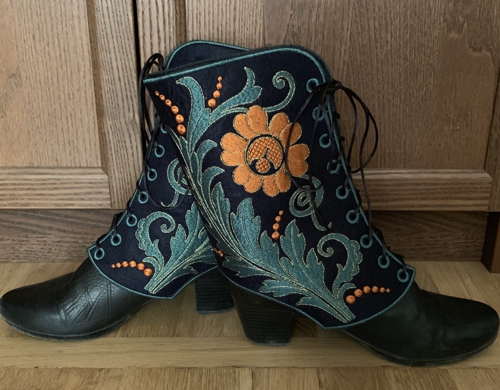
These are instructions on how to embroider and sew the Embroidered Gaiters in-the-hoop.
Please note that this project is only for machines that have an embroidery area no less than 8" x 10".
The height of the gaiters is constant. The width is adjustable.
|
The size of each file is 188.3 x 242.5 mm, with 41829 stitches, 4 color changes and 5 stops.
Please note that some pictures in the instructions feature a different embroidery pattern.
|
|
Besides embroidery thread (either polyester or rayon, however polyester is preferable because it lasts better), you will need
- medium- to light-weight non-fraying dense fabric for the lining,
- fabric for the upper part - we recommend polyester leatherette or felt,
- shoe laces,
- hole punch,
- a piece of elastic 1/2"-1" wide of a matching color.
|
| Emboridery |
| There are 2 files, one for the left gaiter and one for the right. |
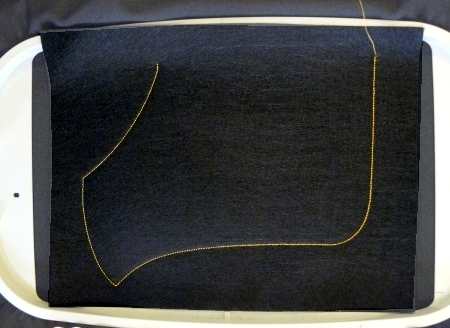
Step 1: Hoop the lining fabric and tighten the hoop. Place a piece of the outer fabric over the hoop. Please note that the lower edge of the fabric lines up with the edge of the frame, while the upper edge goes over the frame. This extra fabric will let us adjust the width of the gaiter
Start the machine and embroider the outline of the gaiter. |
|
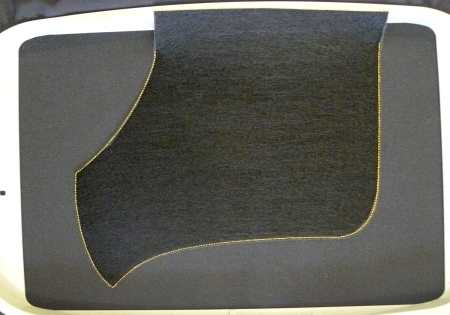
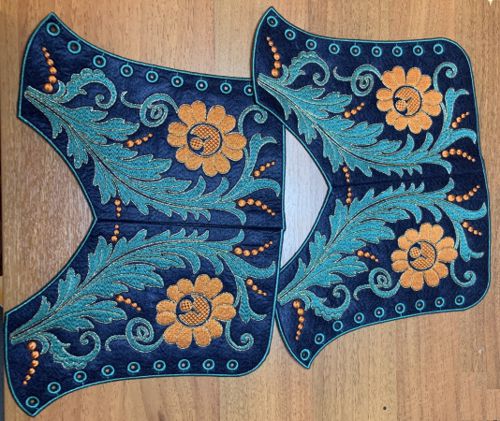
| Step 2: Take the hoop from the machine and with a pair of sharp scissors cut away the fabric around the stitches. Leave some fabric at the upper edge, as shown. |
|
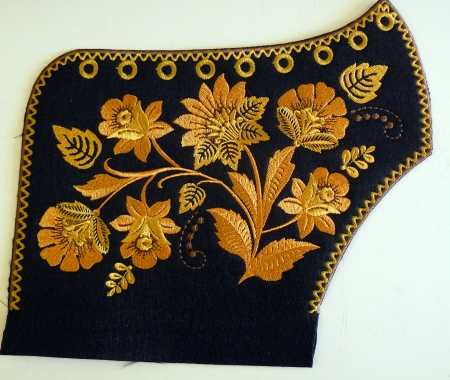
Step 3: Return the hoop to the machine and finish the embroidery. You can use the colors we suggest or choose whichever colors best work for your project.
When the embroidery is done, cut away the excess fabric of the lining as close to the stitches as possible.
In the same way, embroider the second file. |
|
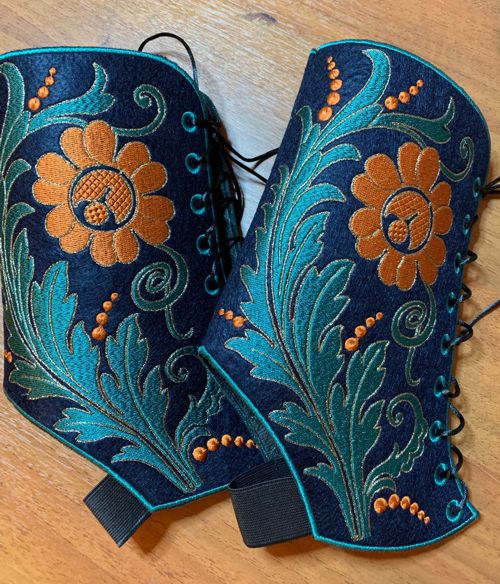
Step 4: Punch holes for the laces. To reinforce the holes, apply a small amount of leather glue to the stitches around the holes on the lining side.
|

|
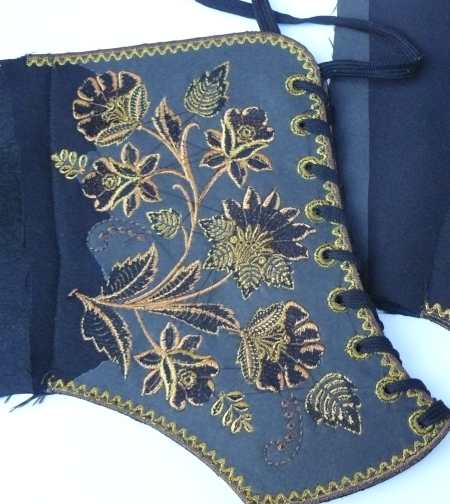
| Step 5: Lace the gaiters. |
|
Put on the boots and slide the gaiter over the boots to check the width.
|
|
| Mark the line with chalk on both sides. |
|
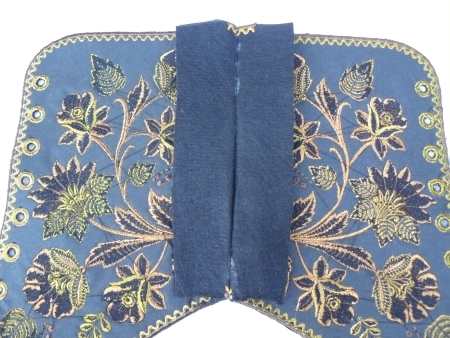
| Step 6: Unlace the gaiters, transfer the marking to the back side and stitch the gaiters together along the marked line. |
|
| Step 7: Cut away the excess fabric of the "lining" close to the stitches. Open the seam of the outer fabric. Press if needed. |
|
| Step 8: Topstitch on the right side 1/4" (6 mm) on both sides of the seam. Cut away the excess fabric. |
|
Step 9: Lace the gaiters again, put them on to mark the position and the length of the elastic band.
Stitch the band in place. It will hold the gaiter in place while walking. |
|
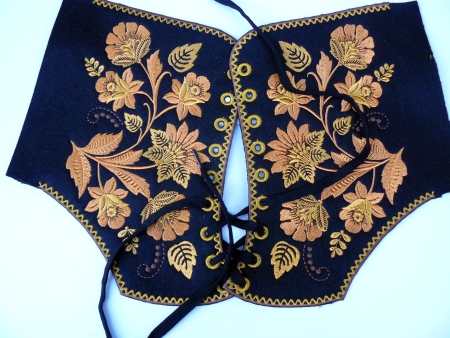
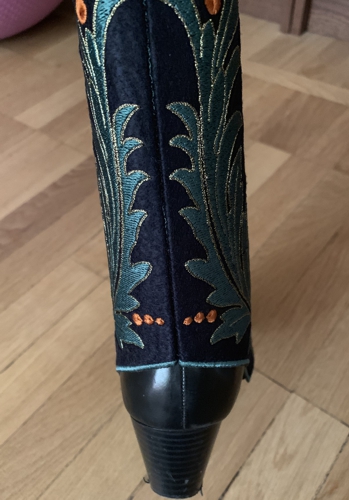
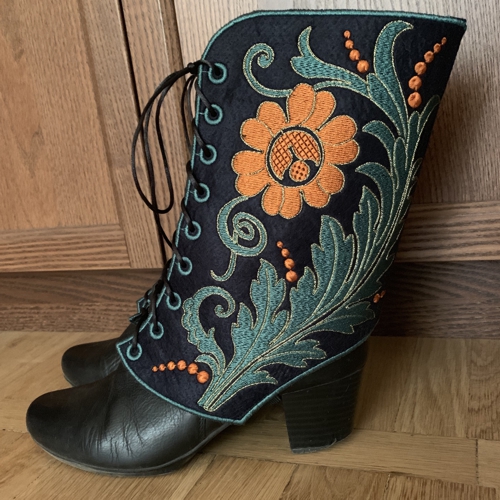
| This is what a gaiter looks like from the back. |
|
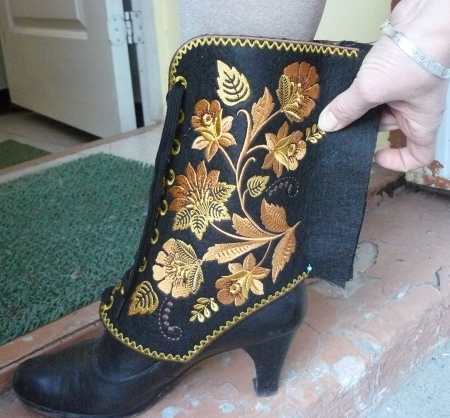
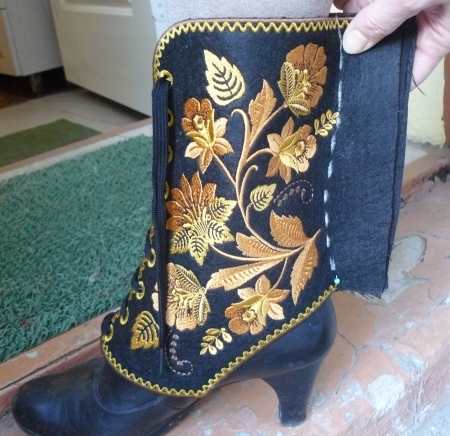
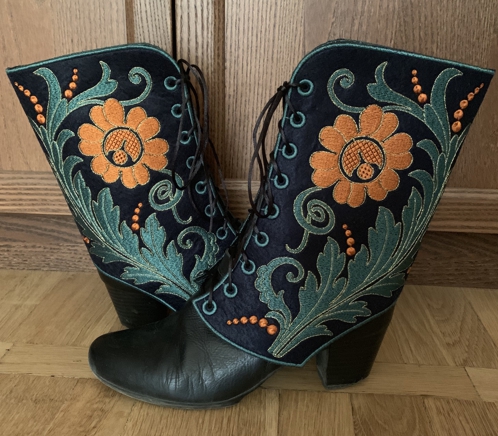
| Your gaiters are ready! |
|
|
|
Enjoy!
|
|
Happy Stitching!
|
|
Back to Embroidered Gaiters in the hoop.
|
|


