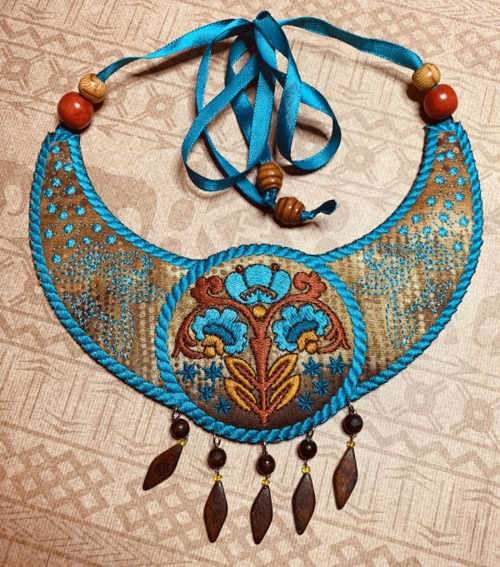
These are instructions on how to embroider the Folk Art Necklace in the Hoop.
The design is for a large hoop (5"x7").
|
|
Stitches: 17 881
Size: 114.6 x 162.4 mm
Colors: 9/15
|
You will need :
- embroidery threads, you can use our color card, or choose your colors,
- a piece of spunbond nonwoven fabric large enough to be hooped; as an alternative you can use medium-weight cut-away stabilizer,
- a piece of polyester craft felt,
- fabric for the face of the gorget and for the lining,
- applique scissors,
- 1/4" wide satin or organza ribbon,
- several sewing pins,
- iron,
- (optional) additional embellishments, such as beads or rhinestones.
|
Embroidery
|
Note: you can embroider the Steps 1-4 with one color. We made them different to make the machine stop.
|
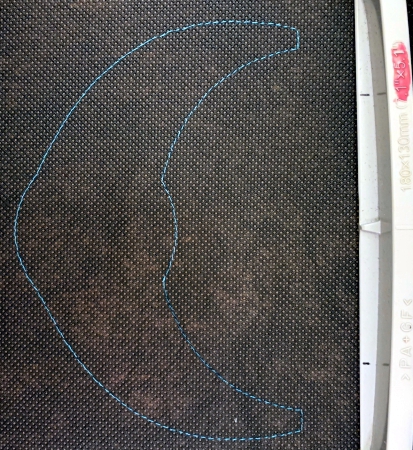
| Step One: Hoop a piece of spunbond nonwoven fabric. Upload the file into the machine. Start the machine. The first color will embroider an outline of the necklace. |
|
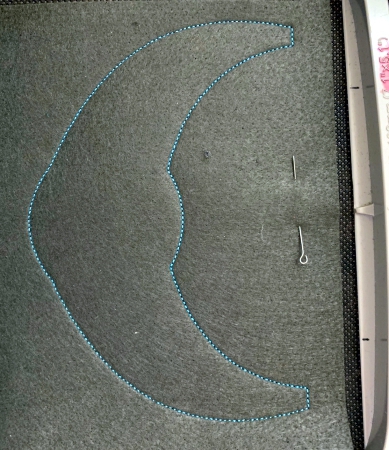
Step Two: Cover the outline with a piece of felt. Start the machine, it will embroider the same outline over the felt.
|
|
Step Three: Take the hoop from the machine and cut away the felt around the outline as close to the stitches as possible. Be careful not to cut through the stitches.
|
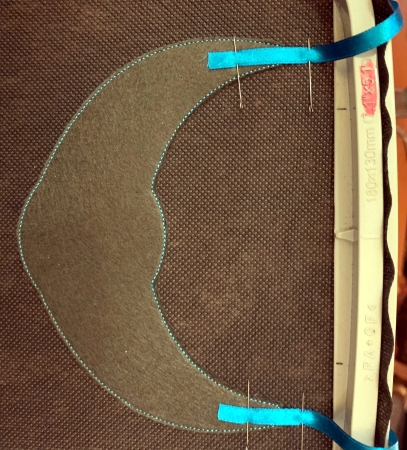
| Step Four: Pin 2 pieces of ribbon in the corners as shown on the pictures below. |
|
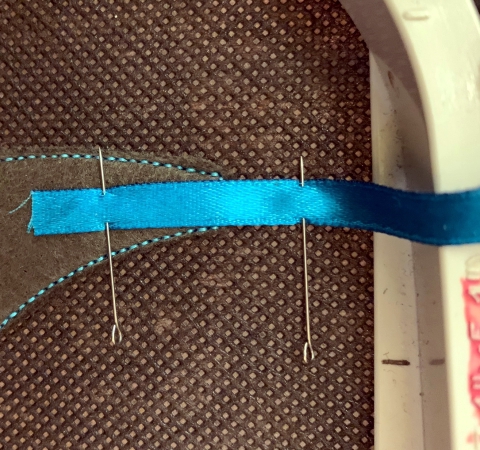
|
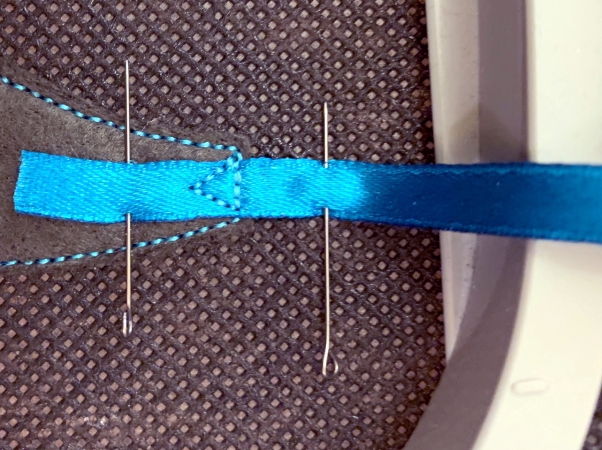
| Start the machine. It will sew the ribbons to the felt. |
|
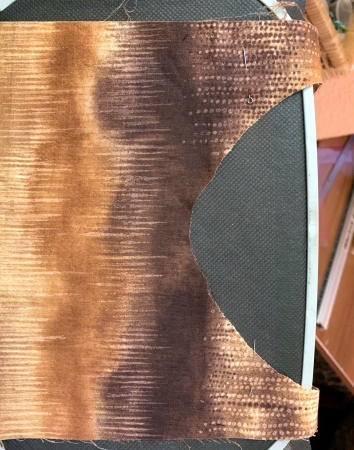
Step Five: Place a piece of fabric over the felt, start the machine. It will embroider the same outline over the fabric.
|
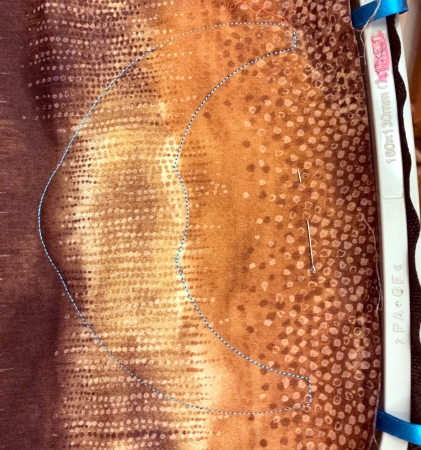
|
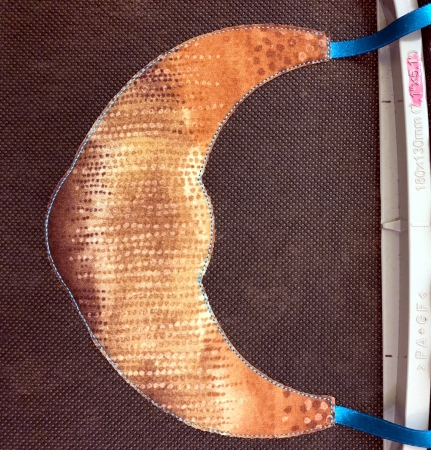
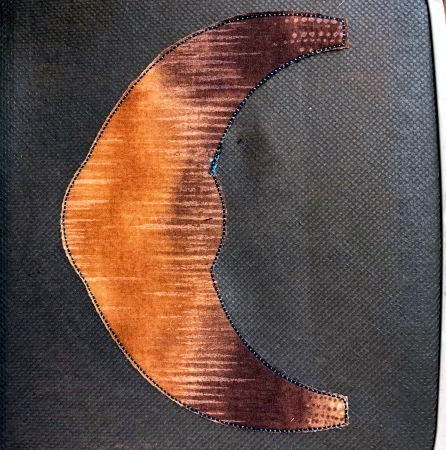
| Step Six: Cut away the fabric around the outline close to the stitches. Take care not to cut through the stitches, through the spunbond/stabilizer and cut away the ribbons. |
|
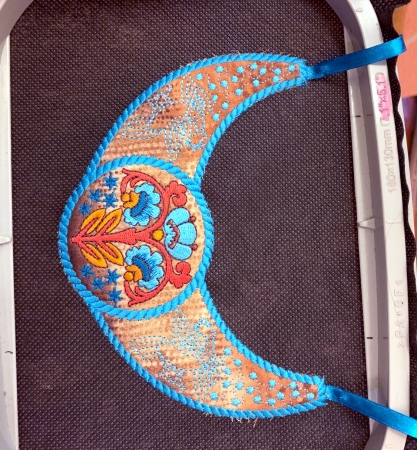
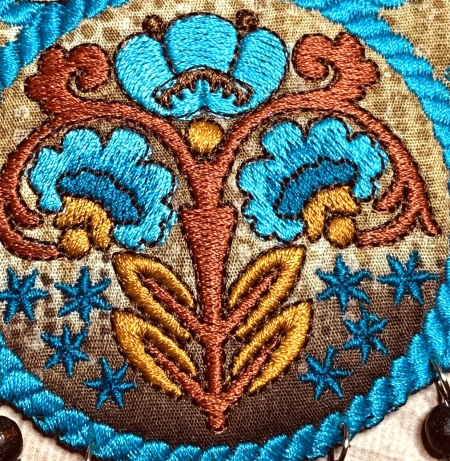
Step Seven: Colors 5-13 embroider the design. Follow the color card when you embroider the design for the first time at least. Then you can choose your own colors.
|
Step Eight: Before you start embroidering color 14, pin a piece of lining fabric to the back of the hoop. Check that the ribbons are not on the embroidery field.
Return the hoop to the machine.
|
|
Start the machine. Color 14 will embroider the outline again and secure the lining.
|

|
| Cut away the excess fabric around the outline. |
|
Step Nine: Color 15 will finish the raw edges.
|
|
Step Ten: Cut away the spunbond around the embroidery.
|
|
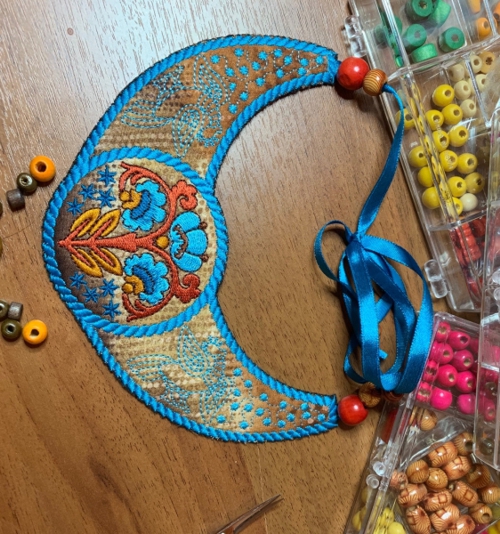
Step Eleven (optional): Embellish the necklace with beads. We chose wooden beads that match the style and colors of our embroidery.
|

|
|
Have fun!
|
|
Back to Folk Art Necklace in the Hoop.
|
Back to Projects Page
|


