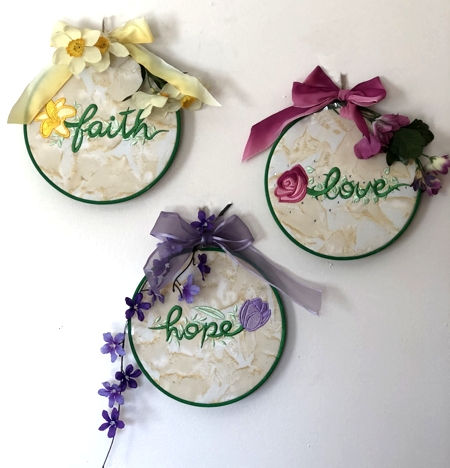
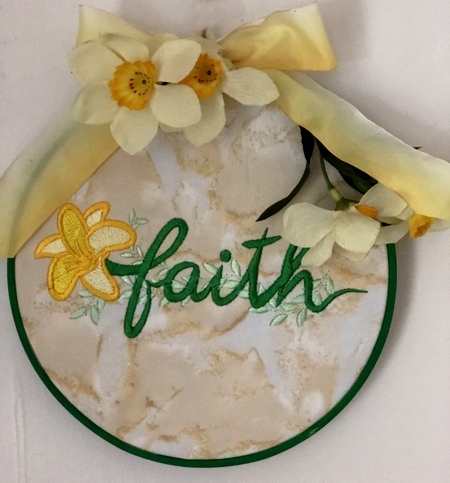
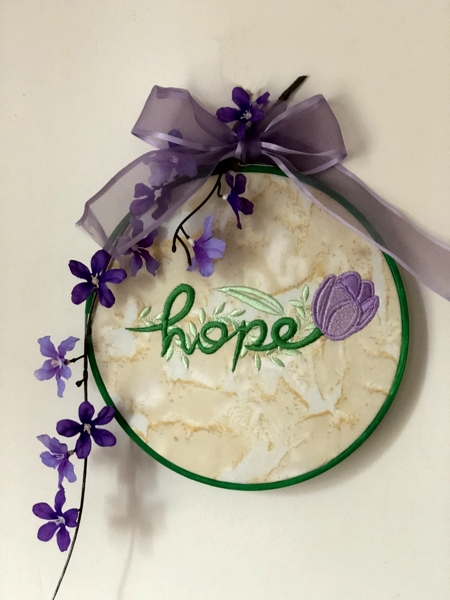
This very easy Spring-themed project makes a gift for housewarming parties, weddings and so on. We used the designs from the Faith-Hope-Love Floral Set. All designs are for the large (5" x 7") hoop.
|
|
|
You will need :
- embroidery threads, either polyester or rayon (feel free to choose your own colors),
- cut-away medium-weight stabilizer,
- light-colored fabric for the embroidery,
- 3 round hoops for hand embroidery, 8" diameter,
- sewing needle and thread (some hand-stitching will be required),
- a piece of cord or ribbon to hang the finished work,
- light-colored polyester craft felt,
- acrylic paint and brush (optional),
- scissors,
- graphic pencil,
- iron,
- small screw driver (the one from your machine kit will work),
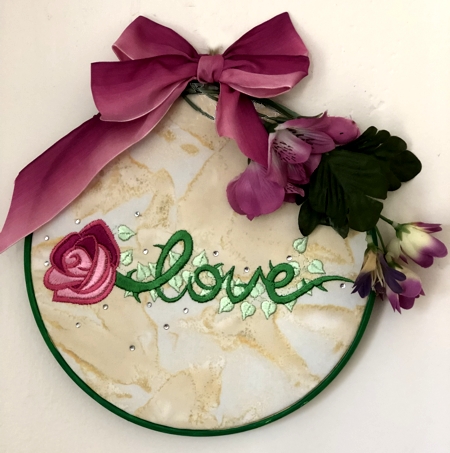
- all kinds of embellishments to your taste (we used silk flowers, wired ribbons and some rhinestones).
|
Embroidery:
|
Stabilize the fabric for embroidery with medium-weight cut-away stabilizer. Hoop it tightly.
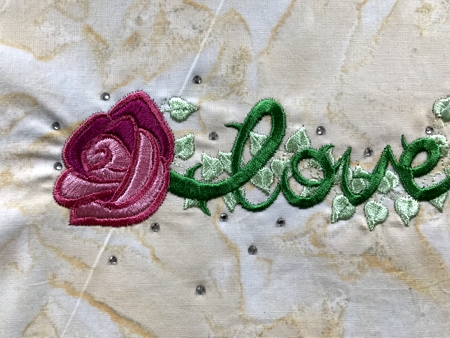
Upload the files from the Faith-Hope-Love Floral Set into the machine and embroider them one by one. |
Press the stitch-outs. Do not remove the stabilizer!
If you want to decorate the stitch-outs with rhinestones, do it at this stage.We attached a few hot-fix crystals to imitate dew drops on the flowers.
Now set the stitch-outs aside for the time being. |
|
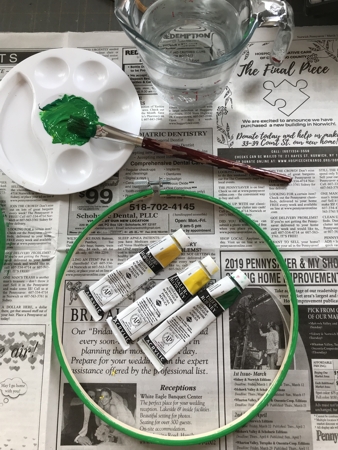
| Painting the Hoop (optional): |
While the machine is doing the embroidery, you can paint the hoops.
Open the hoop and paint the outer circle (the one with the screw). Leave to air dry. |
|
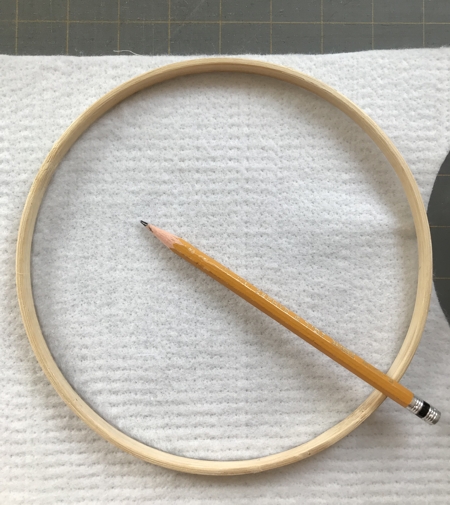
While you are waiting the hoops to dry, lay the craf felt on a table. Take the inner circle of the hoops and a graphite pencil.
Trace the inside of the inner circle. |
|
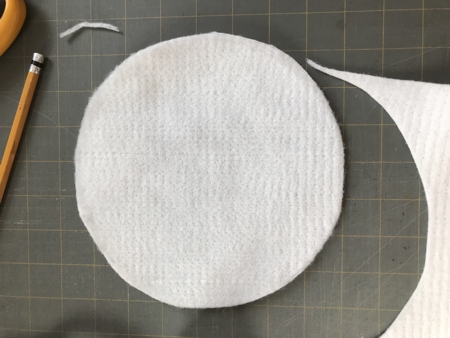
| Cut out along the trace line. You'll need 3 felt circles. |
|
Assembly:
|
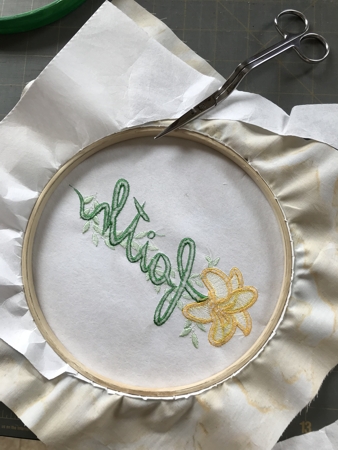
| Now insert the stitch-out into the hoop. Stretch the fabric to avoid any creases and folds. Tighten the screw. |

|
| Cut away the excess stabilizer. Take care not to cut the fabric. |
|
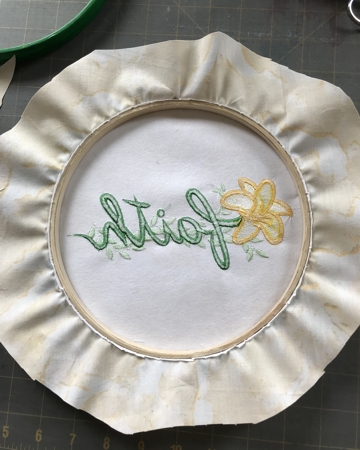
| Then cut away the excess fabric, leaving margins about 1 1/2"- 2". |
|
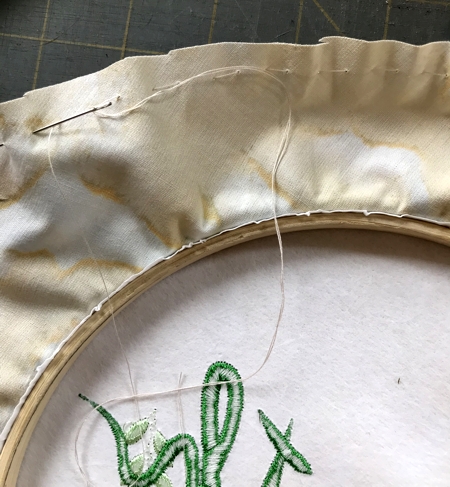
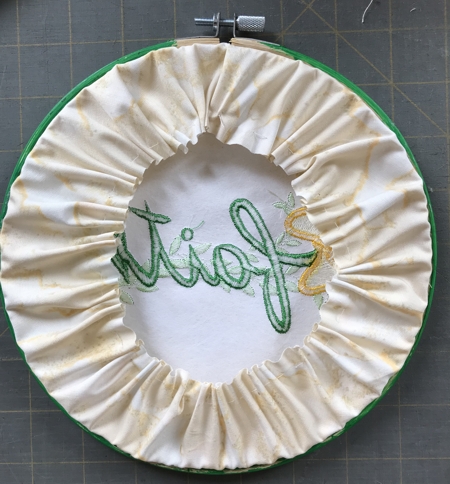
| Thread the needle and baste along the outer edge. |
|
| Pull the thread to gather the fabric. Tie the thread and cut. |
|
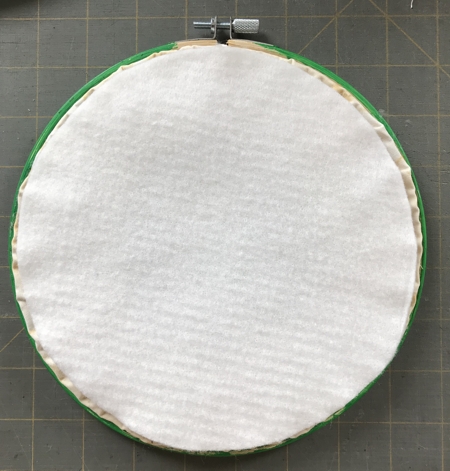
| Cover the back with the felt circle. Sew the felt circle to the fabric along the outer edge of the felt. |
|
| Finishing: |
| Decorate the hoops with silk flowers and/or ribbons. |
|
|
|
| Have fun! |
|
Back to Faith-Hope-Love Set
|
Back to Projects Page
|


