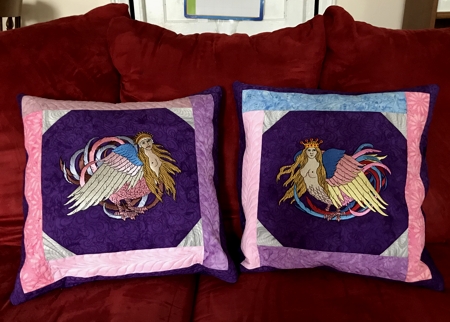
For these charming Fantasy-themed pillowcases, we used the designs Sirin Fairytale Bird and Sirin Fairytale Bird II.
|
|
You will need :
- embroidery threads, either polyester or rayon,
- medium-weight cut-away stabilizer,
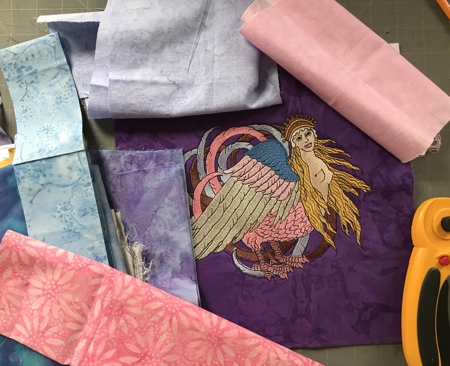
- 1 1/2 yard of the main fabric (we used deep purple batik),
- 2 1/2" wide strips of 5-6 matching fabrics (we used 3 shades of pink, light purple, medium blue, and gray; all colors used in the embroidery),
- low loft polyester batting,
- 16" square pillow shape,
- 1/2 yard of cotton fabric for the backing (we used muslin),
- #12 universal sewing needles,
- #12-14 quilting needle,
- rotary cutter,
- quilter's ruler,
- graphic pencil,
- 1/2 yard of Velcro tape 1/2" wide.
- iron.
|
Embroidery:
|
Print-out the color card of each design. Select threads according to the color card.
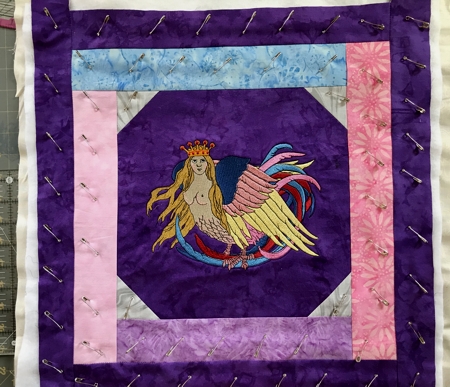
Stabilize the main fabric (purple) with medium-weight cut-away stabilizer. Hoop tightly. It's a good idea to wrap the long sides of the frame with strips of muslin and after hooping, pin the edges of the fabric to the hoop. It will keep the fabric tighter.
Upload the file into the machine. Embroider the design.
Unhoop and trim the stitch-out to 11" x 11" square. Then cut away the excess stabilizer around the embroidery. |
|
| Cutting: |
| Note: We give the numbers for one cushion. |
Out of gray fabric, cut 4 squares measuring 2 1/2" x 2 1/2".
Out of fabrics of 4 different colors, cut
- 1 strip measuring 2 1/2" x 11",
- 1 strip measuring 2 1/2" x 13",
- 1 strip measuring 2 1/2" x 13" and
- 1 strip measuring 2 1/2" x 15".
It doesn't matter which strip is which color.
Out of the main fabric (purple), cut
- 2 strips measuring 2 1/2" x 15" and
- 2 strips measuring 2 1/2" x 19 1/2" for the front panel;
- 2 pieces measuring 10 1/2" x 19 1/2" for the back panel.
Out of fabric for the backing, cut
- a square measuring 19 1/2" x 19 1/2" and
- 2 pieces measuring 9 1/2" x 19 1/2" .
Out of batting, cut
- 1 square measuring 19 1/2" x 19 1/2" and
- 2 pieces measuring 9 1/2" x 19 1/2".
|
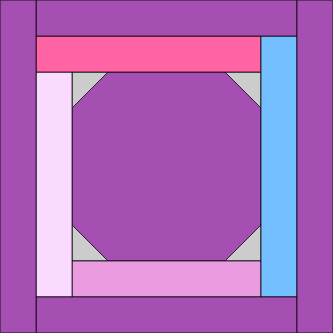
Assembly the Front Panel:
|
| Note: All seams are 1/4", press every seam immediately after you make it. |
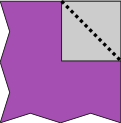
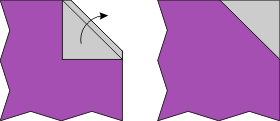
Place the square with embroidery on the table, face up. Position a 2 1/2" gray square in one of the corners, face down. Align the 2 sides.
With the ruler connect 2 opposite corners of the small square and draw a diagonal. Topstitch along the diagonal.
|
|
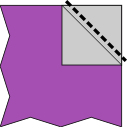
| Cut the corner away 1/4" from the stitch line. |
|
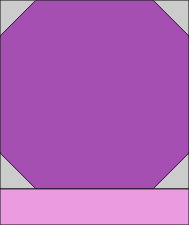
| Open the corner and press. Trim the "ears". |
|
Repeat for all corners.
|

|
| Sew the 2 1/2" x 11" strip to the bottom edge of the central square. |
|
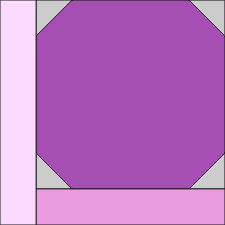
Sew the first 2 1/2" x 13" strip to the left edge of the central square.
|
|
| Sew the second 2 1/2" x 13" strip to the top edge of the square. |
|
| Sew the 2 1/2" x 15" strip to the left edge of the square. |

|
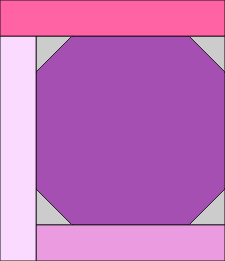
Sew the 2 1/2" x 15" purple strips to the top and bottom edges of the working piece.
Sew the 2 1/2" x 19 1/2" purple strips to the right and left edges of the working piece. |
|
Back Panel:
|
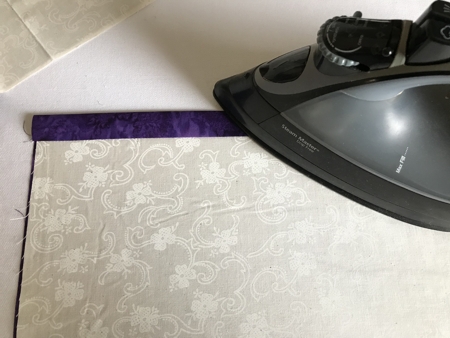
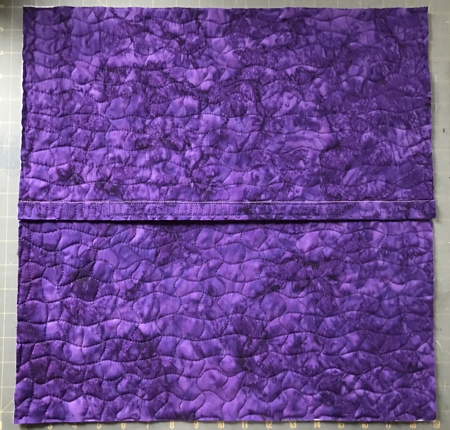
Take the purple 10 1/2" x 19 1/2" piece and the backing 9 1/2" x 19 1/2" piece. Position them face to face, align one long edge and stitch along that edge.
Turn out, so the right sides are facing out. Fold the puple fabric along the second long side onto the backing. Press this line. |
|
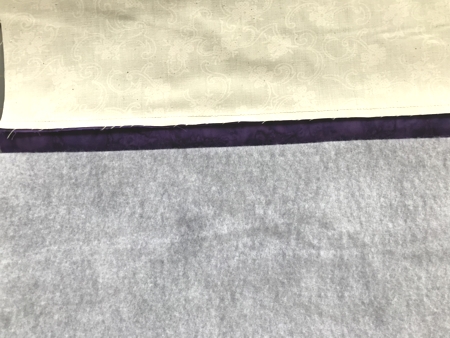
| Unfold and place a piece of batting between the 2 layers, aligning the upper edge of the batting with the pressed line. |
|
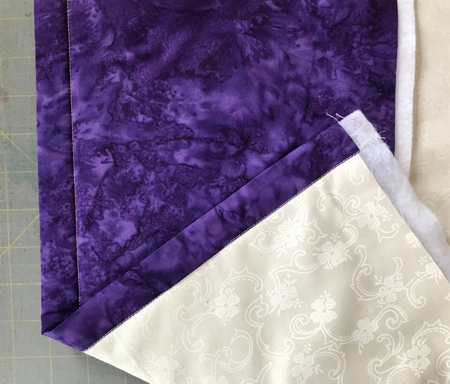
| Fold back and topstitch in the ditch along the line where 2 fabrics meet. |
|
| Repeat with the remaining pieces to make a second identical piece. |
Quilting:
|
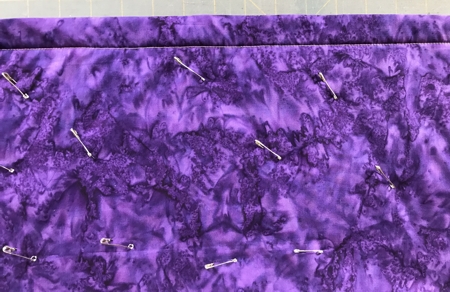
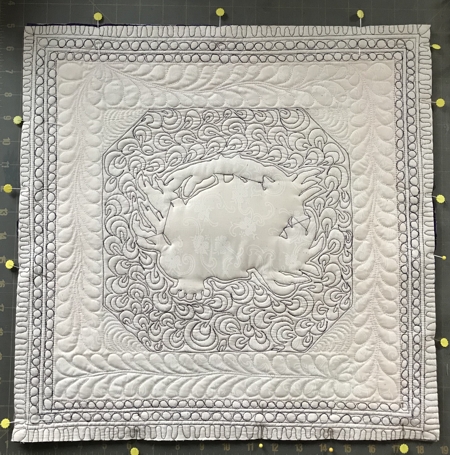
Now place the backing square (19 1/2") on a flat surface (table) face down. Cover with the batting. Spread the front panel over it. Pin all layers together.
|
|
| Pin the back panels to make them ready for quilting. |
|
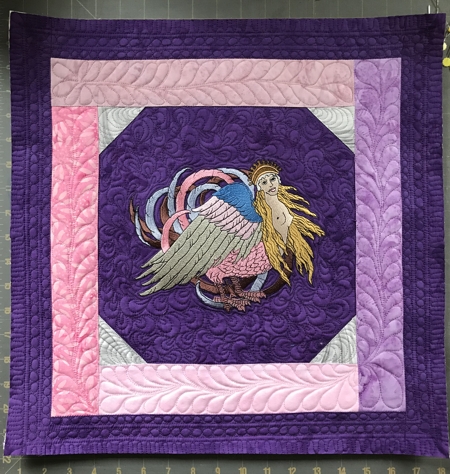
We quilted in a free-motion style all over the panels. Press with heavy steam. Square the front panel. Trim it to 18" x 18" square.
|
|
| Trim each back part to 10" x 18". |
Finishing:
|
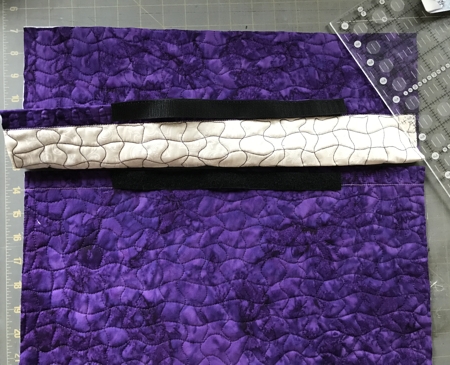
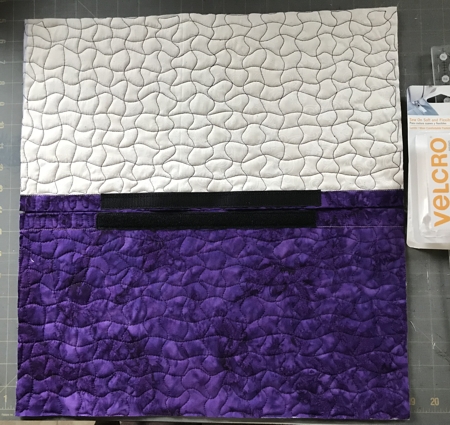
Position the back parts face up with folded edges overlapping 1".
Cut the Velcro tape in 2 pieces 9" long. Sew one half of the tape to the top edge of the lower part, facing up.
Sew the second half of the tape to the bottom edge of the upper part, facing down. |
|
|
| Overlap and close. |
|
Cover with the front panel, face down. Align all edges and pin.
Topstitch along all edges, seam allowance 1/2".
Finish the raw edges with zigzag. |
|
Open the Velcro closure and turn right side out.
Insert the pillow shape.
That's it! |
|
|
Back to Sirin Fairytale Bird and Sirin Fairytale Bird II
|
Back to Projects Page
|


