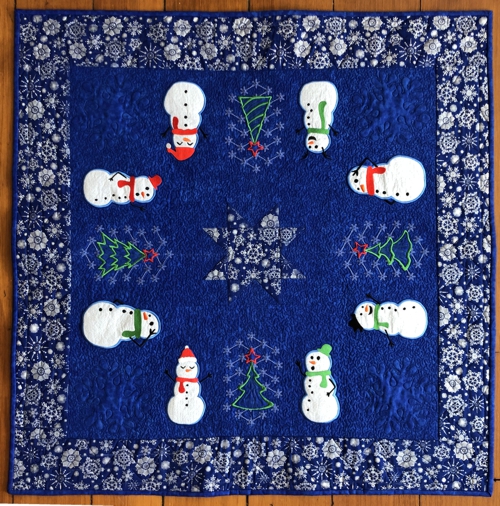
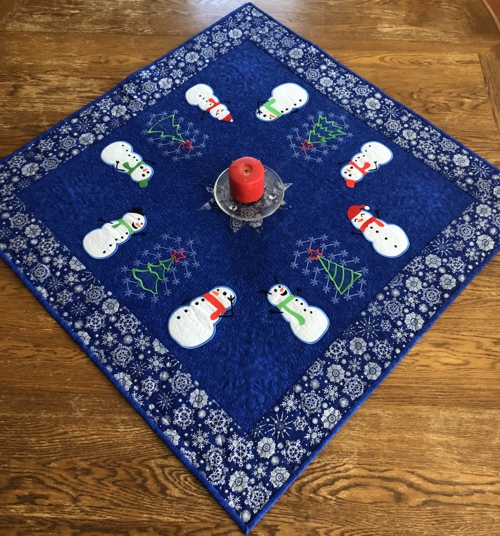
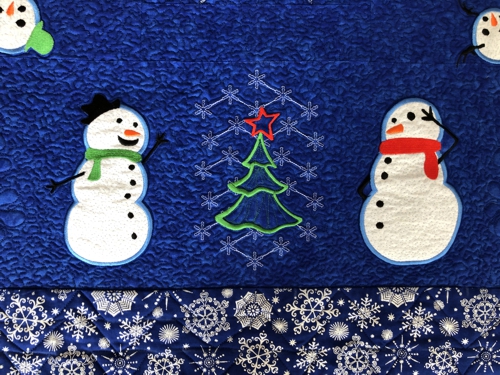
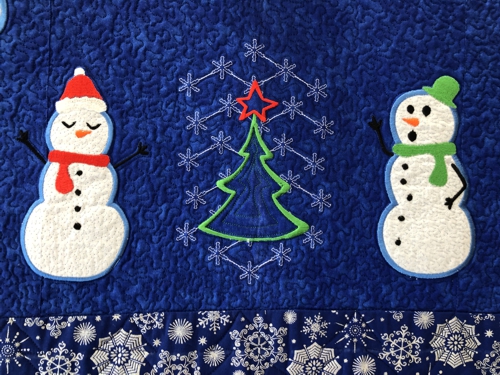
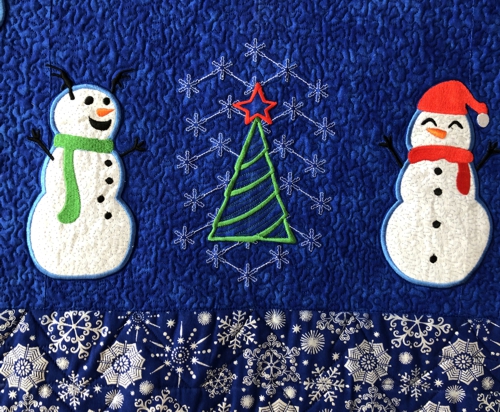
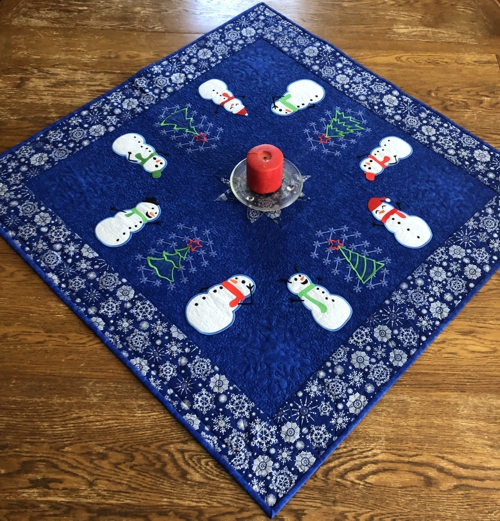
This charming table topper uses the designs from the Snowman Applique Set and Christmas Tree Set III.
All designs fit the large hoop (5" x 7").
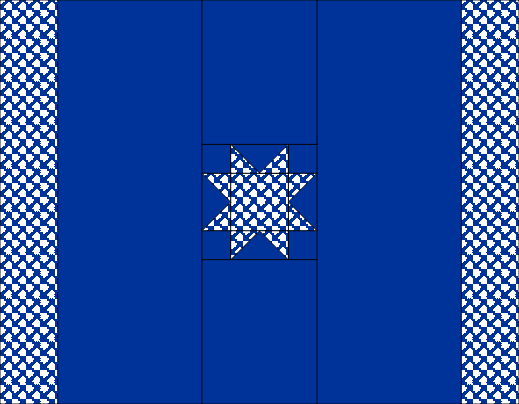
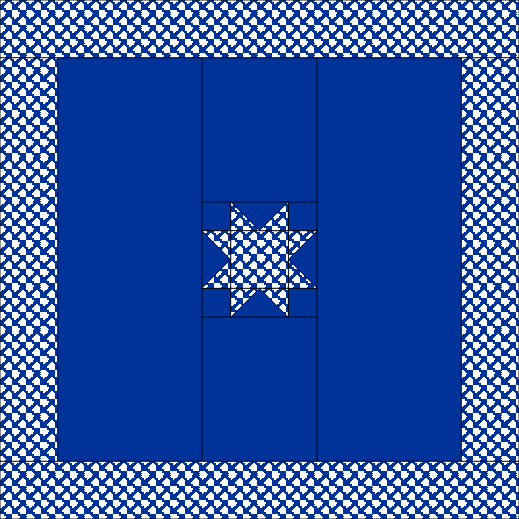
The finished size of the tabletopper is about 35" x 35".
|
|
|
You will need :
- embroidery threads, either polyester or rayon, the choice of color is yours,
- 1 yard of solid royal blue fabric,
- about 1/2 yard of patterned royal blue fabric (we used a fabric with silver snowflakes),
- scraps of white fabric for the applique,
- light-weight embroidery stabilizer,
- fabric for the backing,
- low-loft batting,
- applique scissors,
- iron, quilter's ruler, rotary cutter, graph pencil, and chalk pencil.
|
| NOTE: We assembled the top first, then made the embroidery. |
Cutting:
|
For the central star block. out of solid blue fabric, cut:
- 4 strips measuring 2 1/2" x 4 1/2",
- 4 squares measuring 2 1/2" x 2 1/2".
Out of patterned blue fabric cut
- a square measuring 4 1/2" x 4 1/2" and
- 8 squares measuring 2 1/2" x 2 1/2".
|
For the main body of the quilt, out of solid blue fabric, cut
- 2 pieces measuring 8 1/2" x 1 1/2" and
- 2 pieces measuring 10 1/2" x 28 1/2".
Use the remaining fabric for the binding.
|
For the borders, out of the patterned blue fabric, cut
- 2 strips measuring 4 1/2" x 28 1/2" and
- 2 strips measuring 4 1/2" x 36 1/2'.
|
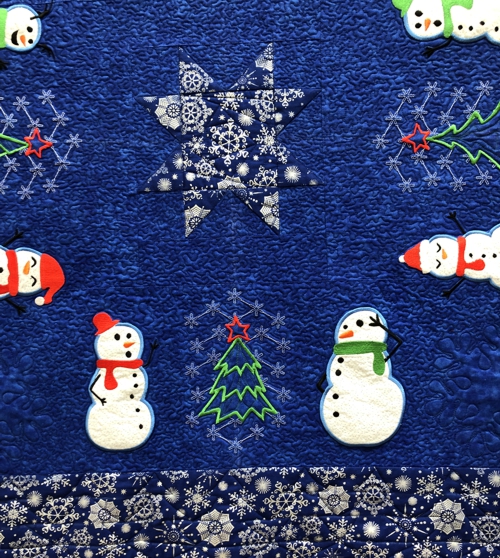
Assembly of the Central Star Block.
|
| Note: seam allowance 1/4", press every seam immediately after you make it. |
|
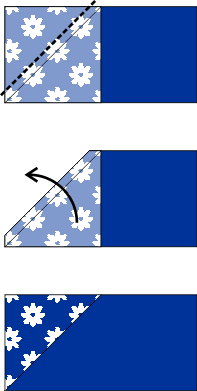
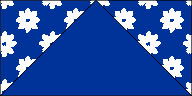
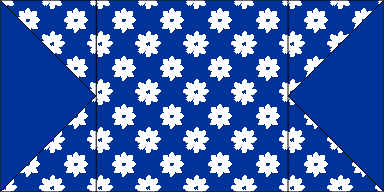
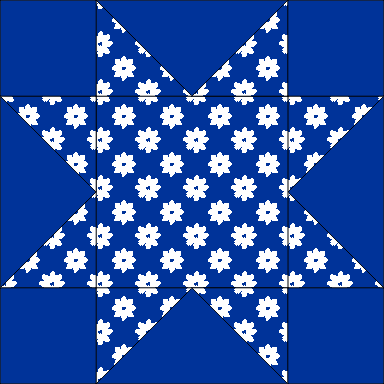
For the star, you need to sew four "flying geese" strips. For each strips, take one solid blue 2 1/2" x 4 1/2" rectangles and two patterned blue 2 1/2" x 2 1/2" squares.
Position the rectangle on your working table, face up. Position one of the squares, face down, on the left of the rectangle. Align the sides.
With a thin graphic pencil, draw a diagonal to connect the upper right corner and the lower left corner.
|
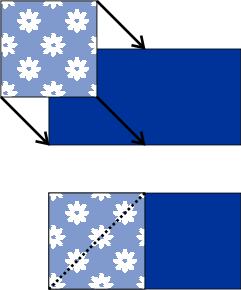
|
Machine stitch along the diagonal.
Cut the excess fabric, leaving 1/4" seam allowance.
Unfold the square and press. |
|
Repeat for the other side of the strip.
You will need 4 such flying geese parts. |
|
| Sew the two "flying geese" to the left and right edges of the 4 1/2" x 4 1/2" patterned blue square. |
|
| Take two "flying geese" strips and four solid blue 2 1/2" x 2 1/2" squares. Sew a square to each end of the "flying geese". |

|
| Sew these strips to the top and bottom edges of the central part. |
|
Assembly of the Top:
|
Sew the 8 1/2" x 10 1/2" solid blue pieces to the upper and lower edges of the star.
|

|
Sew the 10 1/2" x 28 1/2" solid blue strips to the left and right edges of the working piece.
|
|
Sew the 4 1/2" x 28 1/2" patterned strips to the left and right edges of the working piece.
|
|
Sew the 4 1/2" x 36 1/2" border strips to the upper and lower edges of the working piece.
|
|
Embroidery:
|
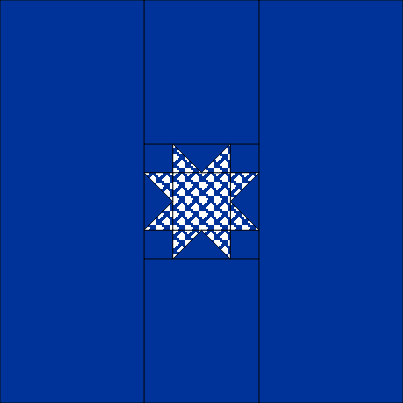
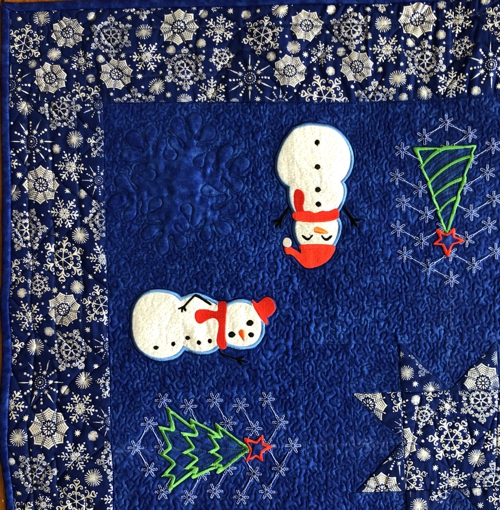
Find the center of each solid blue side of the working piece. Lightly mark with chalk pencil. This will be the position of the Christmas trees.
|
|
Upload 4 files from the Christmas Tree Set to your embroidery machine. Stabilize and hoop the fabric.
Embroider one tree in the center of each side of the table topper.
|
|
Now upload the files from the Snowman Applique Set and embroider them one by one on each side of the tree, leaving about 1 1/2" distance between the patterns.
|
|
You'll need 8 snowmen. There are 6 snowmen in the set, so you'll have to embroider 2 of them twice. You can make them look slightly different by changing the color of the accessories.
|
|
|

|
Quilting and Finishing:
|
Now place the backing on a flat surface (table) face down. Cover with batting. Spread your working piece over it.
Pin all layers together.
We quilted in a free-motion style all over the table topper.
Press with heavy steam. Square the quilt. Finish the raw edges with the binding. |
|
|
Have fun!
|
|
|
Back to Snowman Applique Set and Christmas Tree Set III
|
Back to Projects Page
|


