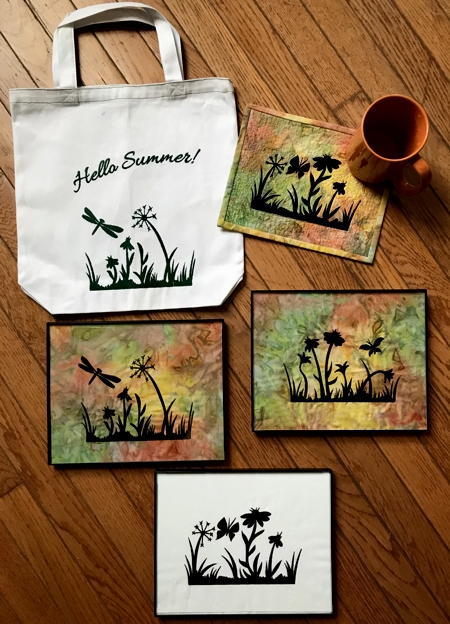
Here are some ideas on how to use the designs from the Summer Meadow Set.
You can make these small projects for yourself, your friends, or for charity sales or craft markets.
For all projects we used designs for the large hoop (5" x 7").
|
|
You will need :
- embroidery threads, either polyester or rayon, the choice of colors is yours,
- quilter's ruler and rotary cutter, scissors, graphic pencil,
- iron
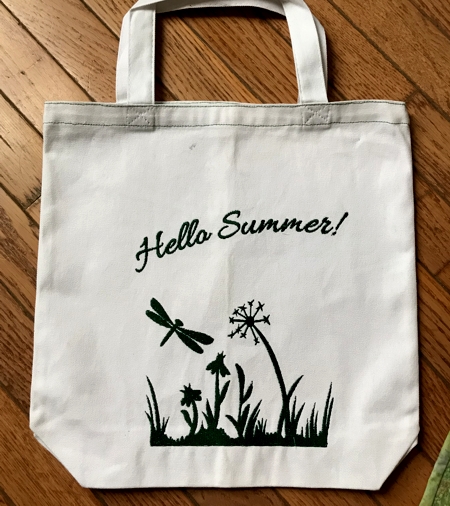
- For the tote bag:
- light-weight tear-away embroidery stabilizer,
- blank canvas tote (our tote measures 13" x13"),
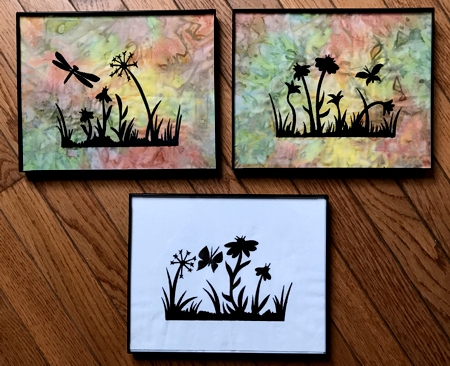
- For the framed embroidery:
- medium-weight cut-away iron-on embroidery stabilizer,
- fabric - either solid, or multicolored batik,
- picture frames (we used modern-looking thin frames),
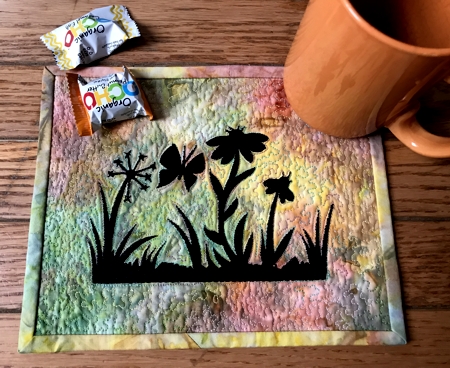
- For the mug rug / place mat:
- light-weight cut-away embroidery stabilizer for the mug rug,
- backing, batting and binding,
|
| NOTE: Before you start embroidery on a new tote bag, make a test run of the design. |
Tote Bag
|
|
To embroider on the tote, we had to rip its side seams.
Mark the position of the design on one of the panels. If you want to add an inscription or a slogan, mark its position on the panel too.
You can make the text in your embroidery machine, or you can download our text here. |
.PES .ART .DST .EXP .HUS .JEF .JEF+ .VIP .VP3 .XXX
|
Stabilize the canvas with light-weight tear away embroidery stabilizer and embroider the inscription and one of the meadow designs, one at a time.
|
Remove the stabilizer.
Fold the tote right side inside and stitch the sides closed. Using zig-zag stitch, finish the raw edges.
Turn the tote right side out. Press the tote.
|
Mug Rug
|
|
We made the embroidery on a multi-colored batik, stabilized with light-weight cut-away embroidery stabilizer.
After the embroidery is done, cut away the excess stabilizer.
Make a quilting "sandwich", backing (face down) - batting - embroidered top, and pin all 3 layers together with safety pins. |
We quilted all over the piece in stippling. After quilting, press the work and square it. We trimmed our piece to 7 1/2" x 9 1/2".
Finish the raw edges with the binding.
|
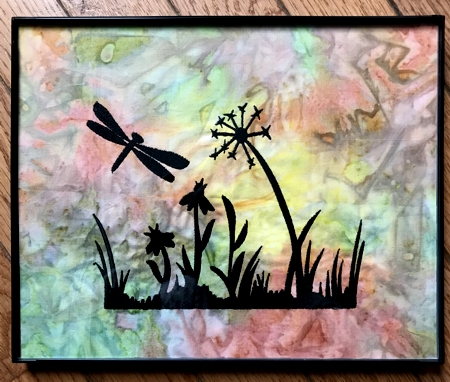
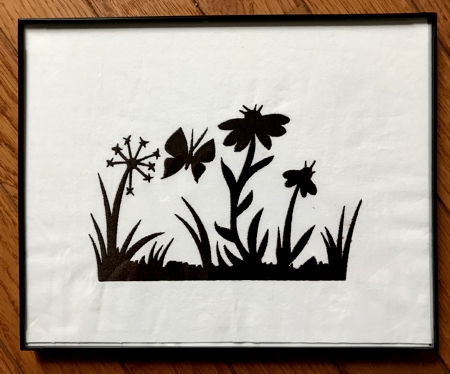
Framed Pictures
|
| For this embroidery we used medium-weight cut-away iron-on embroidery stabilizer, white cotton fabric and multi-colored cotton batik. |
|
Stabilize fabric and embroider the designs. DO NOT remove the stabilizer!
Using a quilter's ruler and rotary cutter, trim the embroideries to the desired size.
Insert into the frames.
|
|
|
Have fun!
|
|
|
Back to Summer Meadow Set
|
Back to Projects Page
|


