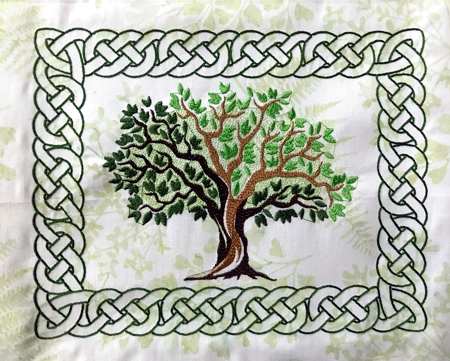
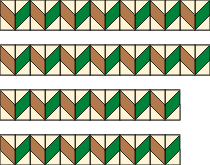
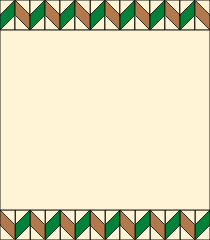
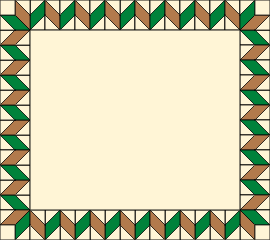
For this small quilt we used the design of a Summer Tree and one of the rectangular frames from the Celtic Frame Set.
The finished size of the quilt is about 19 1/2" x 17 1/2".
|

|
You will need :
- embroidery threads, either polyester or rayon, for the embroidery,
- medium-weight cut-away stabilizer,
- about 1/2 yard of light-colored fabric for the background (we used pale green),
- 1 fat quarter each of 2 fabrics of contrasting colors, but matching the colors of the embroidery (we used light brown and dark green),
- fabric for the backing,
- batting,
- iron,
- quilting threads of matching colors,
- #12 quilting and sewing needles.
|
Embroidery:
|
| Upload both files- Summer Tree and the rectangular frame from the Celtic Frame Set - into the embroidery machine. Open them one by one on the screen of the machine. You will not need any additional editing - the tree file fits into the frame perfectly. |
Stabilize the background fasbric with the cut-away stabilizer. Embroider the files - first the tree, then the frame.
|
|
Press the stitch-out and trim to 12 1/2" x 14 1/2".
|
| Cutting: |
Out of dark green fabric for the borders, cut 30 strips measuring 1 1/2" x 2 1/2",
Cut the remaining fabric into 5 strips 2 1/2" wide and the length of the width of the fabric (18" if you use a fat quarter), for the binding
Out of light brown fabric, cut 30 strips measuring 1 1/2" x 2 1/2".
Out of background fabric, cut
- 116 squares measuring 1 1/2" x 1 1/2" and
- 4 strips measuring 1 1/2" x 18 1/2".
|
The Border Blocks:
|
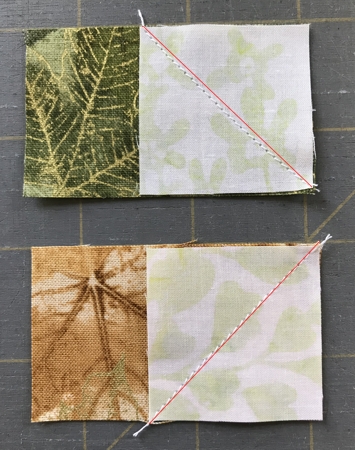
Note: Seam allowance is 1/4", preass the seam immediately after you make it.
|
| Set aside 4 light brown strips, 4 dark green strips and 12 background squares. They will be used for corner blocks. |
Working with the other strips and squares:
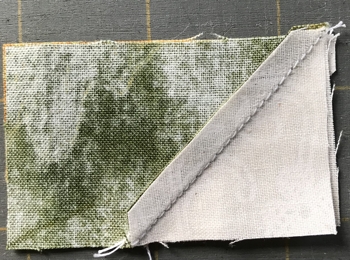
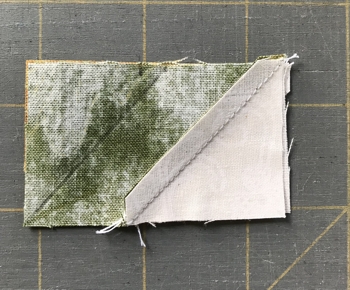
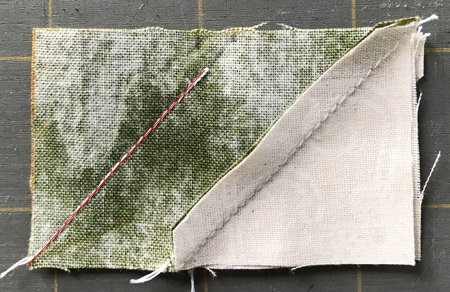
Cover the right part of each of the strips with the squares.
For the green strips: Stitch on a diagonal fromthe upper left corner to the lower right corner.
For the brown strips: Stitch on a diagonal from the upper right corner to the lower left corner.
|
|
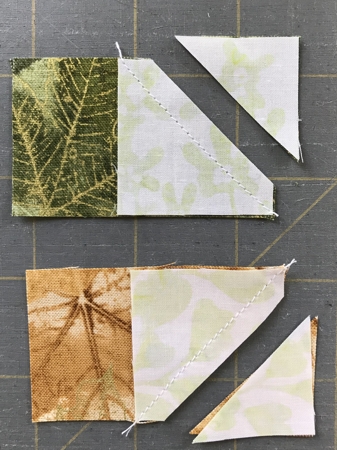
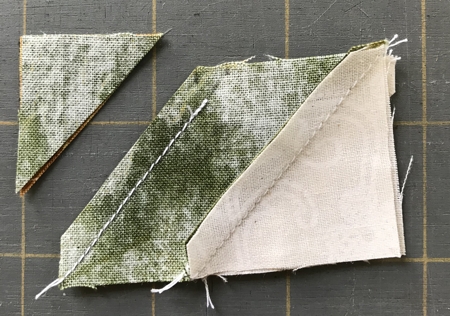
Trim with seam allowance 1/4".
|
|
| Press the seams: for green strips towards green fabric, for brown strips towards the background fabric. |
|
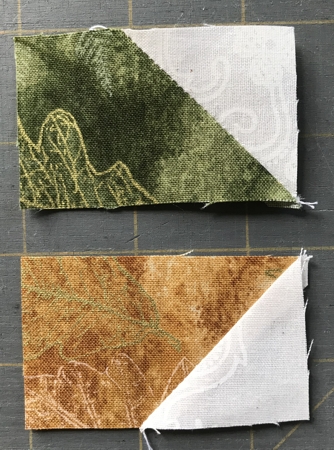
Cover the left part of the strips with squares.
For the green strips: Stitch on a diagonal from the upper left corner to the lower right corner.
For the brown strips: Stitch on a diagonal from the upper right corner to the lower left corner. |

|
| Trim with seam allowance 1/4". Press the seams: for green strips towards the green fabric, and for brown strips towards the background fabric. |
|
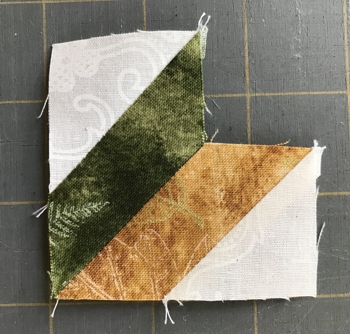
| Sew the green and brown pieces in pairs to get 26 blocks. Press the seam open. |

|
Sew 2 borders with 7 blocks in them and 2 borders with 6 blocks in them.
|
|
| Corner Blocks: |
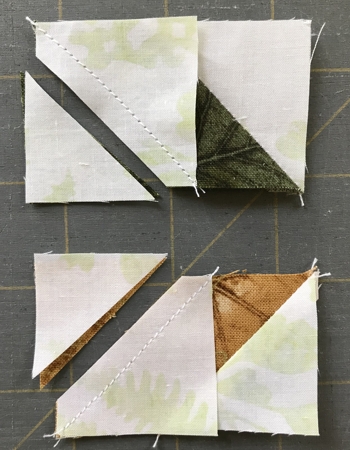
Take the 8 colored strips and 12 squares you set aside earlier.
Cover the right parts of the color strips with squares.
For the green strips: Stitch on a diagonal from the upper left corner to the lower right corner.
For the brown strips: Stitch on a diagonal from the upper right corner to the lower left corner. |
|
|
| Trim with seam allowance 1/4". Press the seams: for green strips, press towards the green fabric, for brown strips, press towards the background fabric. |
|
|
| Place both strips face to face, aligning the edges. |
|
| Measure 1 1/2" from the upper left corner along the long side, and make a mark with the graphic pencil. |
| Connect the dot and the lower left corner. |

|
|
| Stitch from the corner along the drawn line, stop stitching 1/4" from the dot. |
|
| Trim the corner, seam allowance 1/4" |
|
| Press the seam open. |

|
|
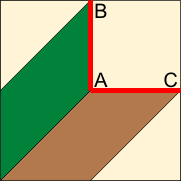
| Now sew in the background square. To sew this square, pin and sew from A to B. Repin and sew from A to C. Press the seams towards the colored fabrics. |
|
| Make 4 corner blocks. |
| Attaching the Borders: |
| Sew the 7-block borders to the upper and lower edges of the central part. |
|
| Sew the corner blocks to the 6-block borders. Then sew them to the left and right edges of the central part. |

|
| Sew 2 background strips (1 1/2" x 18 1/2") to the upper and lower edges of the working piece. |
|
| Sew the remaining 2 background strips to the left and right edges of the working piece. |
|
|
| Quilting and Finishing: |
Now place the backing on a flat surface (table) face down. Cover with batting. Spread your working piece over it.
Pin all layers together.
We quilted in a free-motion style all over the quilt. |
|
| Press with heavy steam. Square the quilt. Finish the raw edges with the binding. |
|
Happy stitching! Have Fun!
|

|
|
Back to Summer Tree or Celtic Frame Set.
|
Back to Projects Page
|


